
| Ford Model A |
![]()
![]()

Self-made 2x72" / 50x2000 mm Tilting Belt Grinder - control panel for motor control
All chapters on the construction of my 2x72" / 50x2000 mm Tilting Belt Grinder:
Chapter 1: Description and performance features of the tilting belt grinder
Chapter 2: Deviations from Jer Schmidt's plans - Using Sanding belts 2x72" AND 50x2000 mm
Chapter 3: Steel cutting and welding
Chapter 4: Operating panel for motor control
Chapter 5: Spark collector, Spark arrester, Dust collector
Chapter 6: Mobile table with drawers for belt grinder
When it comes to cutting sheet metal, I first make a cardboard model for many of my projects. This allows me to verify the size, operability etc. and then I can simply cut the sheet metal.
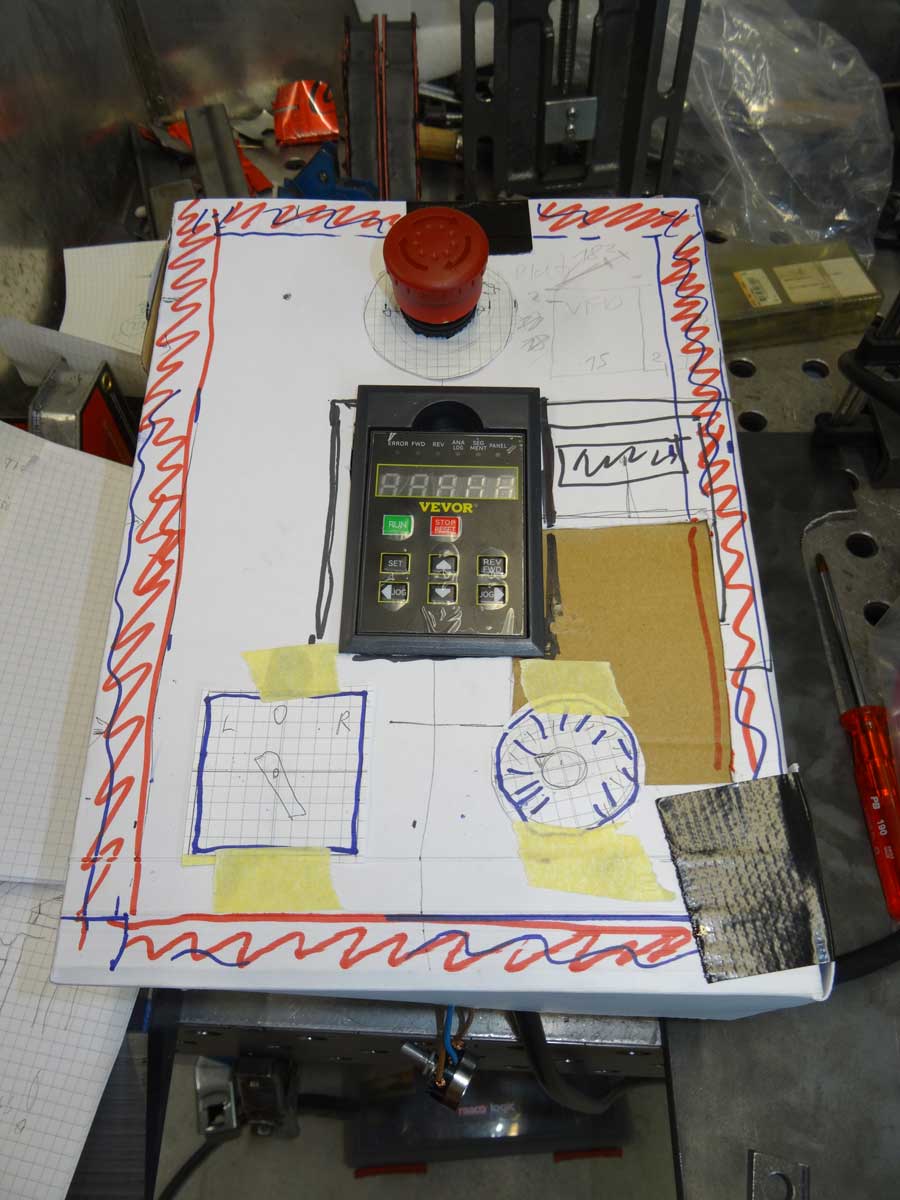
This control panel also starts with a 1:1 cardboard model to determine the size of the housing, position and perfect arrangement of the switches and display.
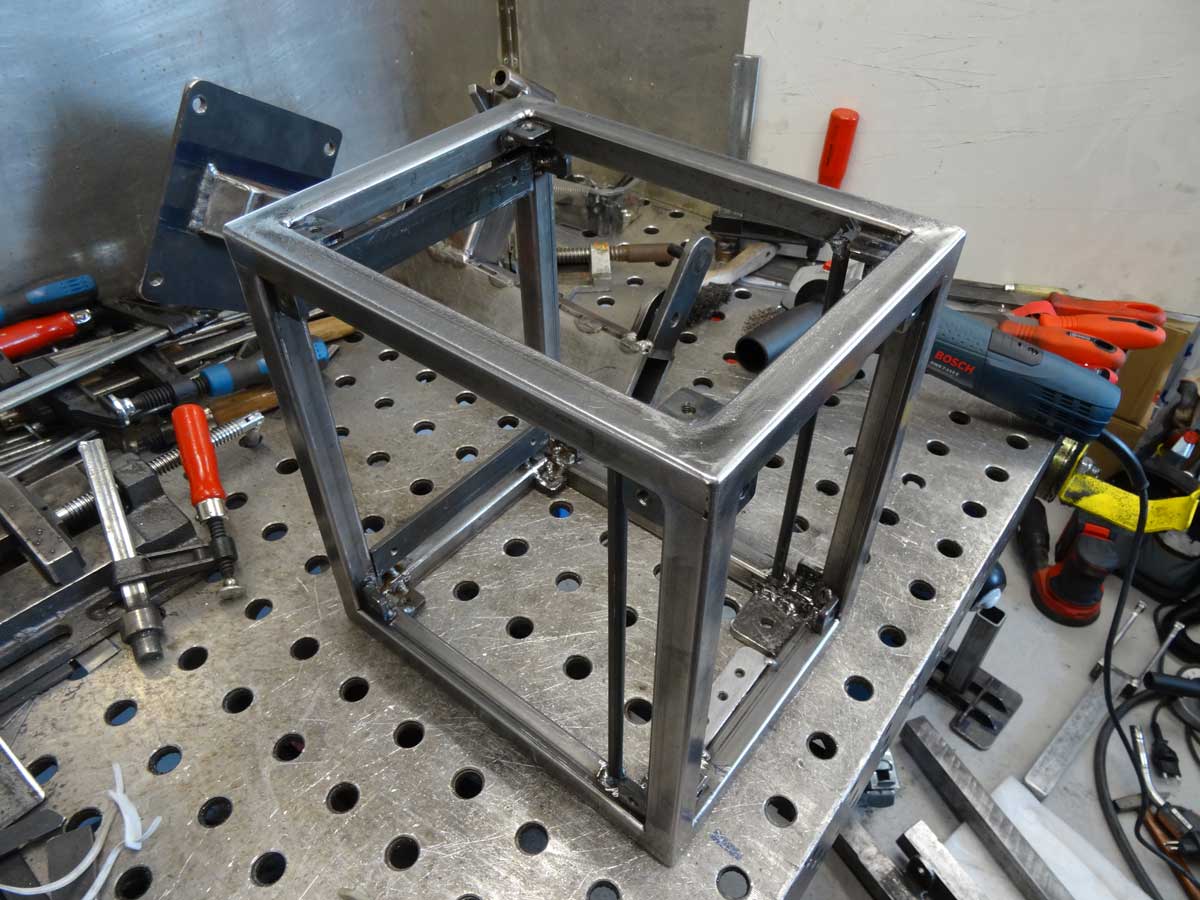
Once the cardboard model is ready, I can cut the steel profiles to size and then weld everything together. I have looked for commercially available housings, but have not found anything suitable and if I make it myself, I can choose the design and shape freely.
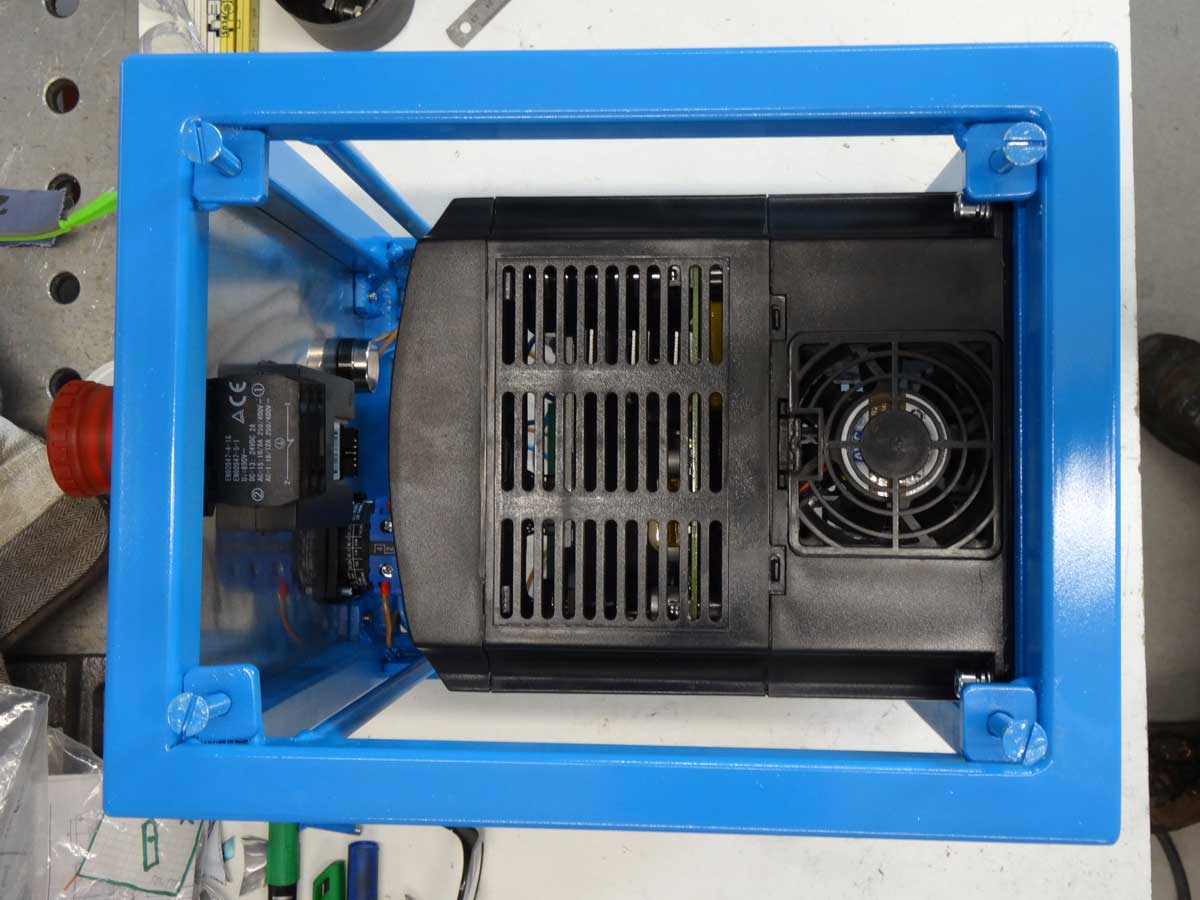
The housing contains a VFD (Variable Frequency Drive) with which I can adjust the speed continuously, as well as the components in the front panel for operation.
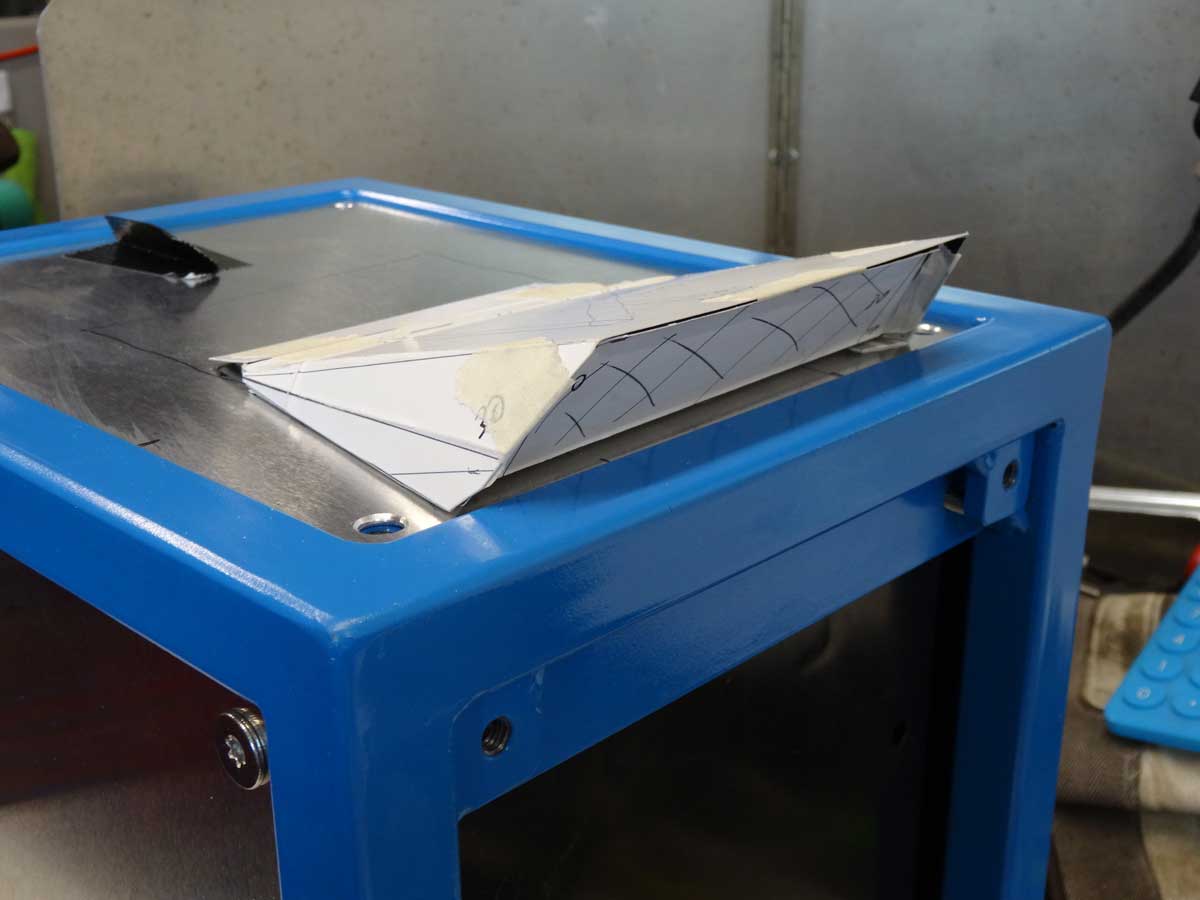
The VFD has a built-in fan and I now have to provide the appropriate holes in the housing for the air supply. I want to install a hood in the lid and am testing the shape and size with a model.
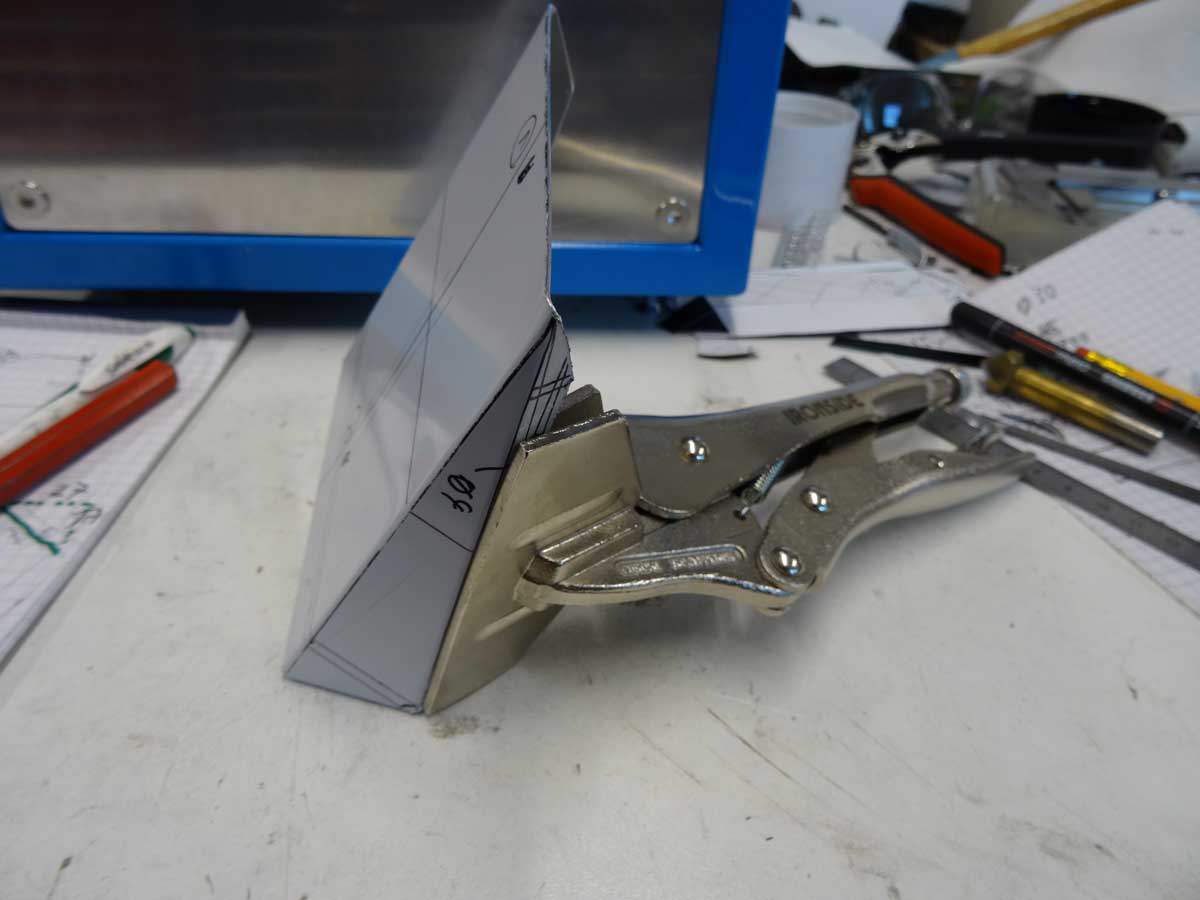
I transfer the shape to 0.8 mm aluminum sheet and bring it into the right shape. The 0.8 mm sheet can be easily bent by hand using these welding pliers.
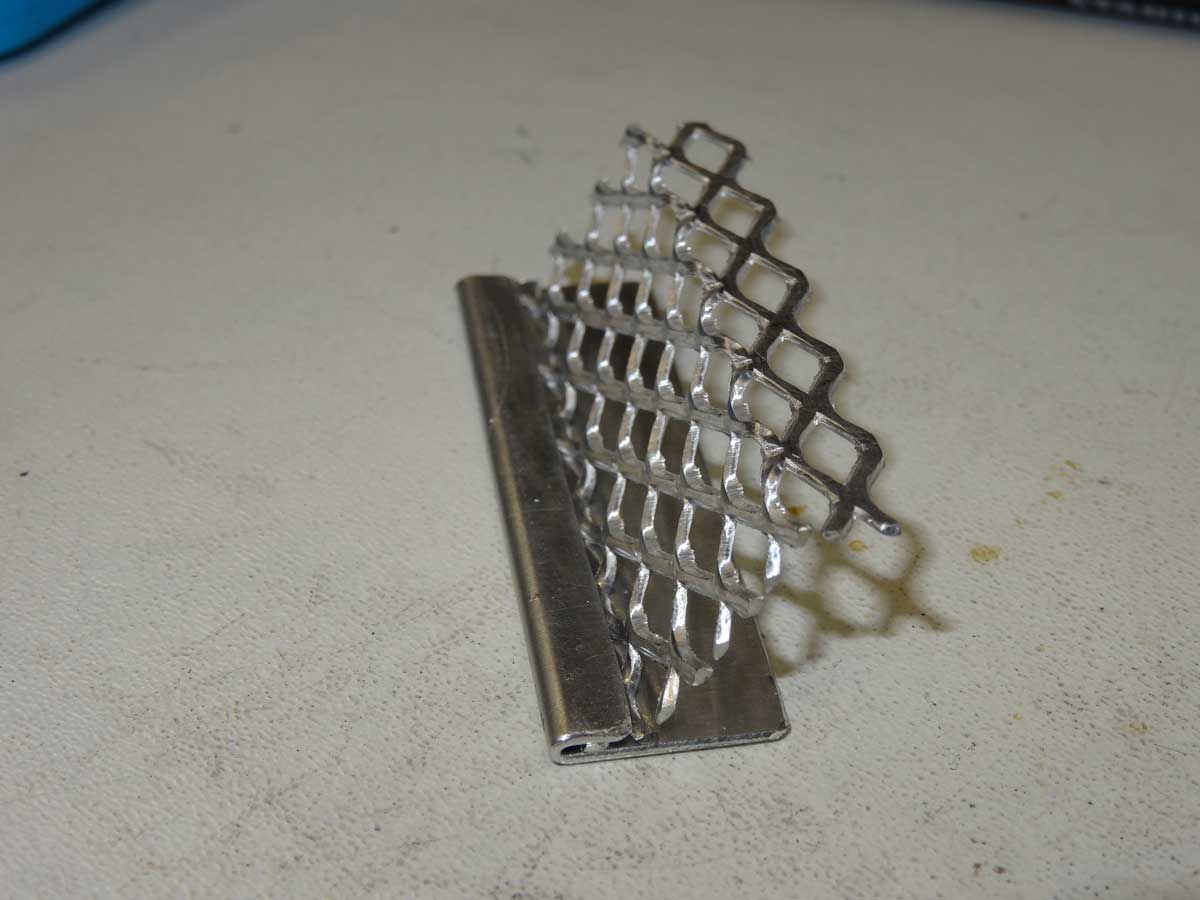
To prevent mice from nesting in the housing, I close the opening with a grid in the form of an expanded metal sheet. I'm doing a test to see if the grille holds well enough when I fold over the edge of the sheet, place the grille in between and then press everything together in a vice. The test is successful and I can continue as planned.

The grille for the hat is cut to size and bent.
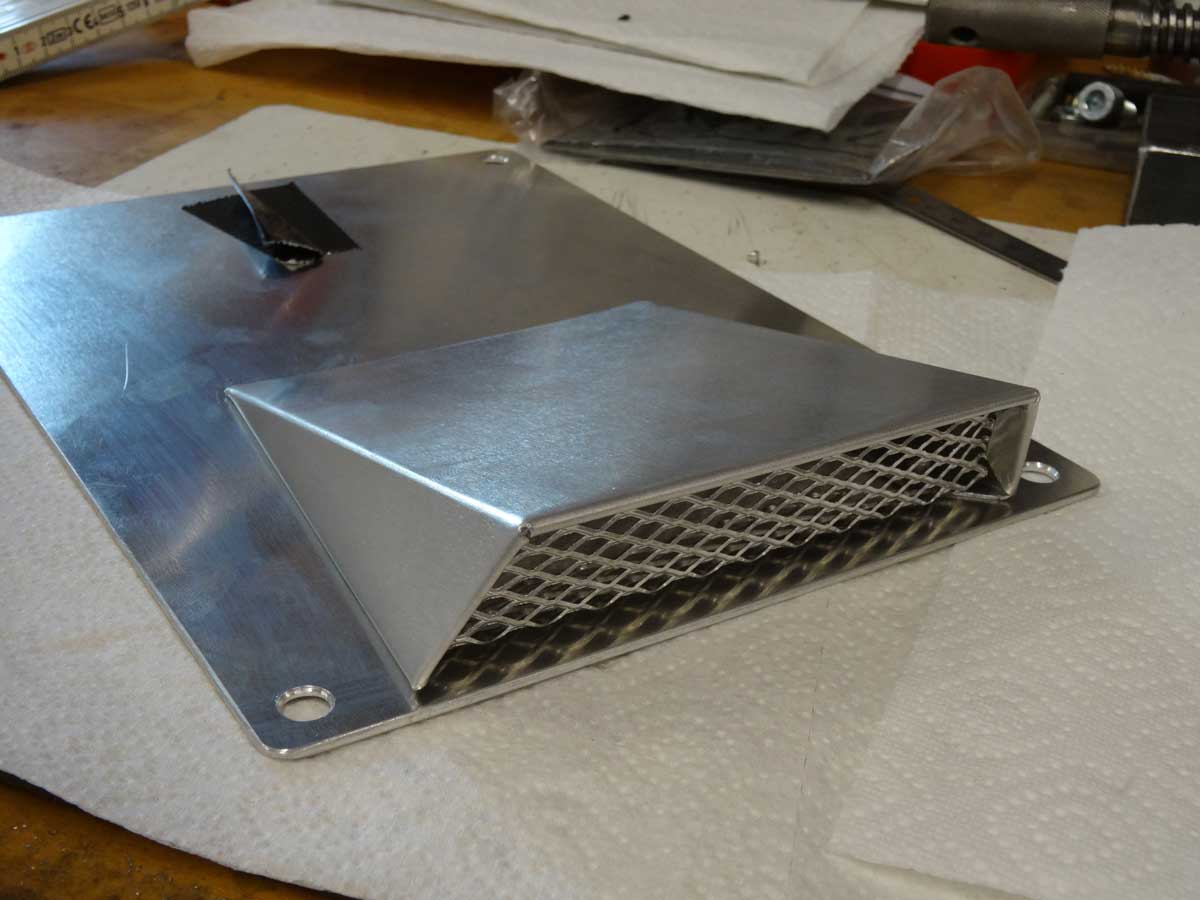
The ventilation hood is then attached to the 1.5 mm sheet metal from the inside using pop rivets.
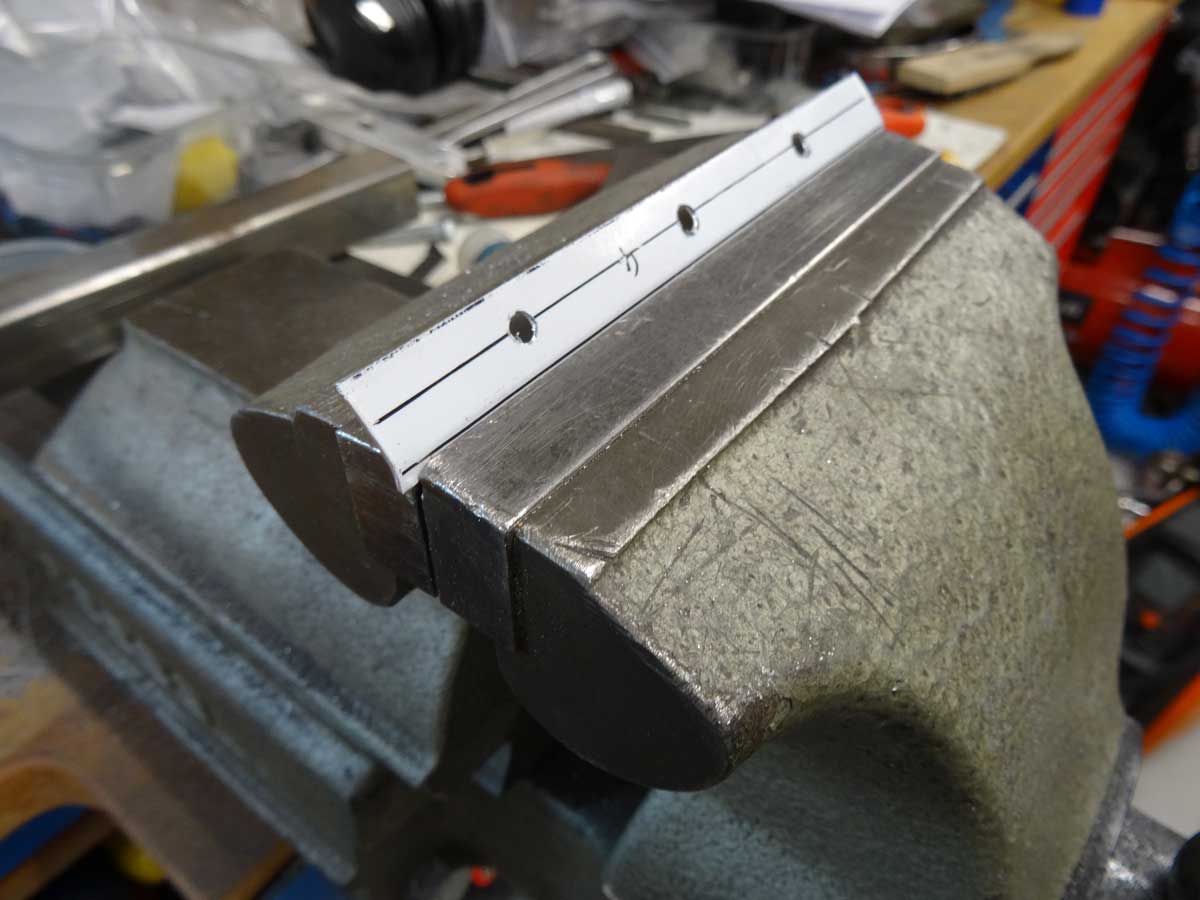
There is also an opening with a grille on the underside to draw in the air. To attach the grille, I cut narrow aluminum strips and bent a narrow edge at 45 degrees on one side.

All parts are drilled and ready for assembly.
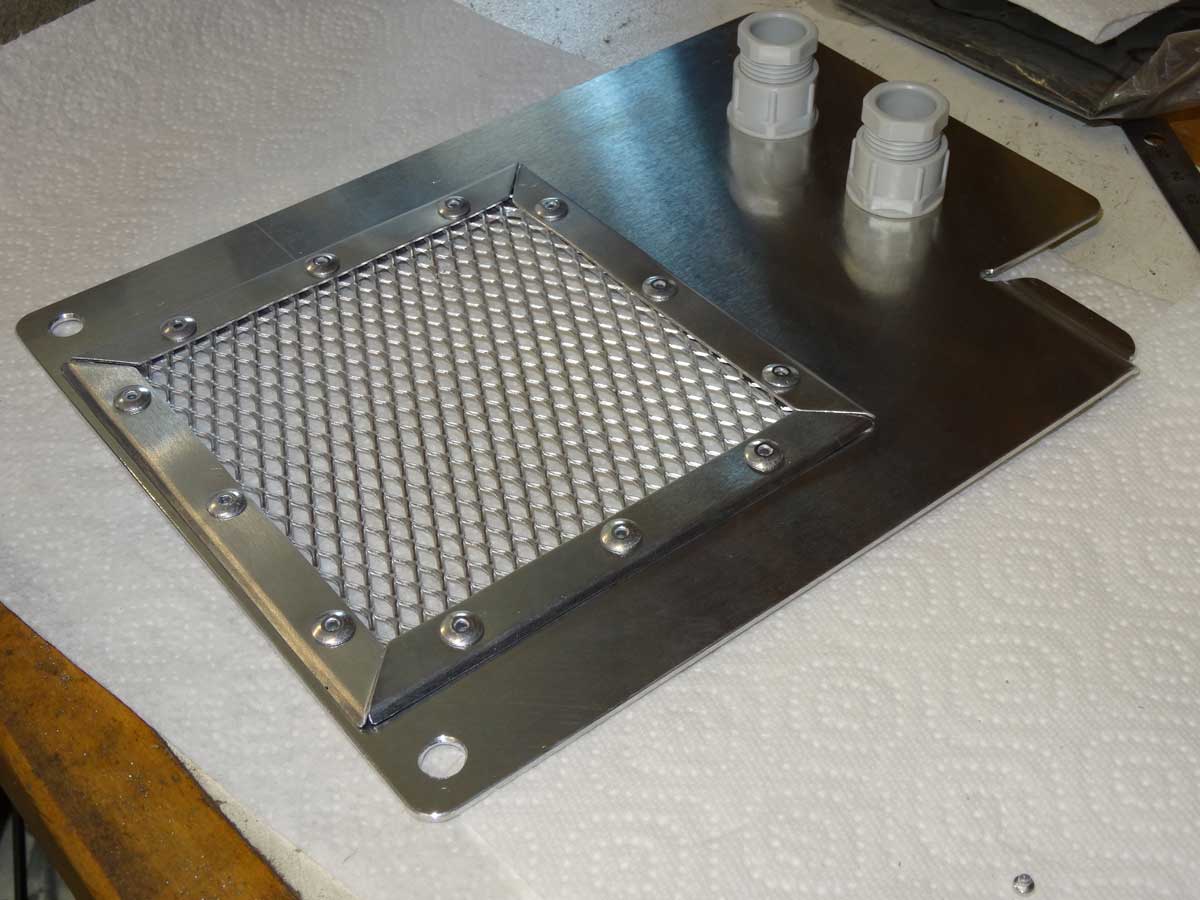
After setting the pop rivets, the underside of the control box is also ready.
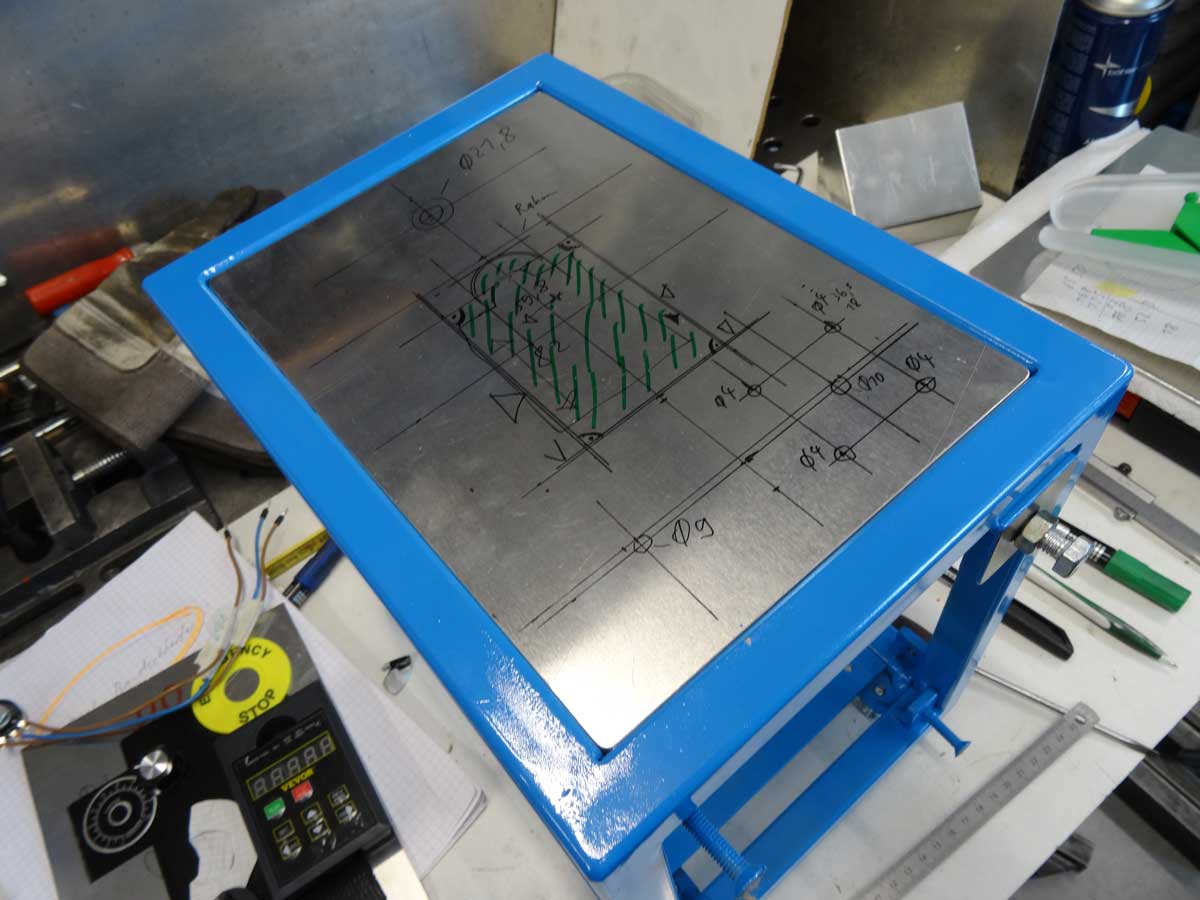
Various holes and sawing work are still required in the front panel to attach the switches and display.
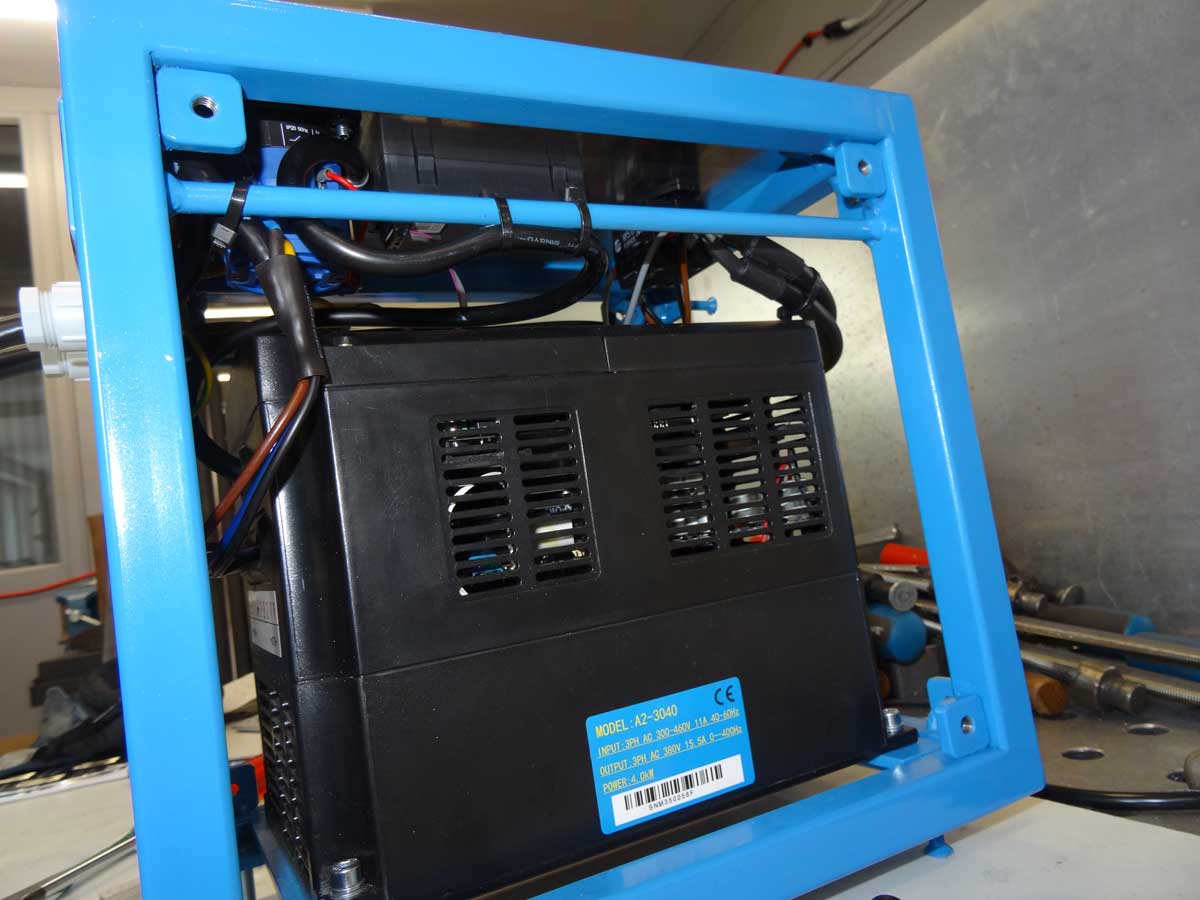
The VFD used can control three-phase motors up to 4 kW, but my motor 'only' has a little bit over 2 kW, but the device does not always run at full load. The built-in fan inside the VFD blows the cooling air through the housing from bottom to top. Both, the motor and VFD are from VEVOR.
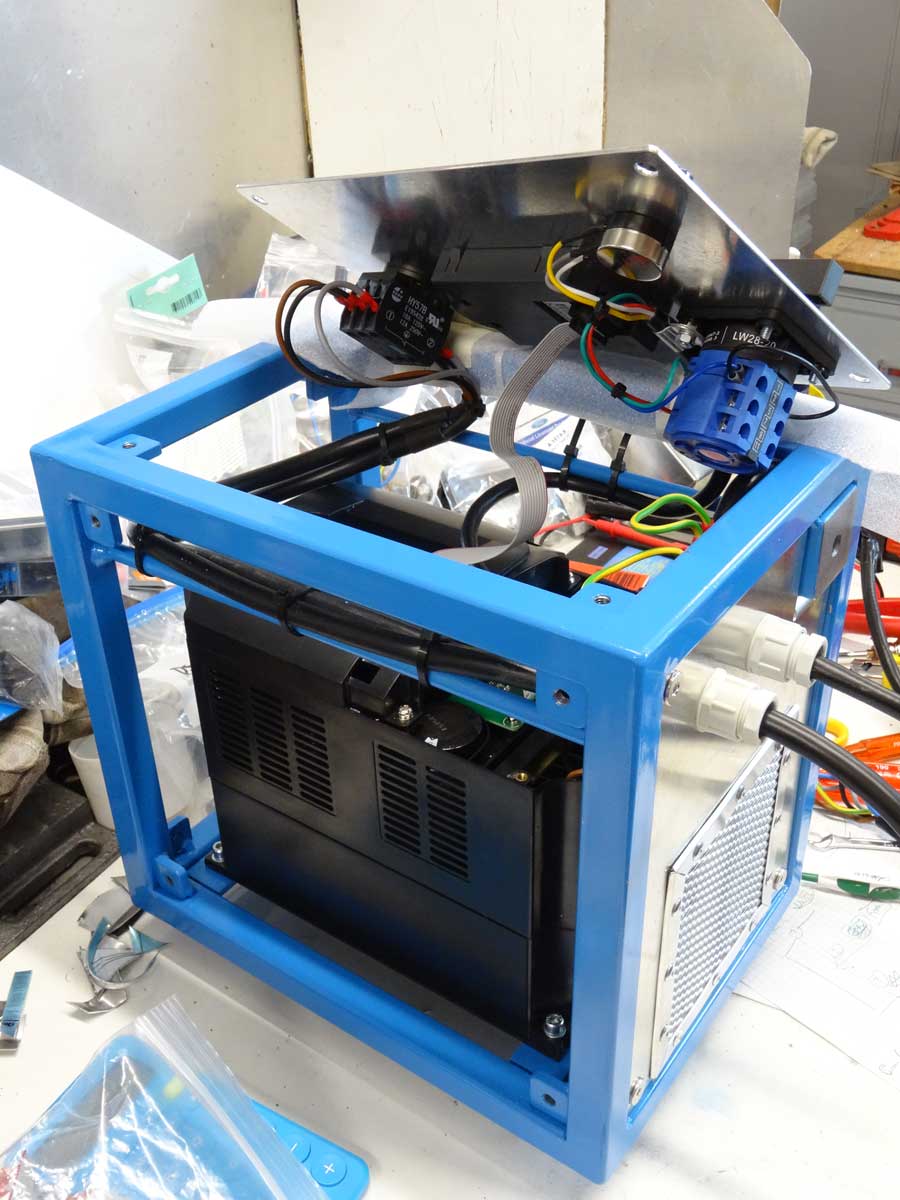
Thanks to the screwed aluminum plates on all six sides of the housing, I have good access to the wiring inside. When wiring the front panel, I made sure that I could tilt the whole thing on its side.
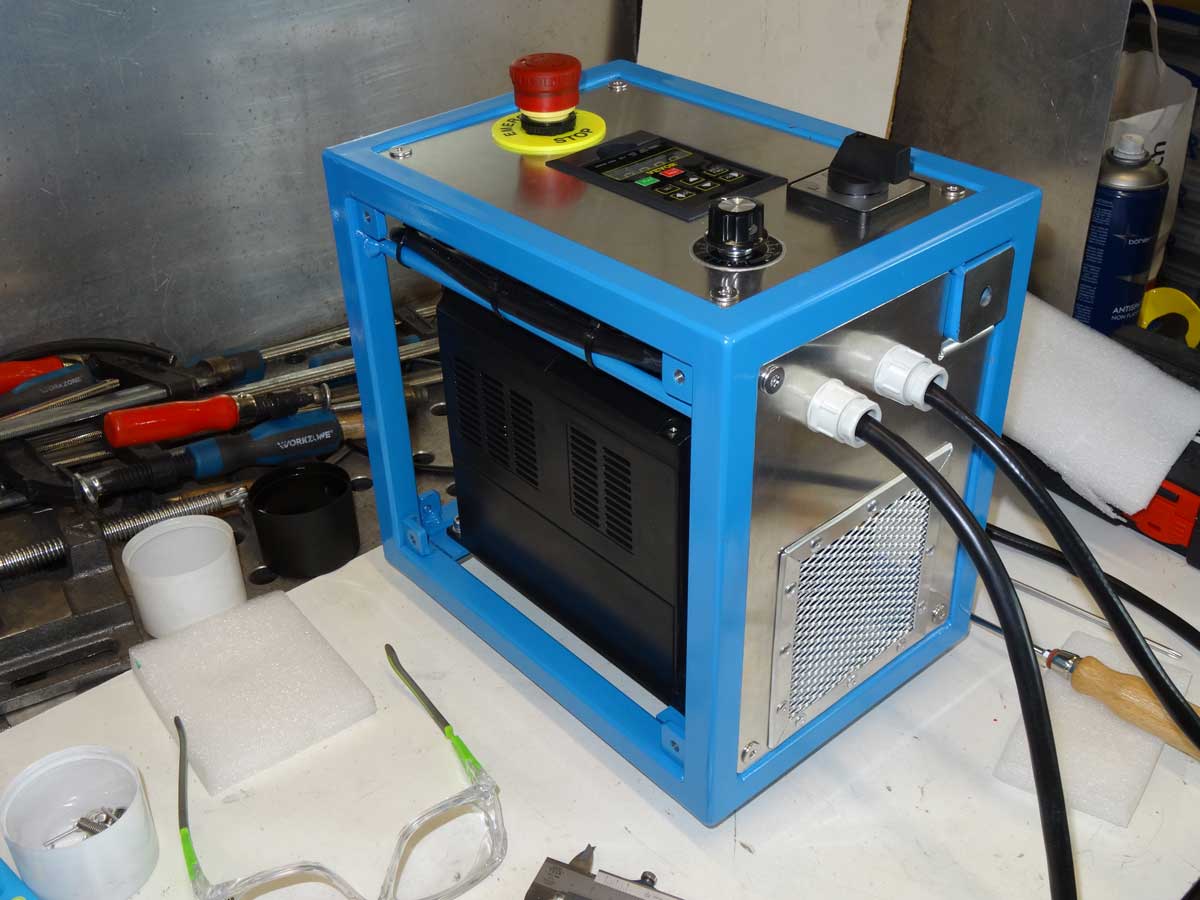
So far my control panel is ready. As you can see on the floor, there is a welded-in steel plate with a hole in the middle. This is where the control panel is connected to the base. This allows me to swivel the box slightly in one direction or the other if necessary. I'll see whether I really need this feature during operation.
Next follows
Chapter 5
where I show my solution for the spark guard / spark arrester / dust catcher.
Copyright © 2001-2024 Markus Maurer - all rights reserved
 Creation Date: 17.11.2024
![]()
![]()
![]()
