
| Ford Model A |
![]()
![]()

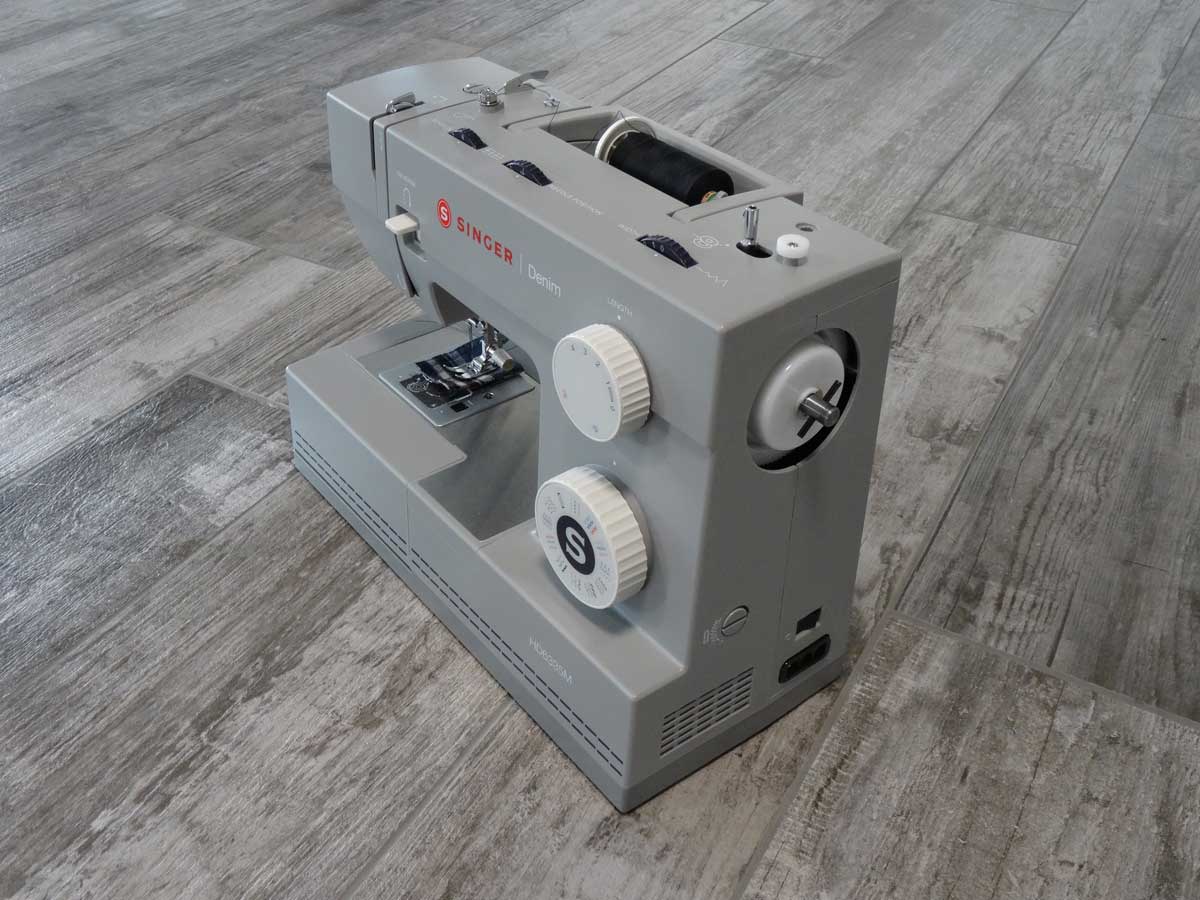
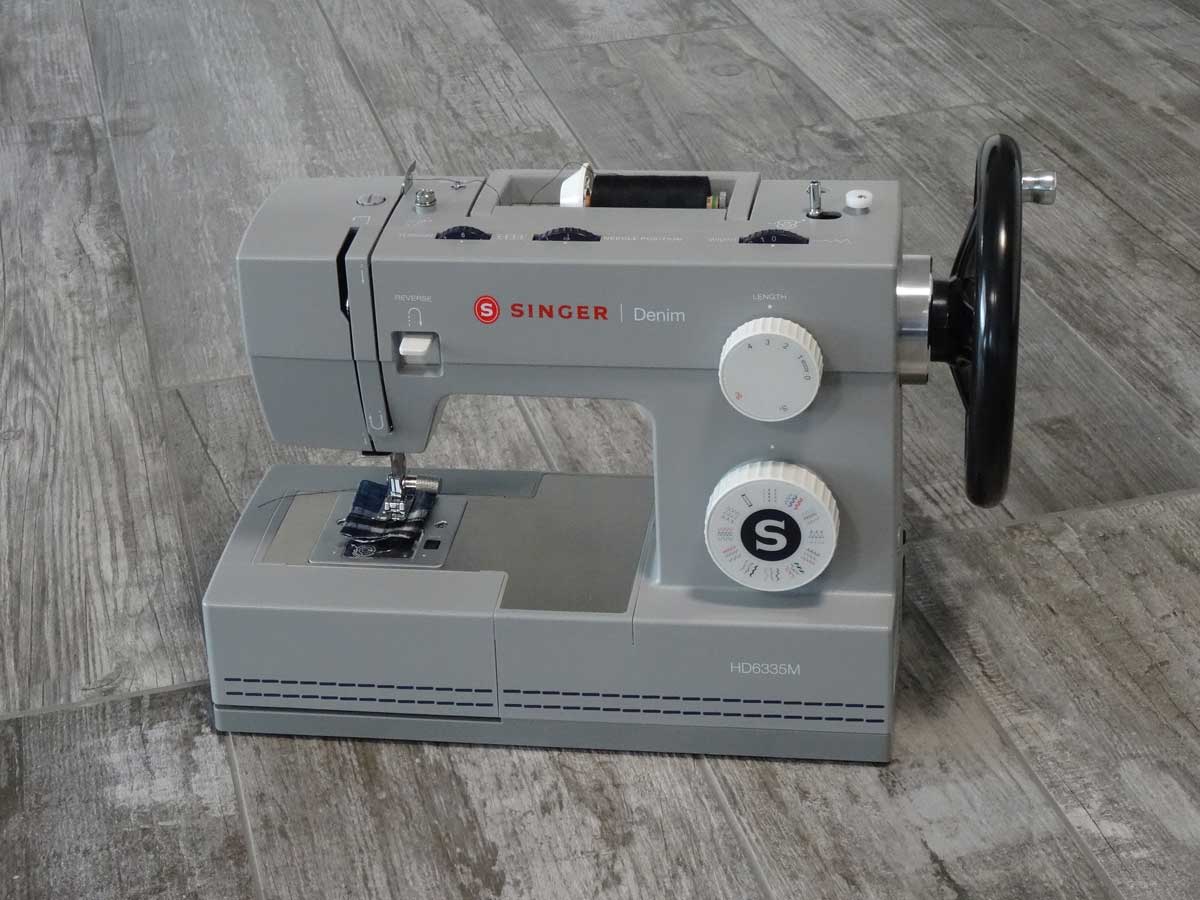
Conversion Singer HD6335 sewing machine to manual operation with hand crank
My old sewing machine gave off smoke signals when I switched it on, and 2 components in the power supply unit went up in smoke. As I bought this machine cheaply at a flea market and it was no longer worth repairing it, I started looking for a replacement machine. I found it cheaply in the form of a Singer HD6335M (Denim). Singer has various HD (Heavy Duty) models on offer, which are built in the same way and only differ in details.
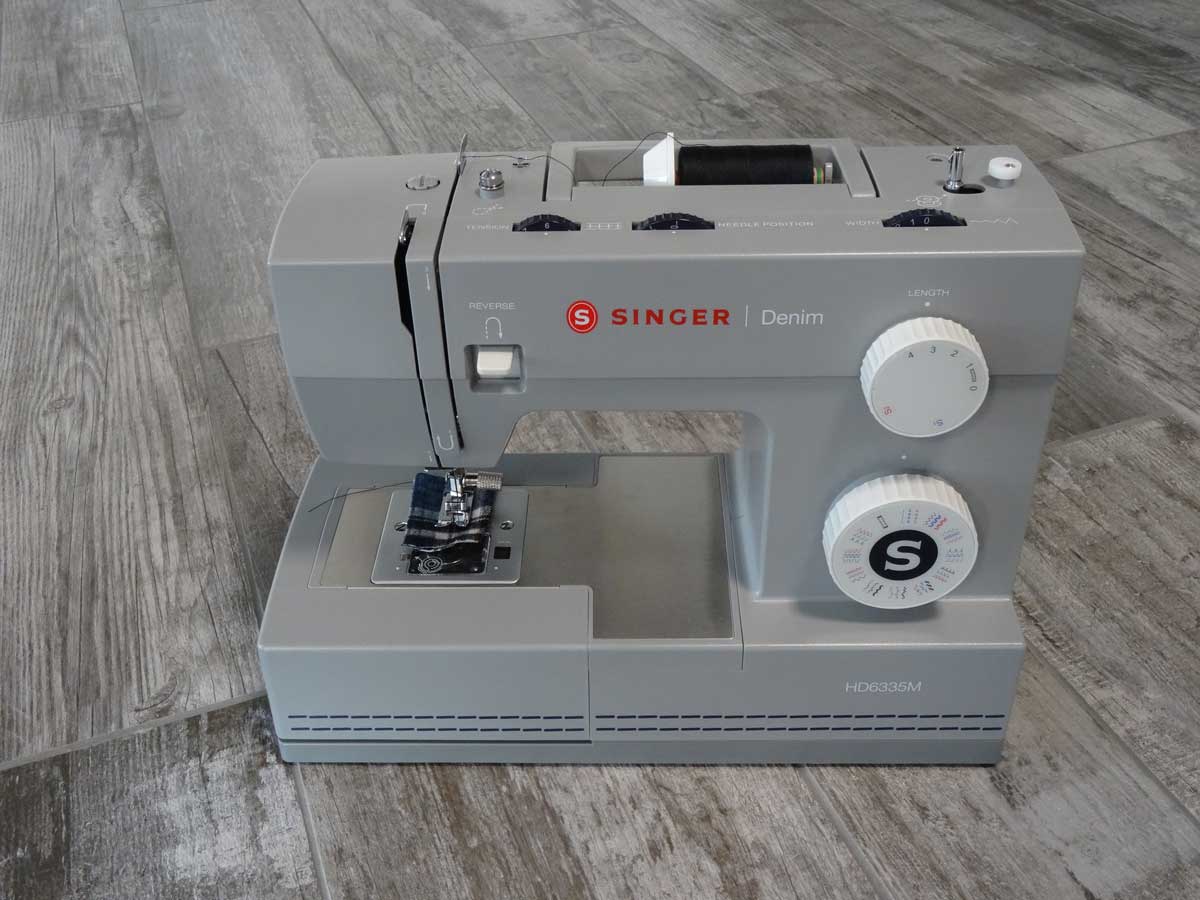
Initial sewing tests were good, but I also want to make it fit for leather and for situations where precise seams are required, and the easiest way to do that is to convert this machine to manual operation with a crank.
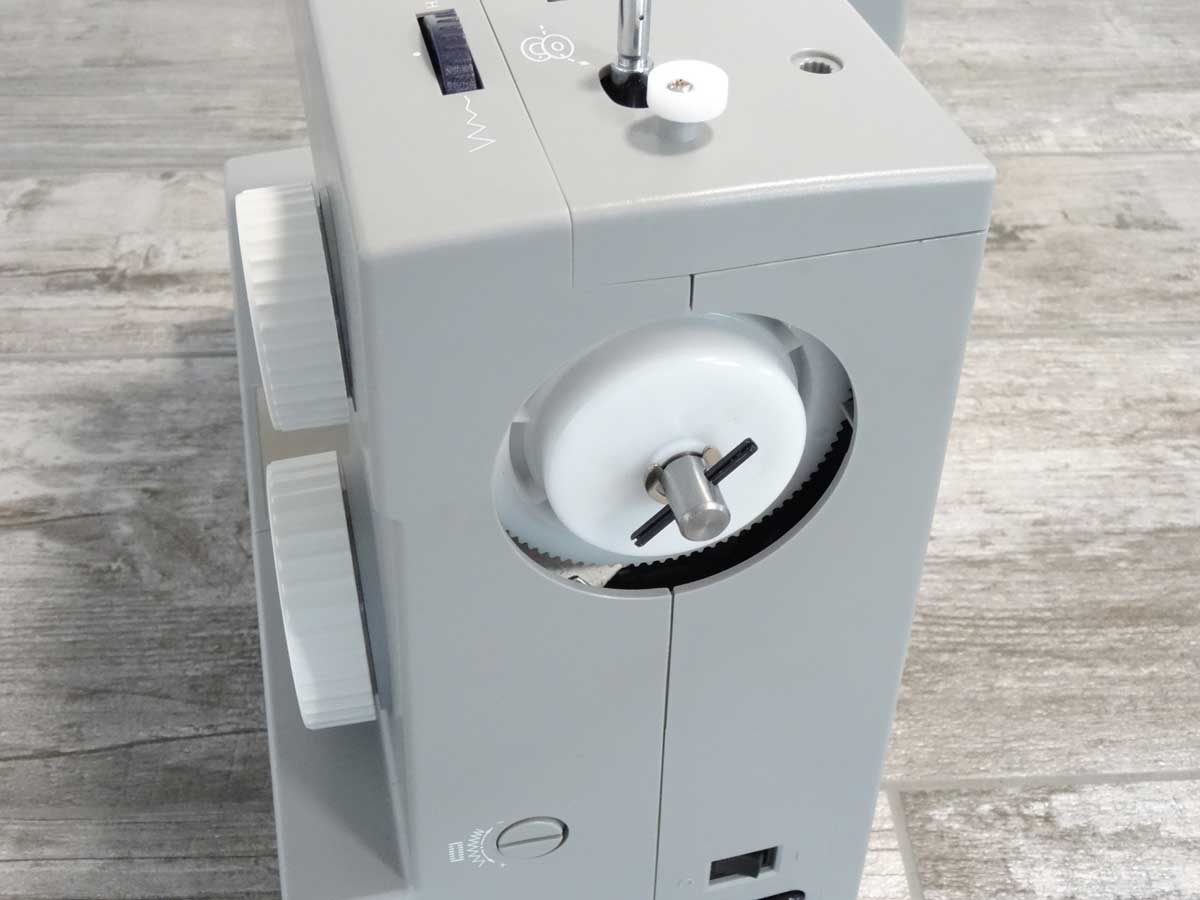
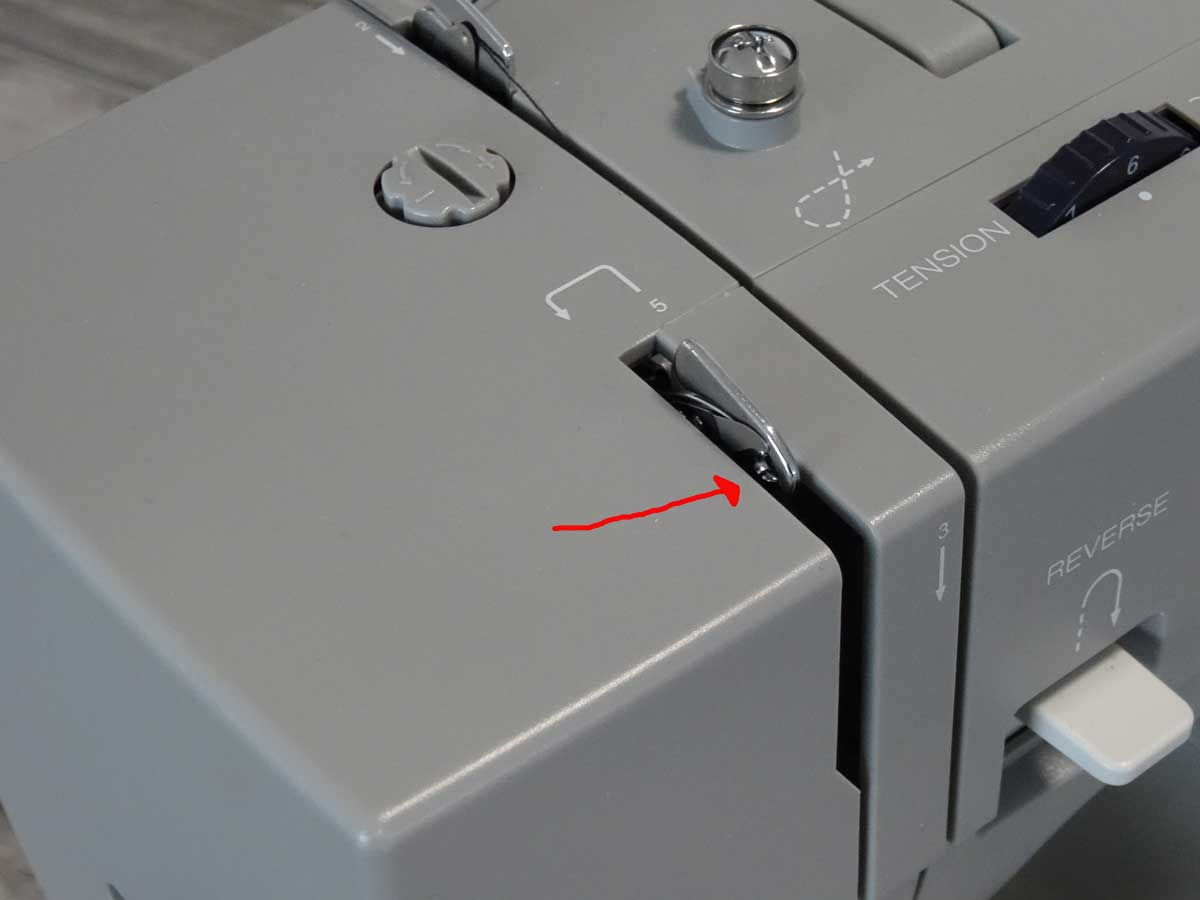
First I dismantle the rotary wheel on the right-hand side of the machine.
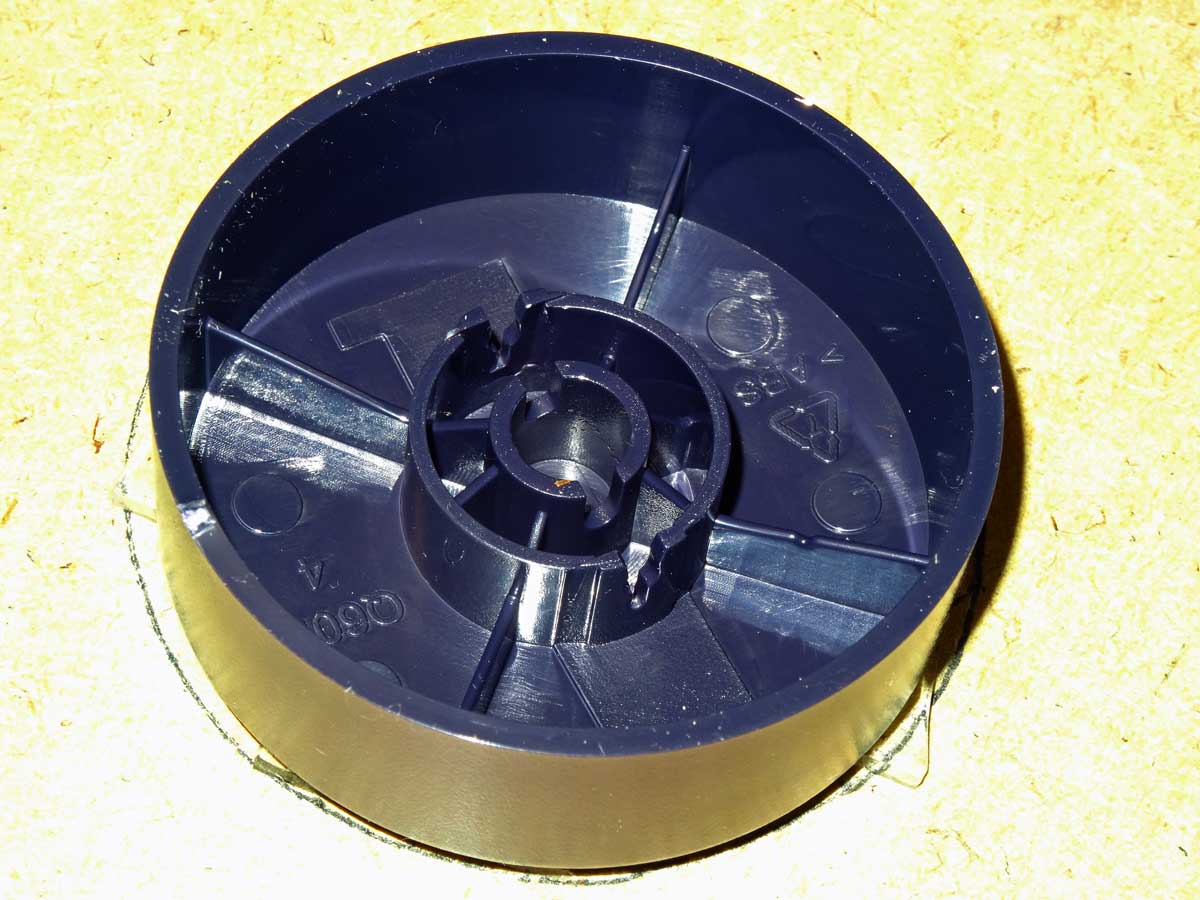
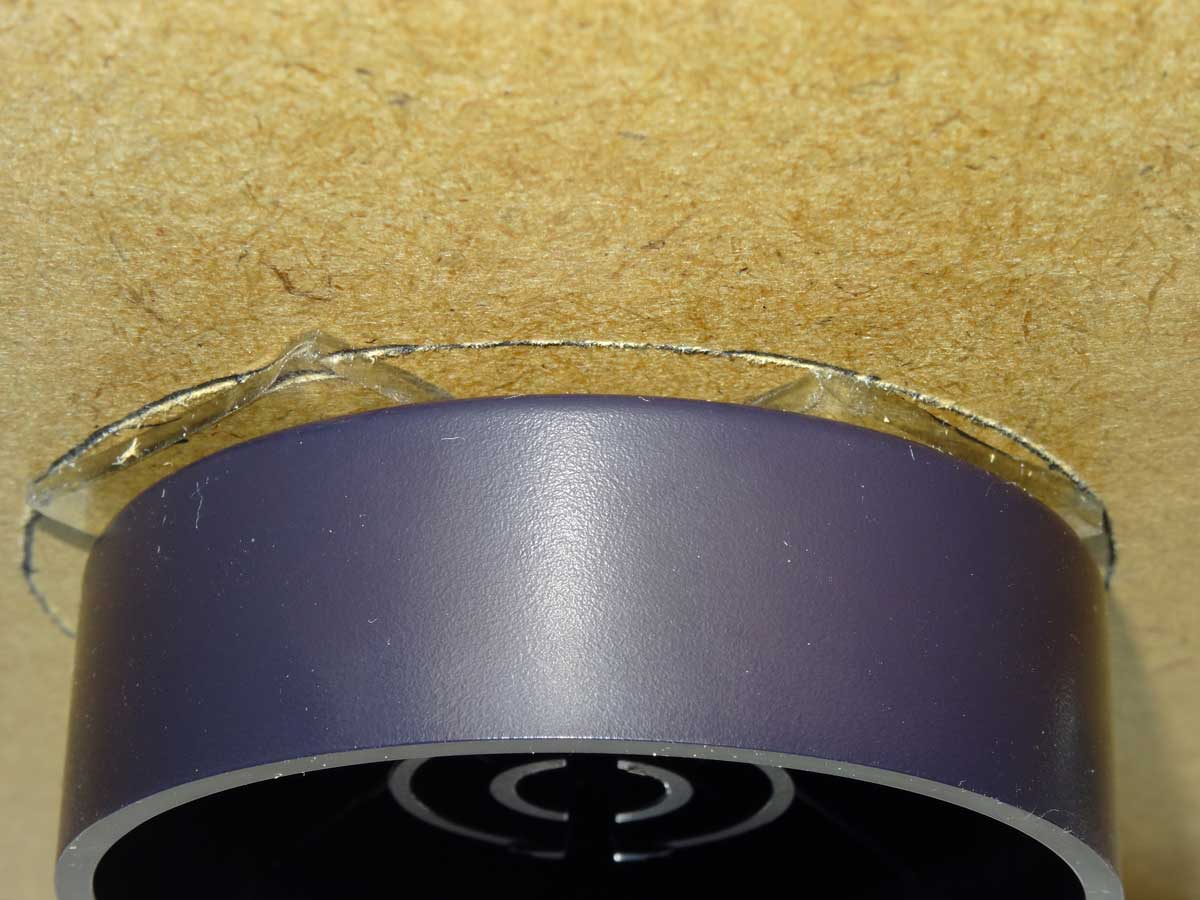
The plastic wheel is only plugged in and can be removed by simply pulling it off in the axial direction.
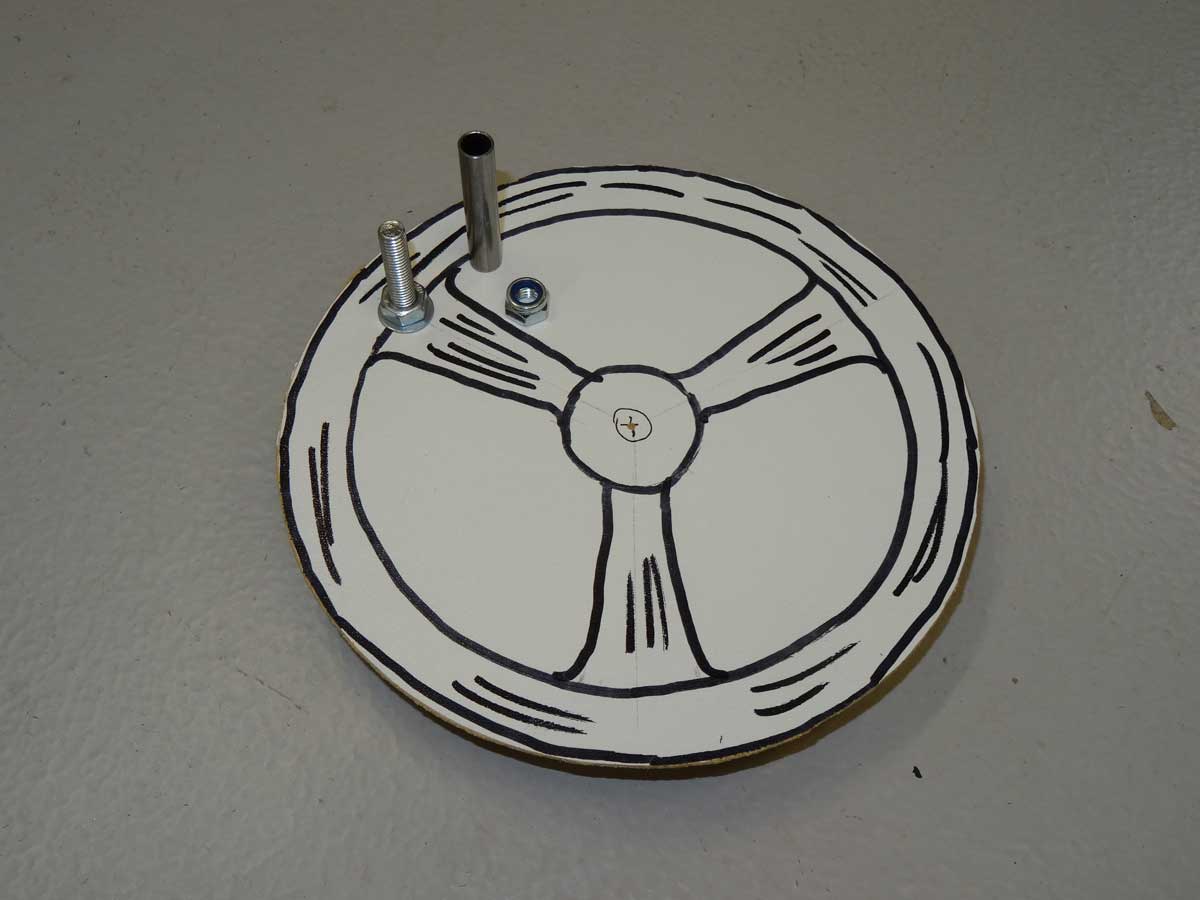
To get a feeling for the diameter of my new wheel, I built this test wheel. I cut a disk with a diameter of 20 cm out of a 3 mm MDF board. I use a long screw as the crank handle and to protect the fingers when turning it, you can put a sleeve over it and secure it with a self-locking nut so it doesn't fall off but can still be turned.
The plate then only needs to be connected with the plastic rotary wheel. I used 2 mm thick double-sided adhesive tape for this. Make sure to attach it at the edge and not in the middle, as the surface of the wheel is convex.
If you don't have a lathe and just want to build my prototype, you can do that too. In my case, the part is bombproof, even when I go full throttle in electric mode. To be on the safe side, I would still use 2 additional screws in addition to the adhesive tape, then you are on the safe side and the part won't fly around the apartment at some point …
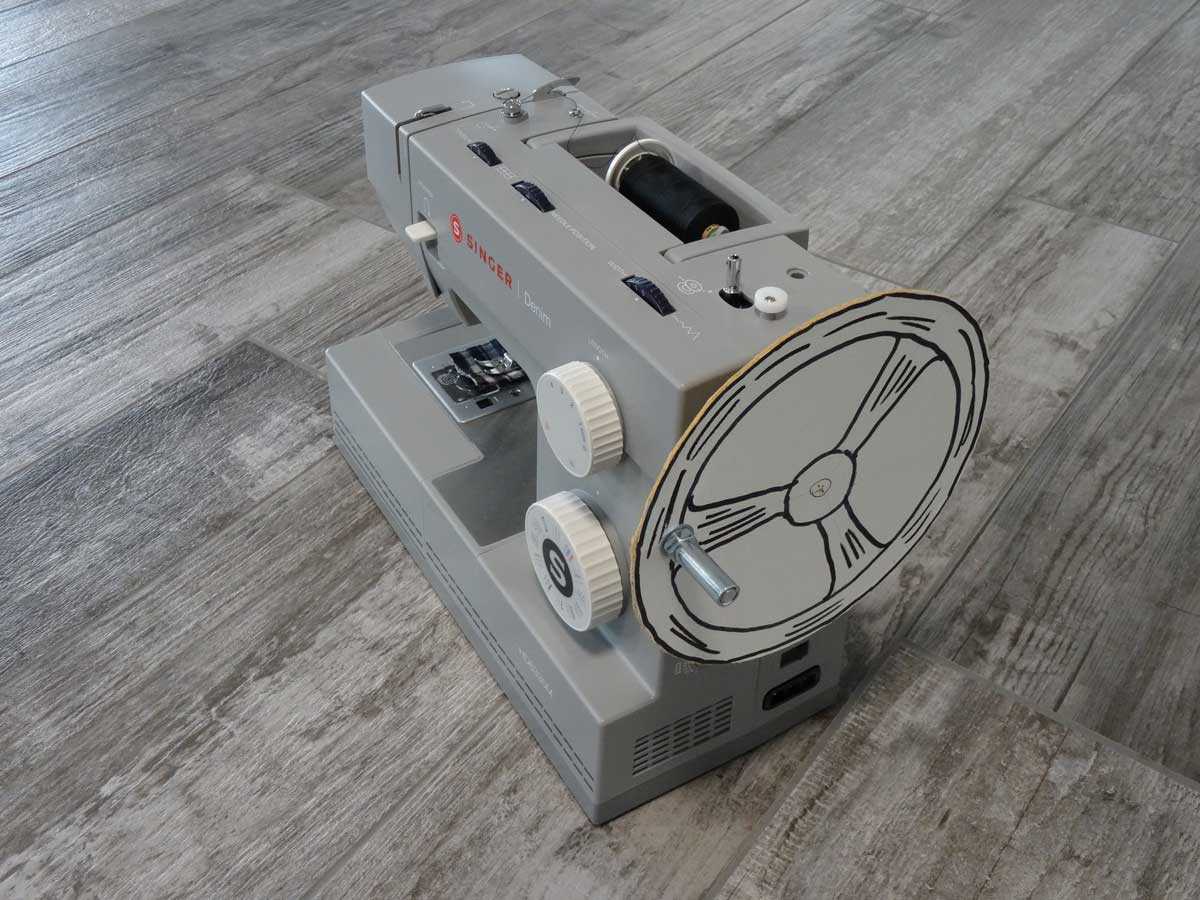
The 20 cm diameter for the wheel is perfect, big enough for sewing with little force, but not too big if you want to sew a little bit faster in manual mode.

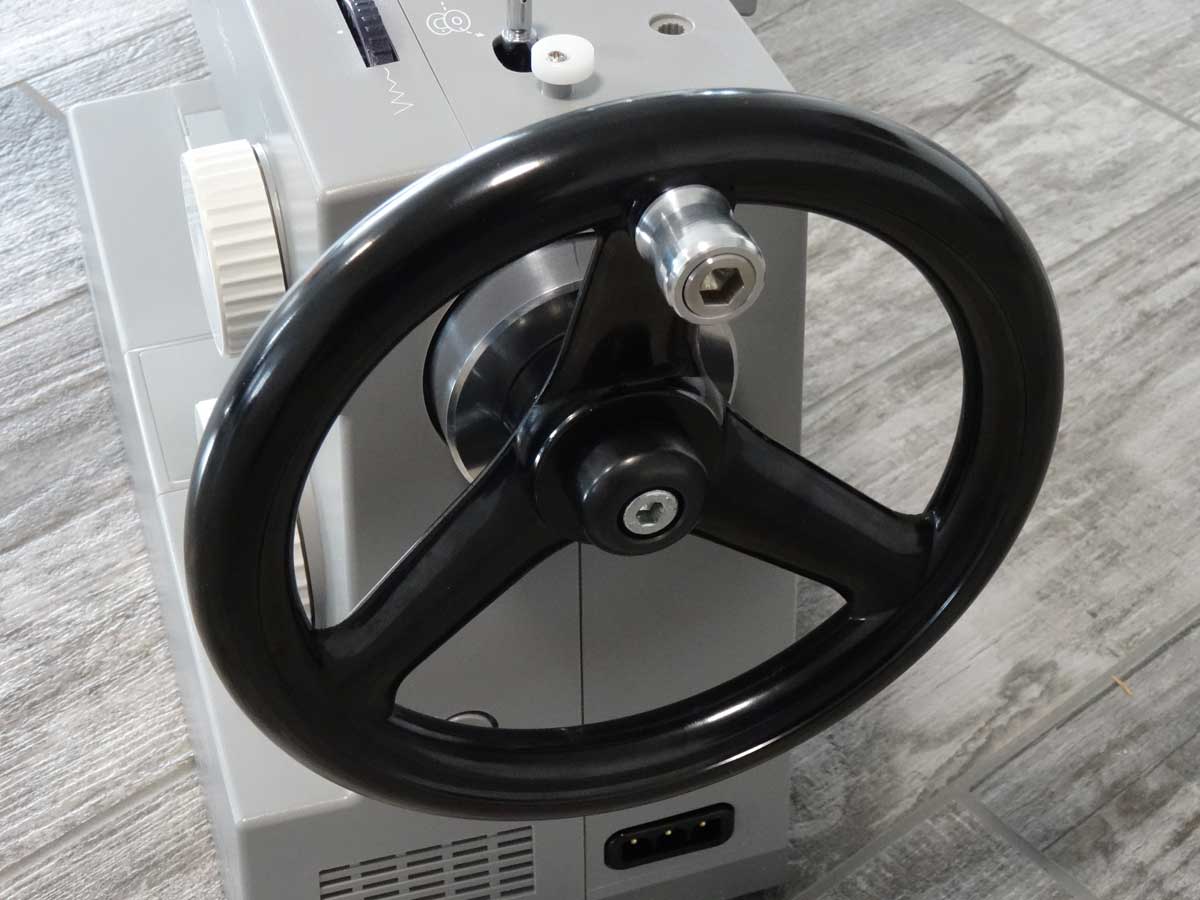
I have chosen this Bakelite hand crank, which is normally used on machine tools and has a diameter of 20 cm. However, the handle supplied is far too long and doesn't have the shape I would like. That's why I'm going to make a new one.
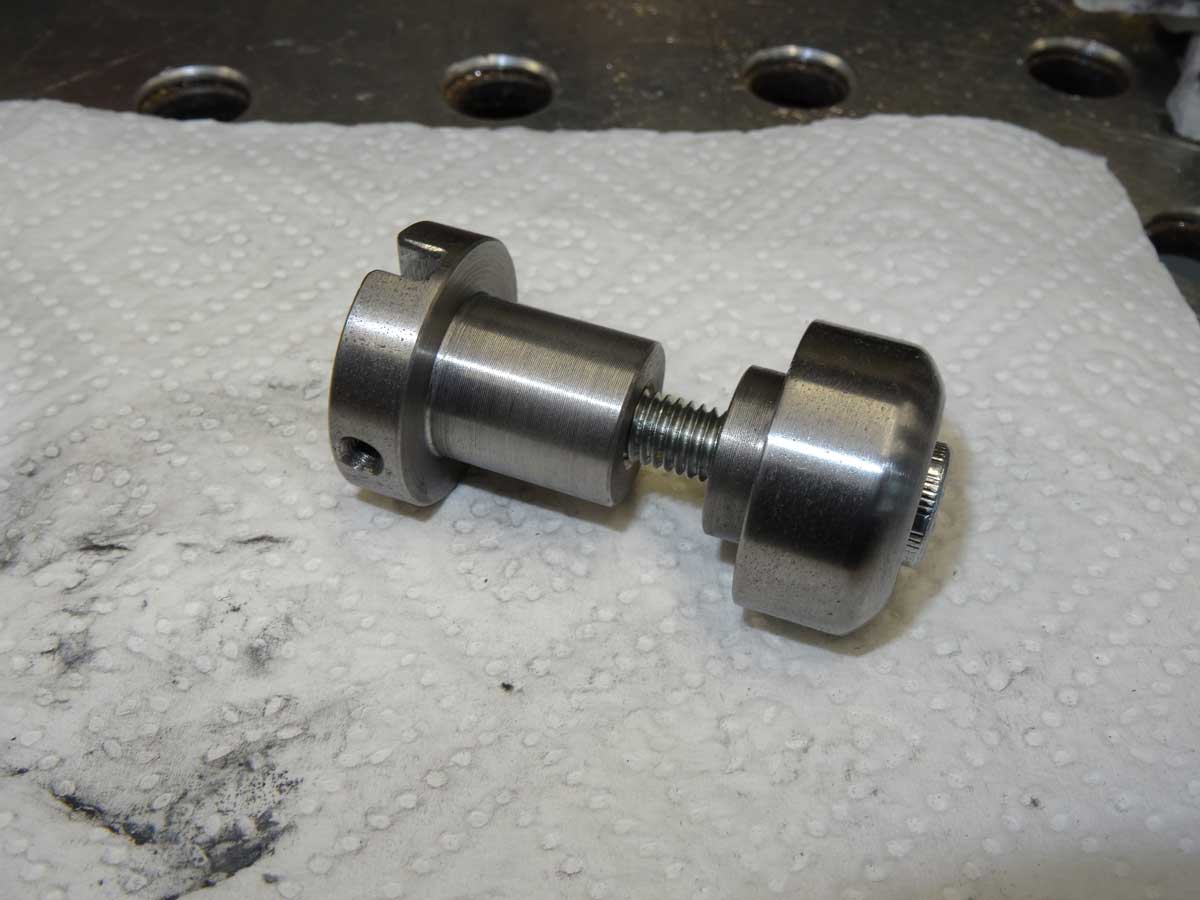
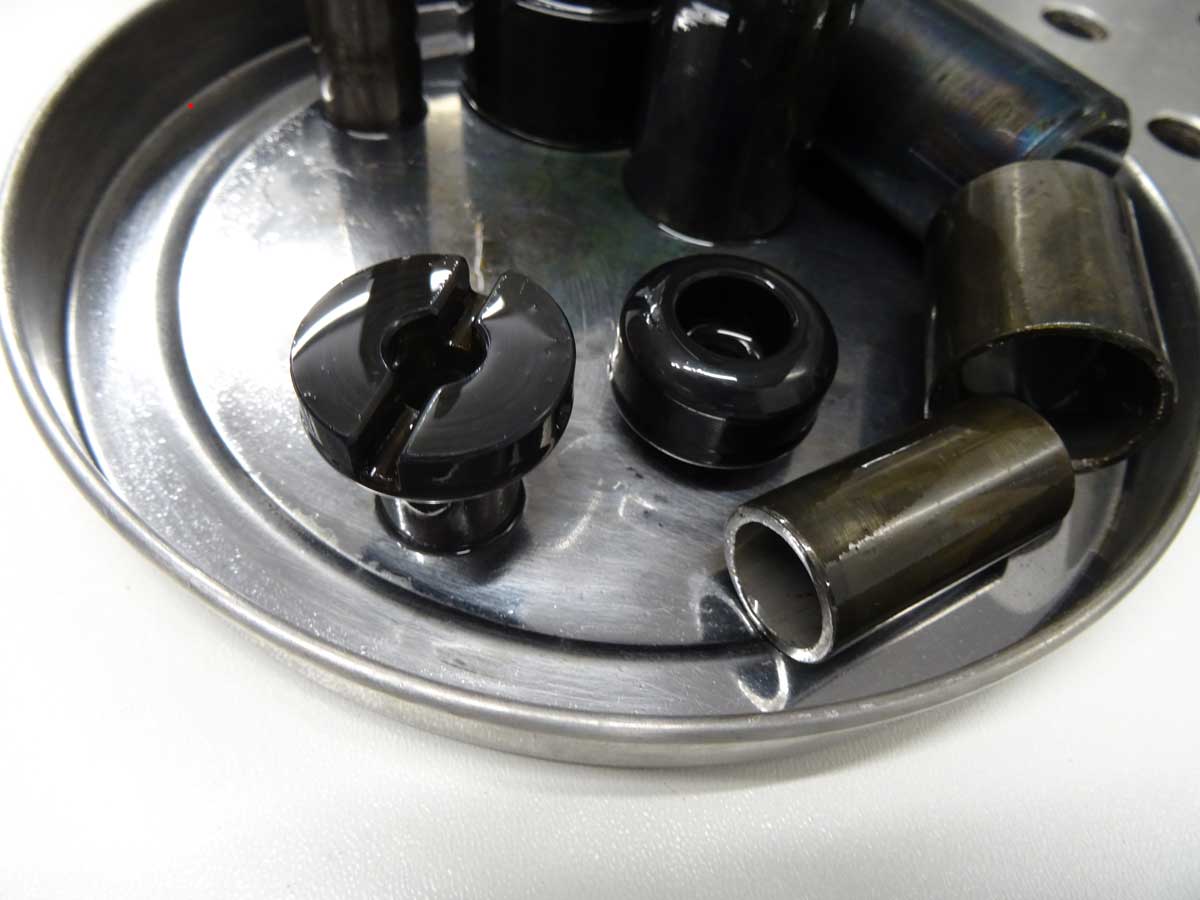
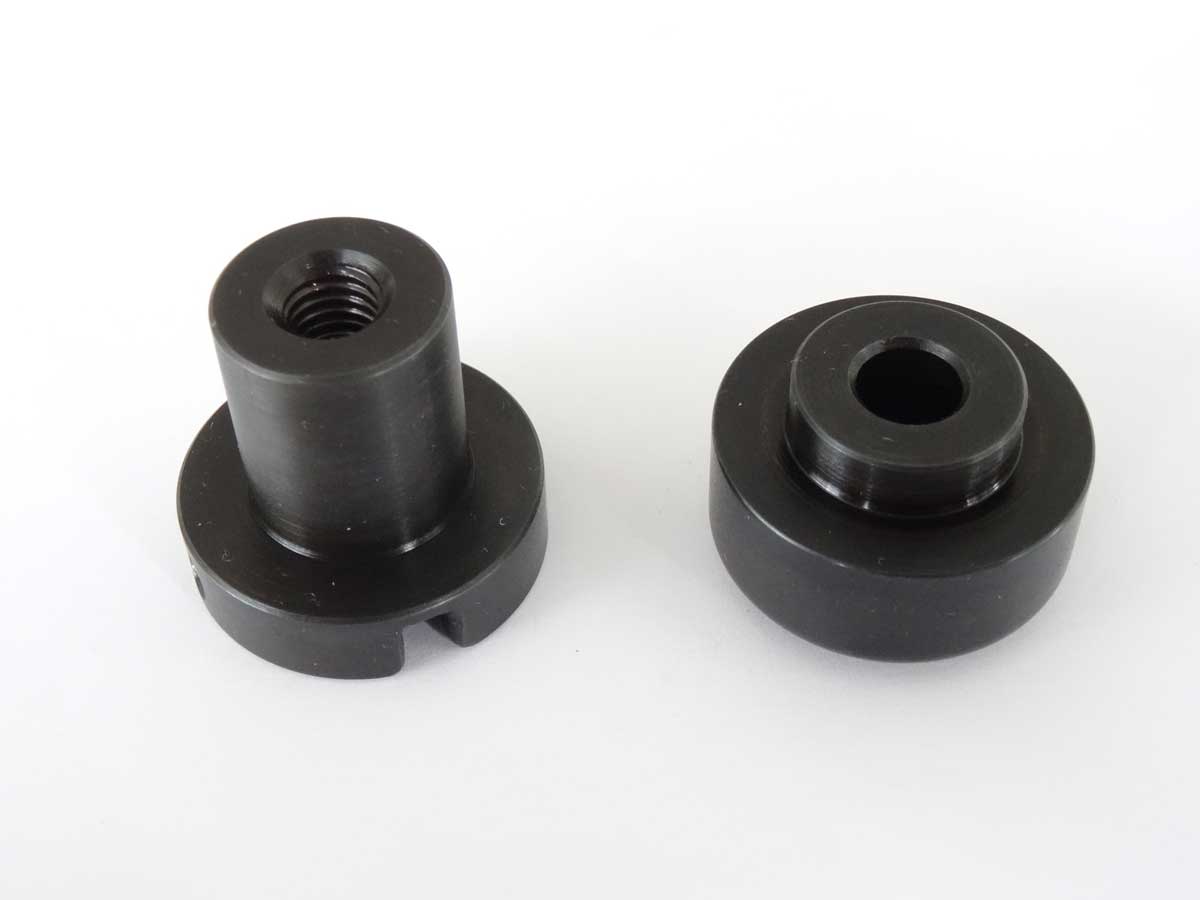
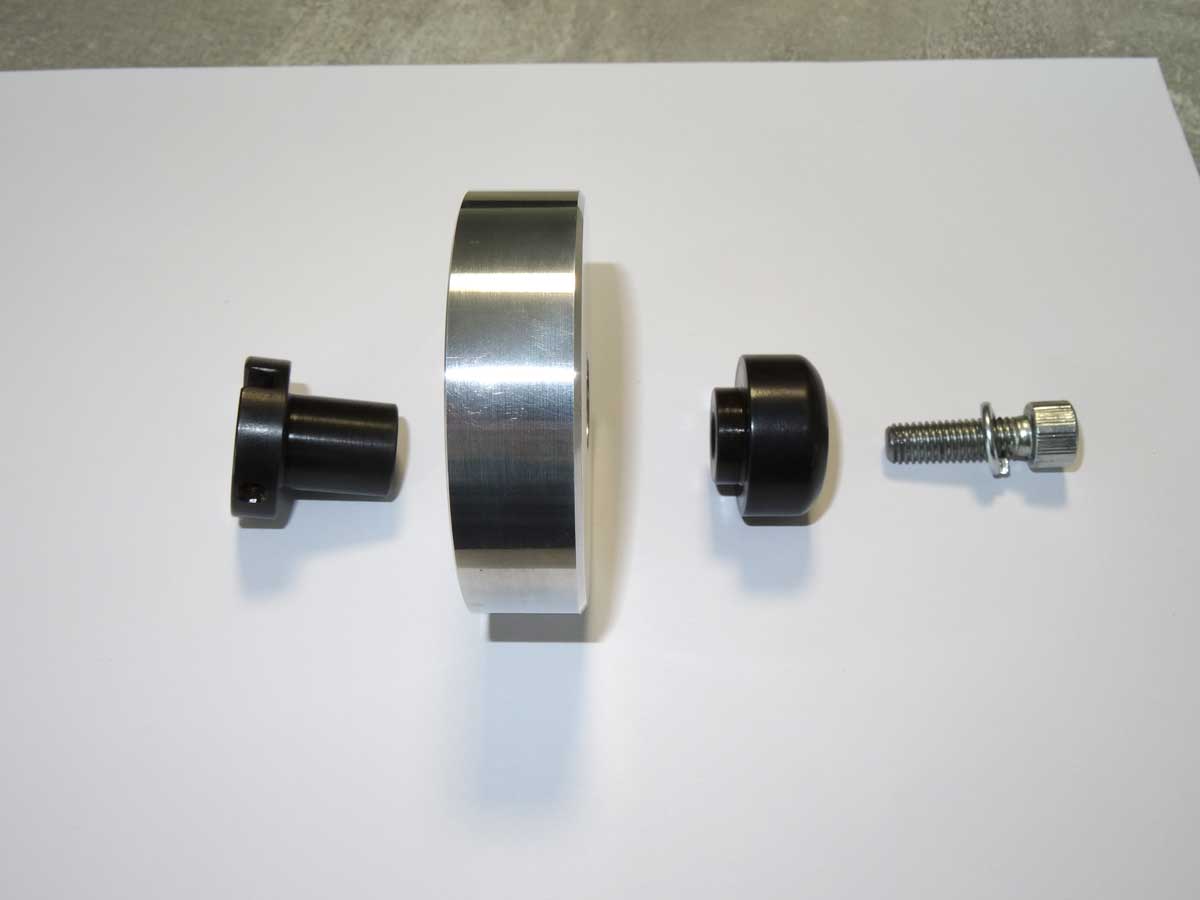
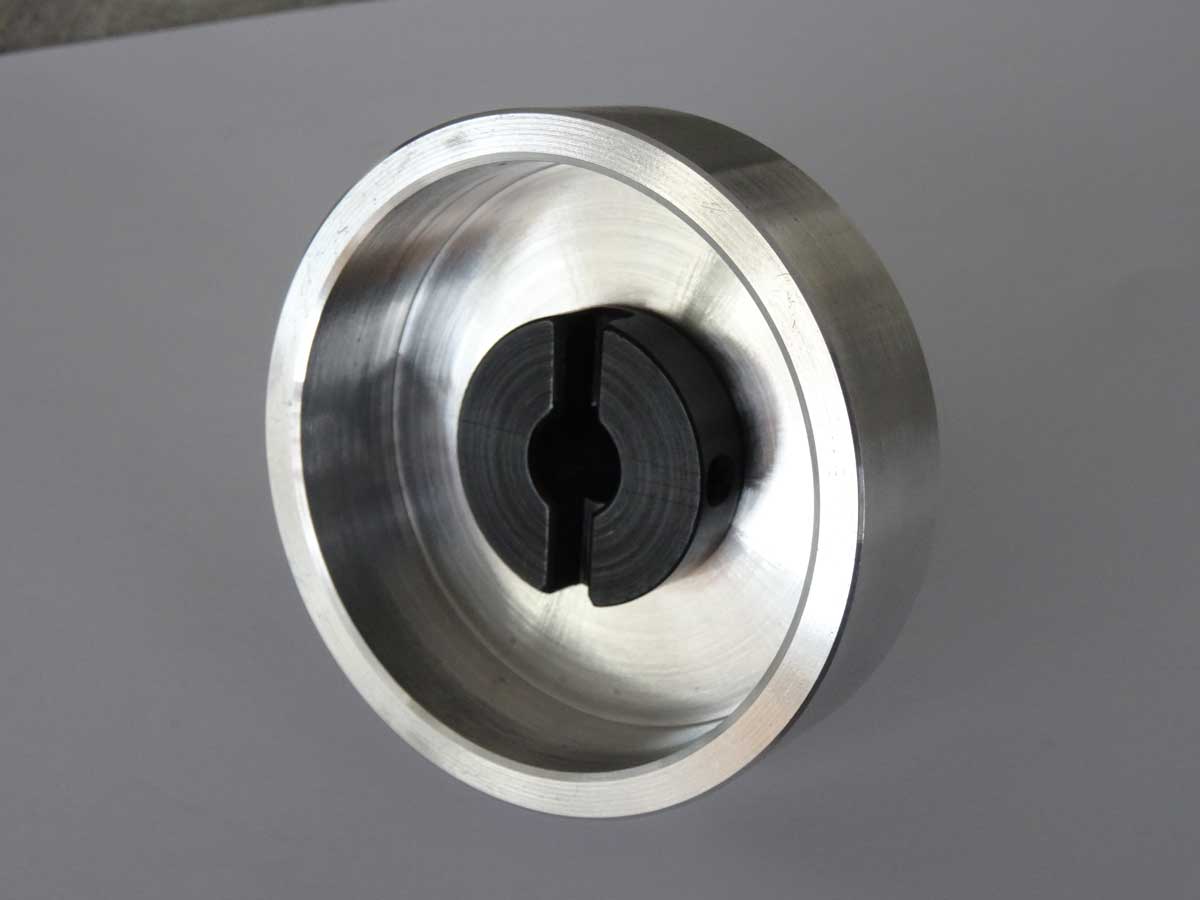
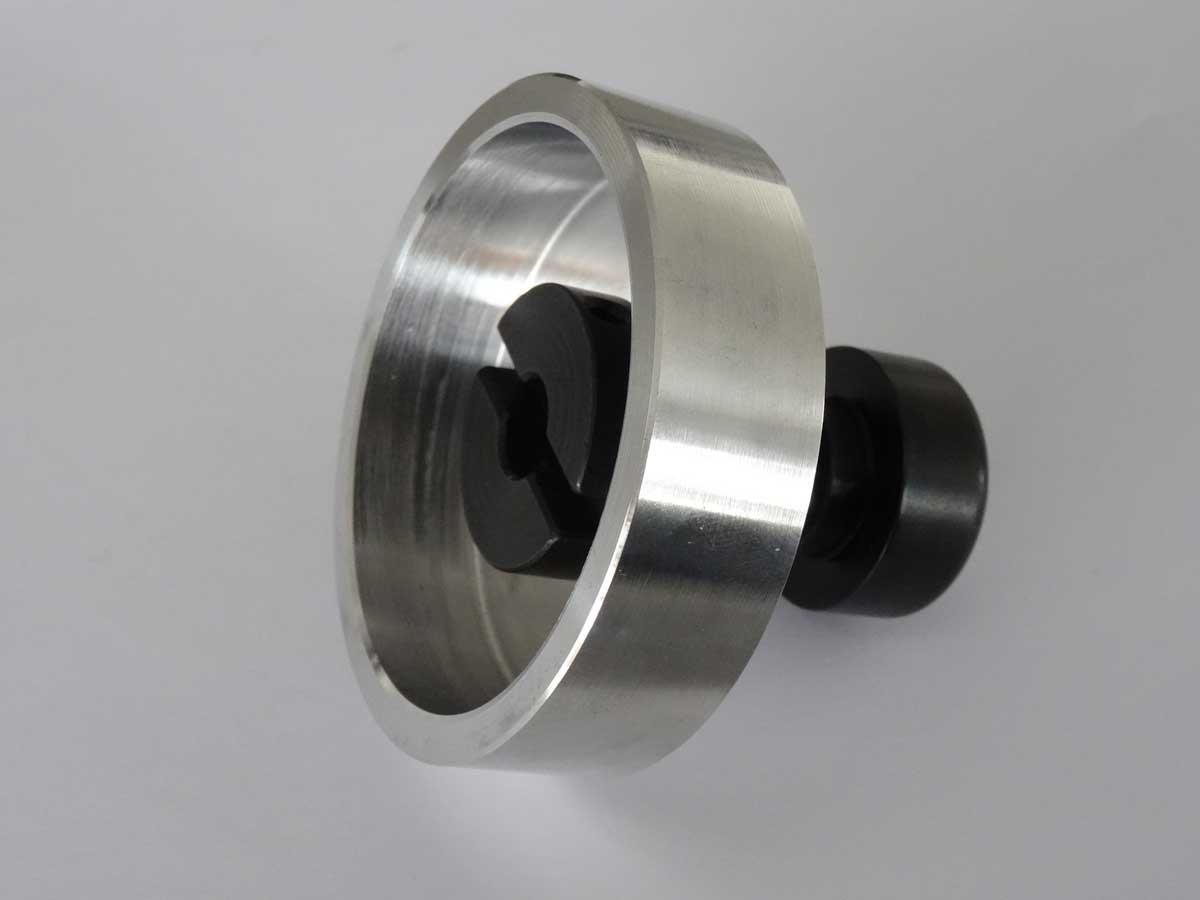
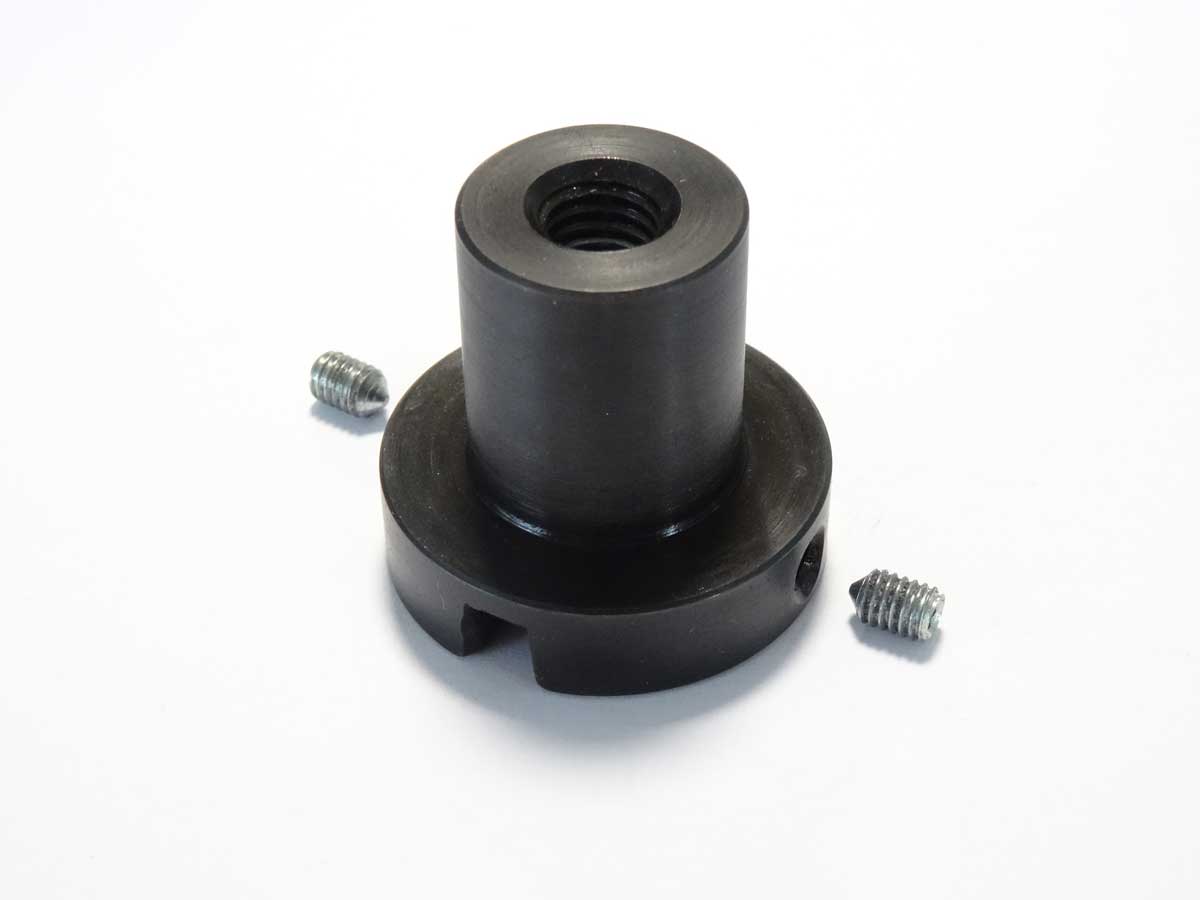
This is the adapter I made on the lathe, consisting of 2 parts.
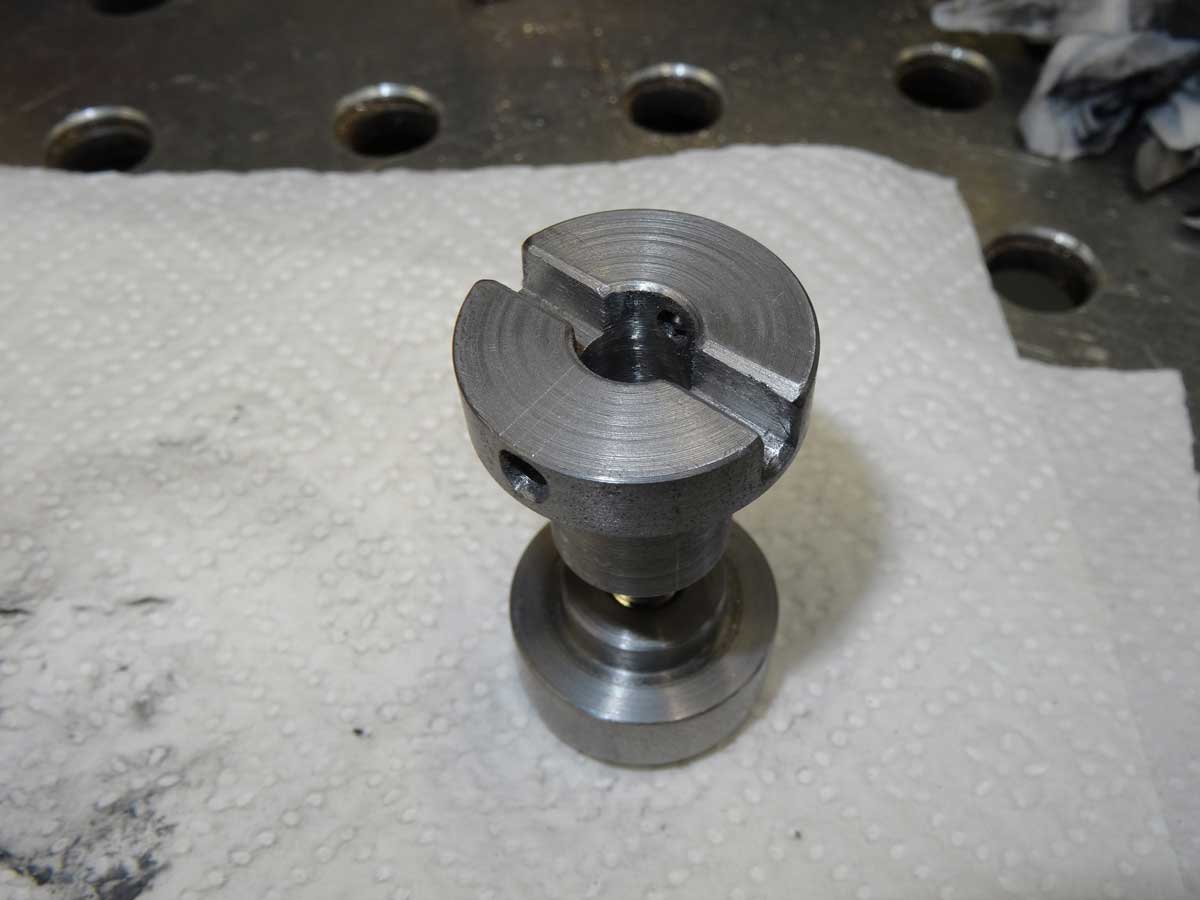
One part has a groove for the heavy-duty dowel pin that sits on the shaft.
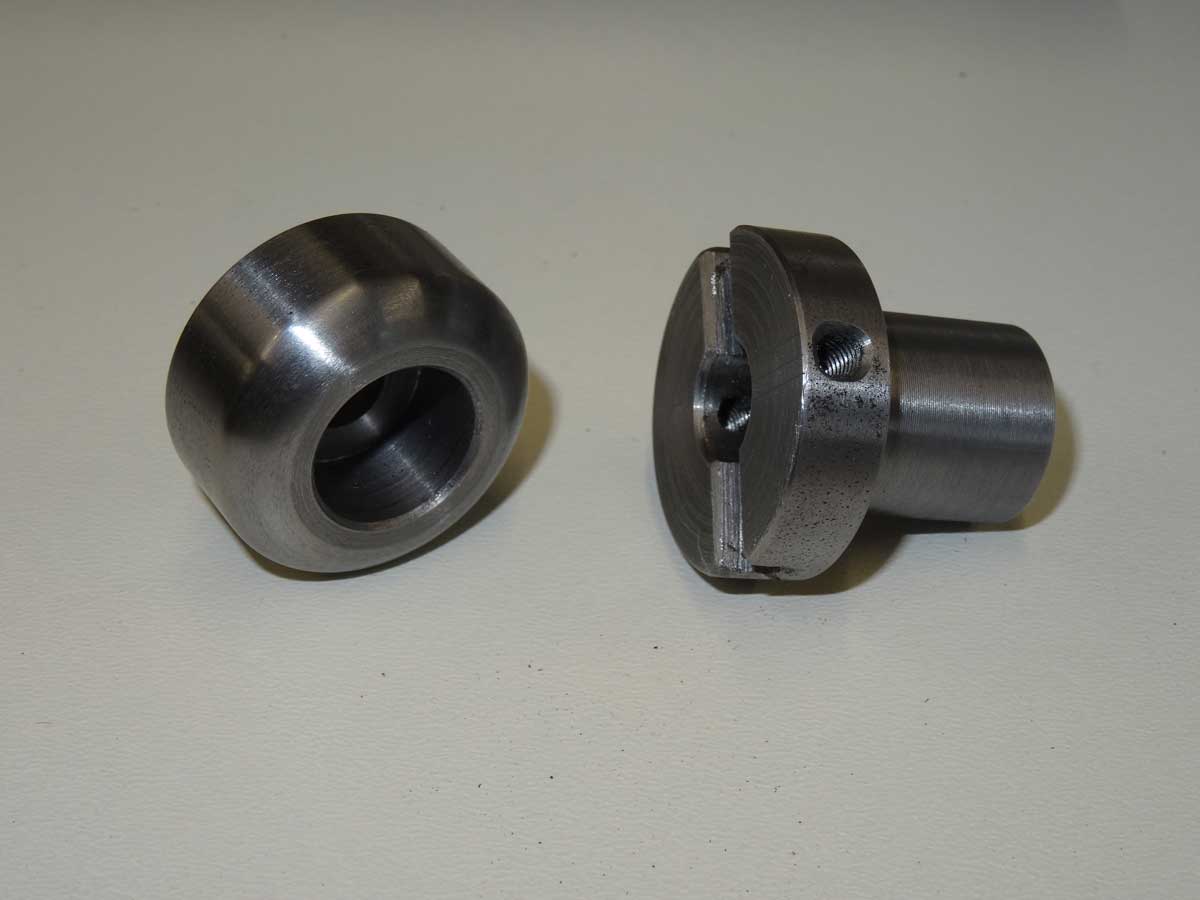
The parts are still bare and don't quite match the sewing machine yet.
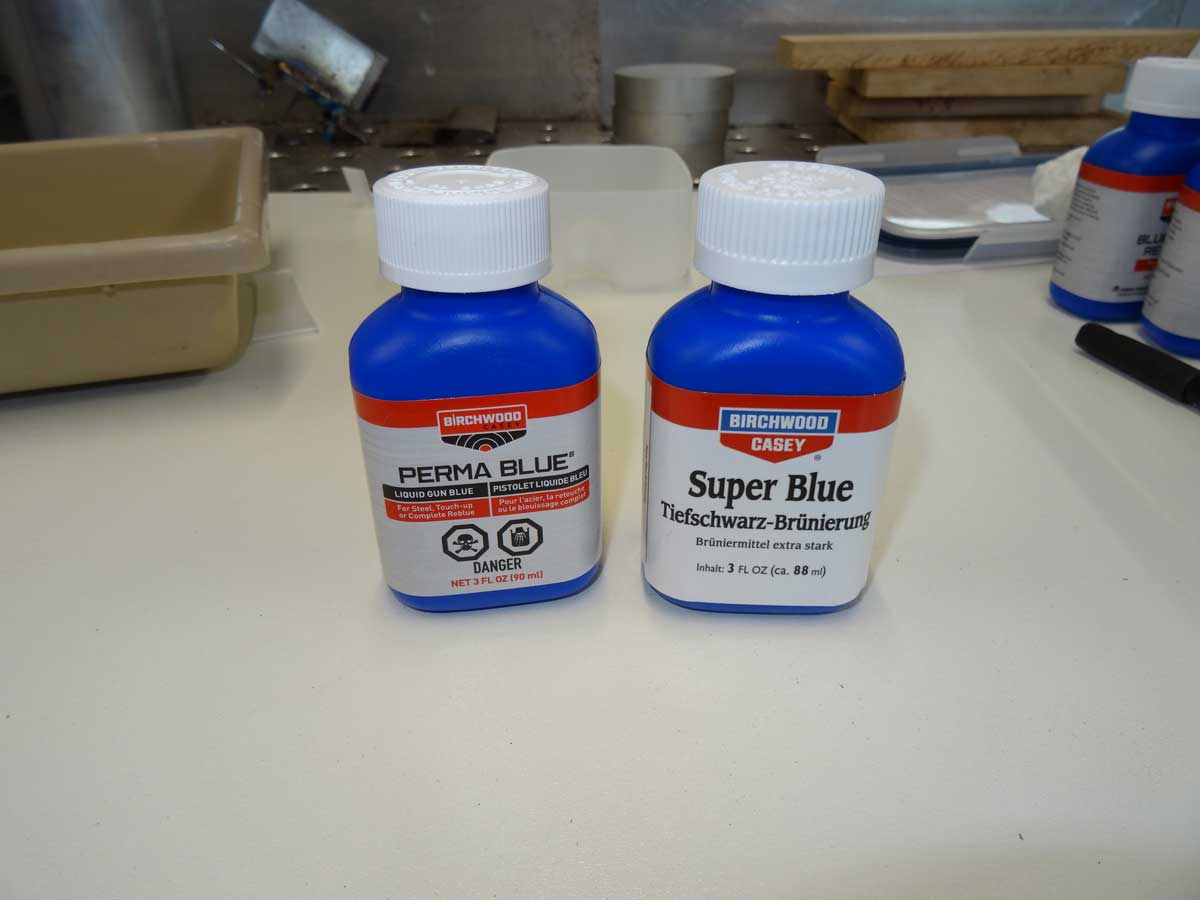
For this reason, both parts will now be burnished (blued). These are the Birchwood products I am using. One can is for a deep black burnish, the other for a slightly blue color. I opted for the deep black version.
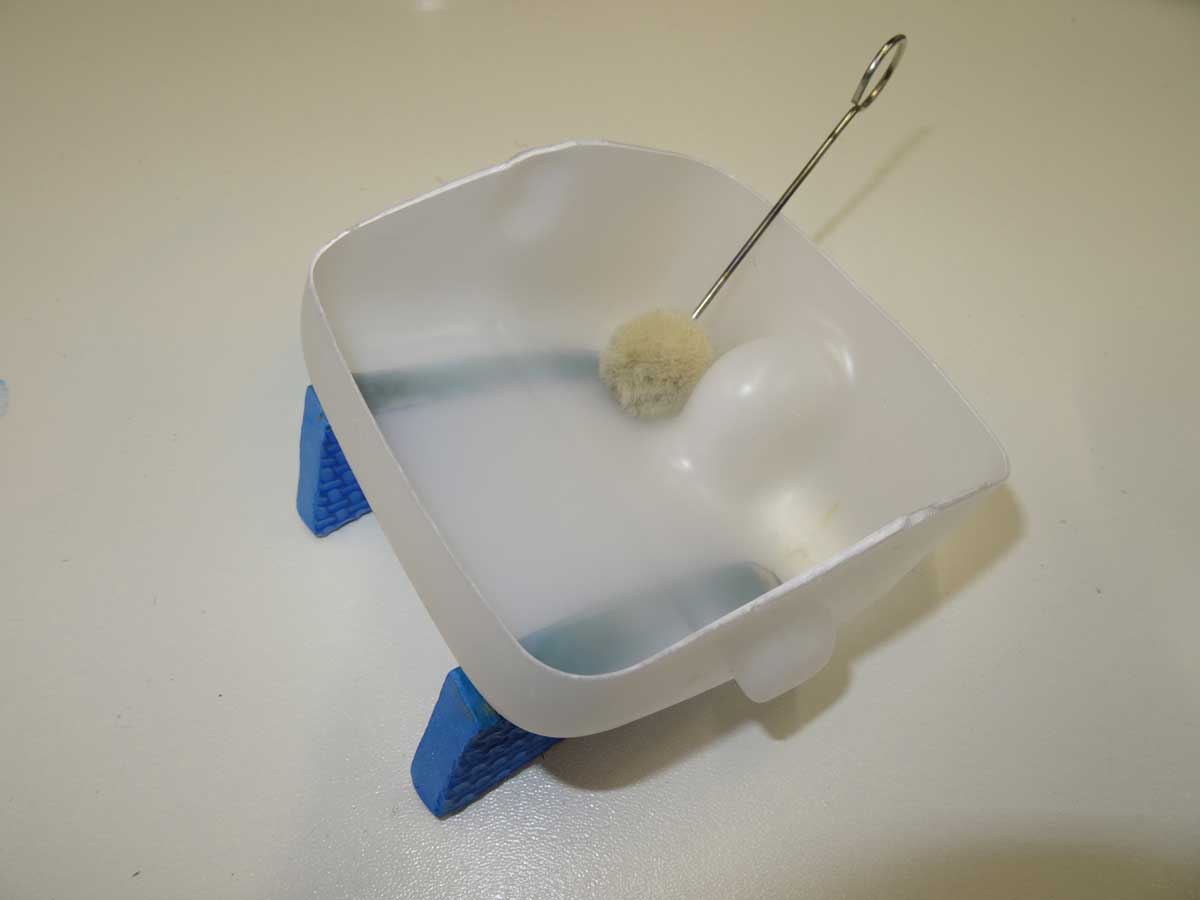
The application is relatively simple and takes just a few minutes. This dabber is used to coat the steel parts and I applied 3 coats. The part must be sanded and degreased beforehand so that you don't get a blotchy result. After each coat, the parts are rinsed with water.
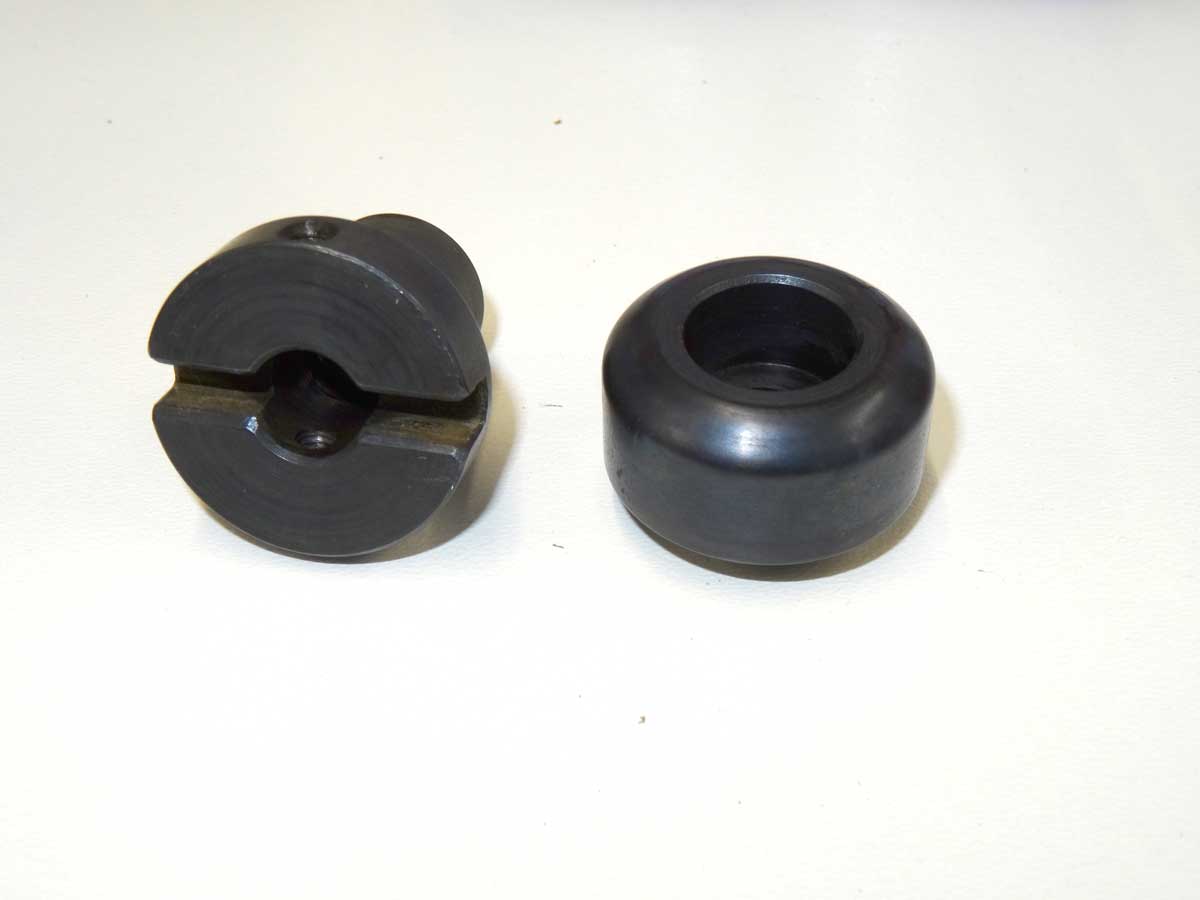
Here the parts have already been treated, washed under running water and dried.
They are then coated with oil and left for 24 hours.
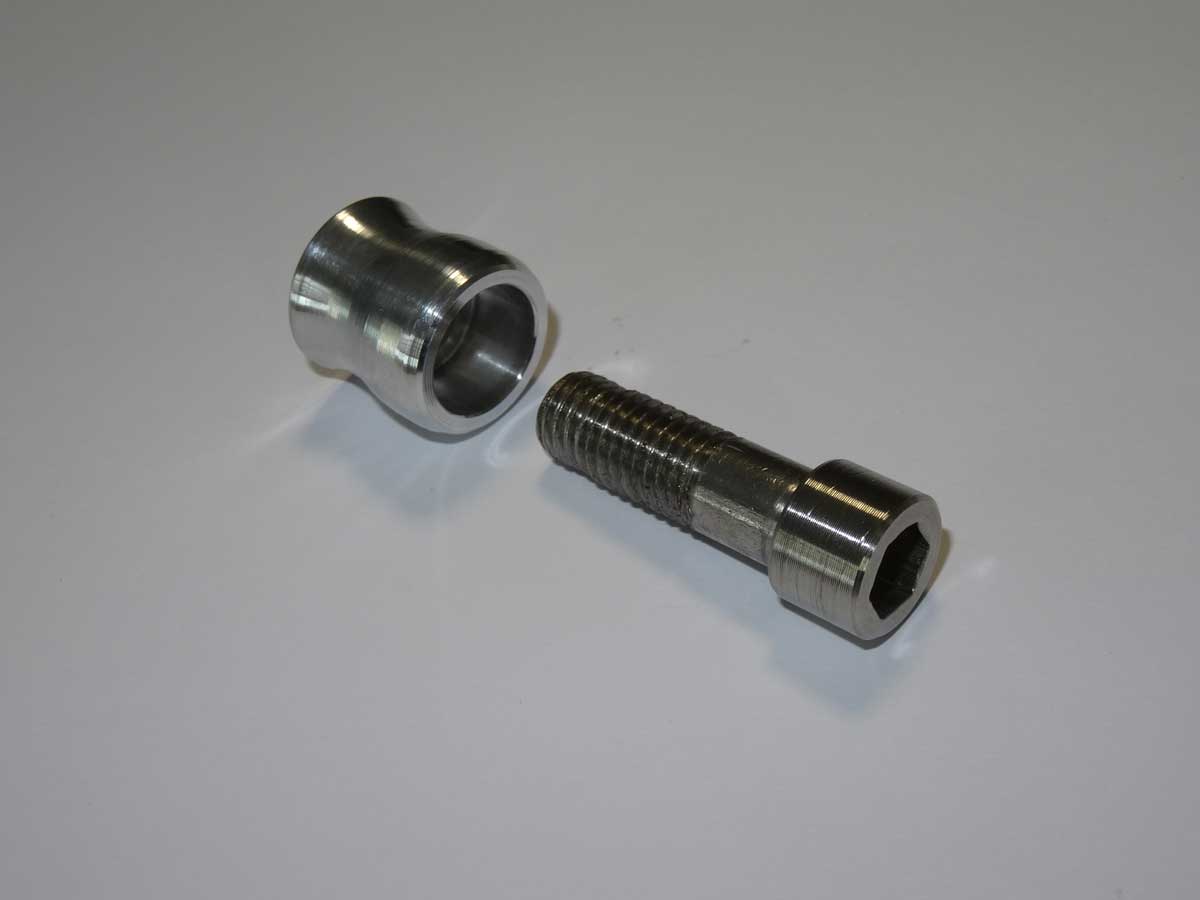
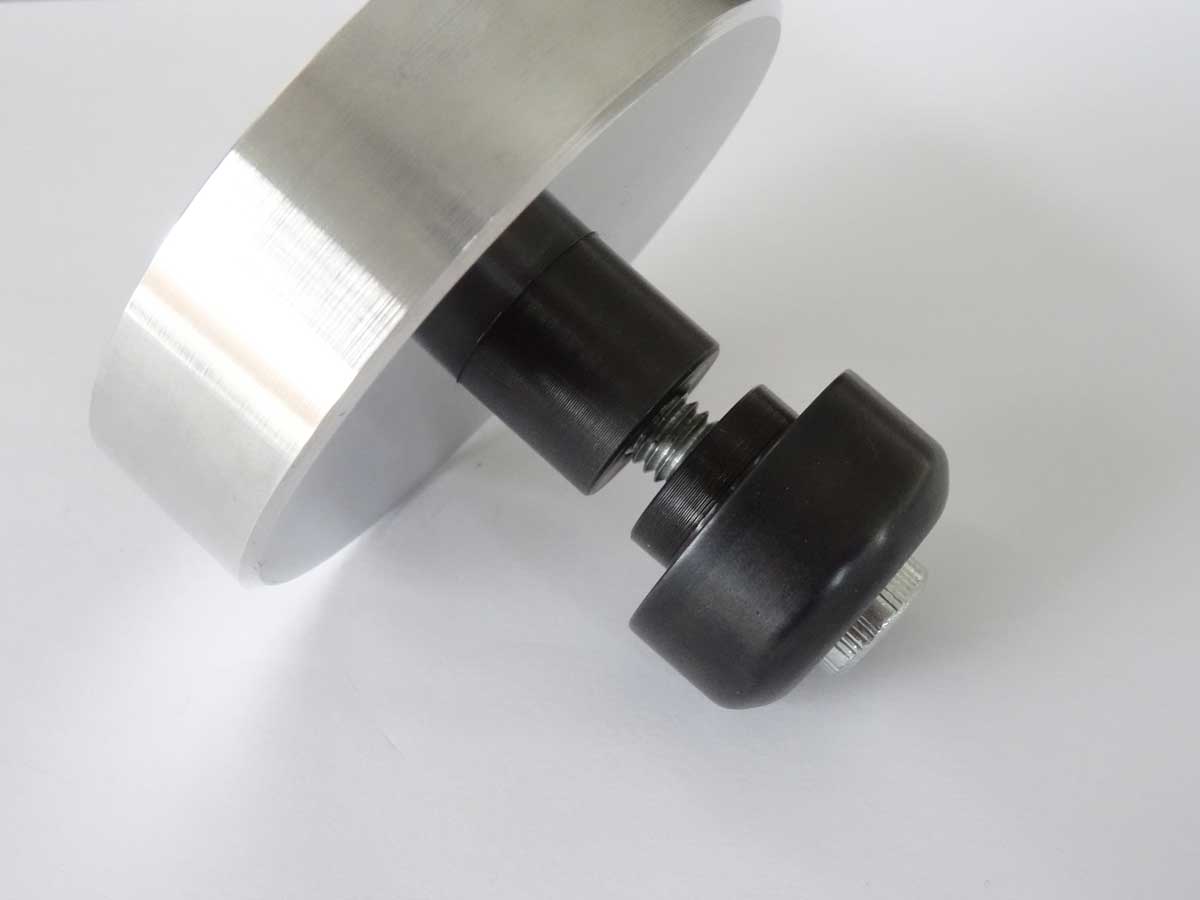
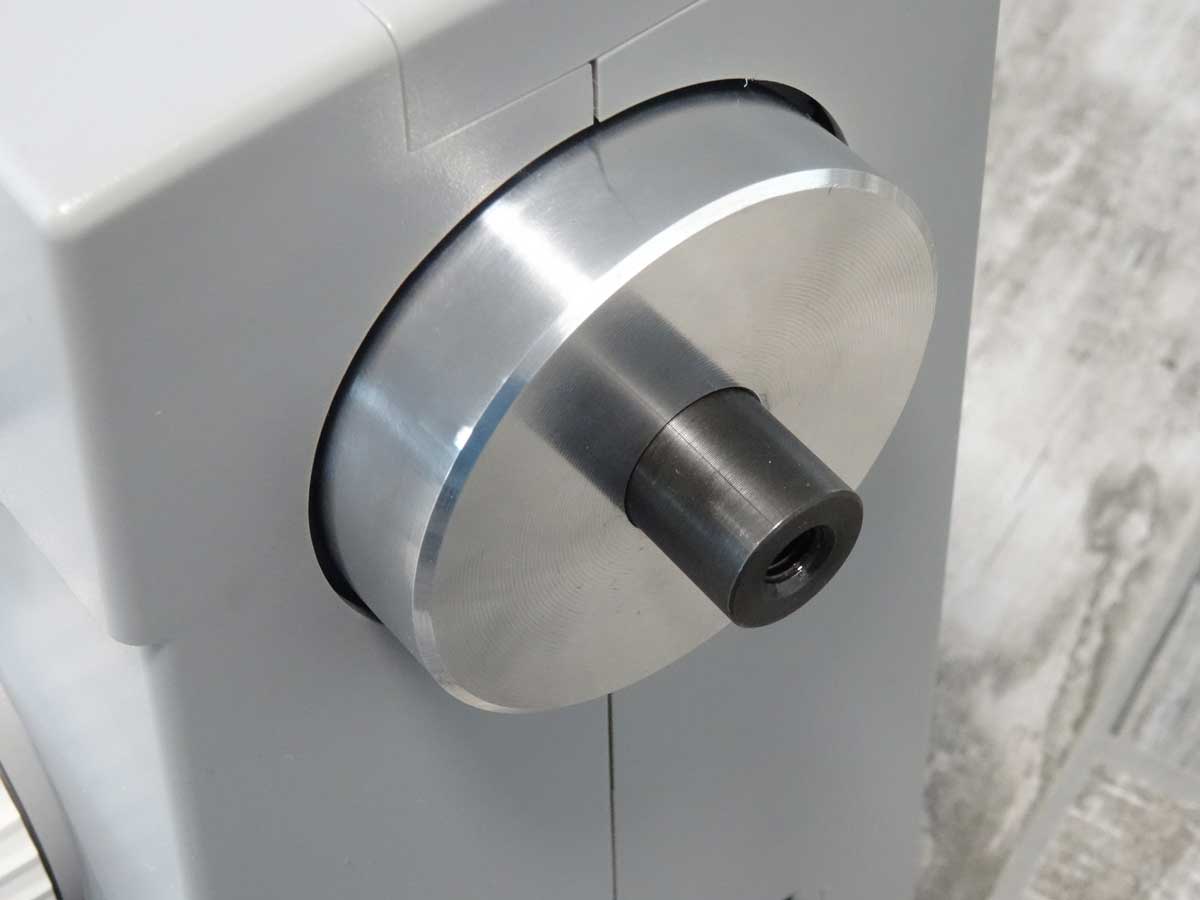
The original handle of the crank was not usable for me, so I slightly turned the head of a stainless Allen screw and turned the knob from a piece of aluminum.
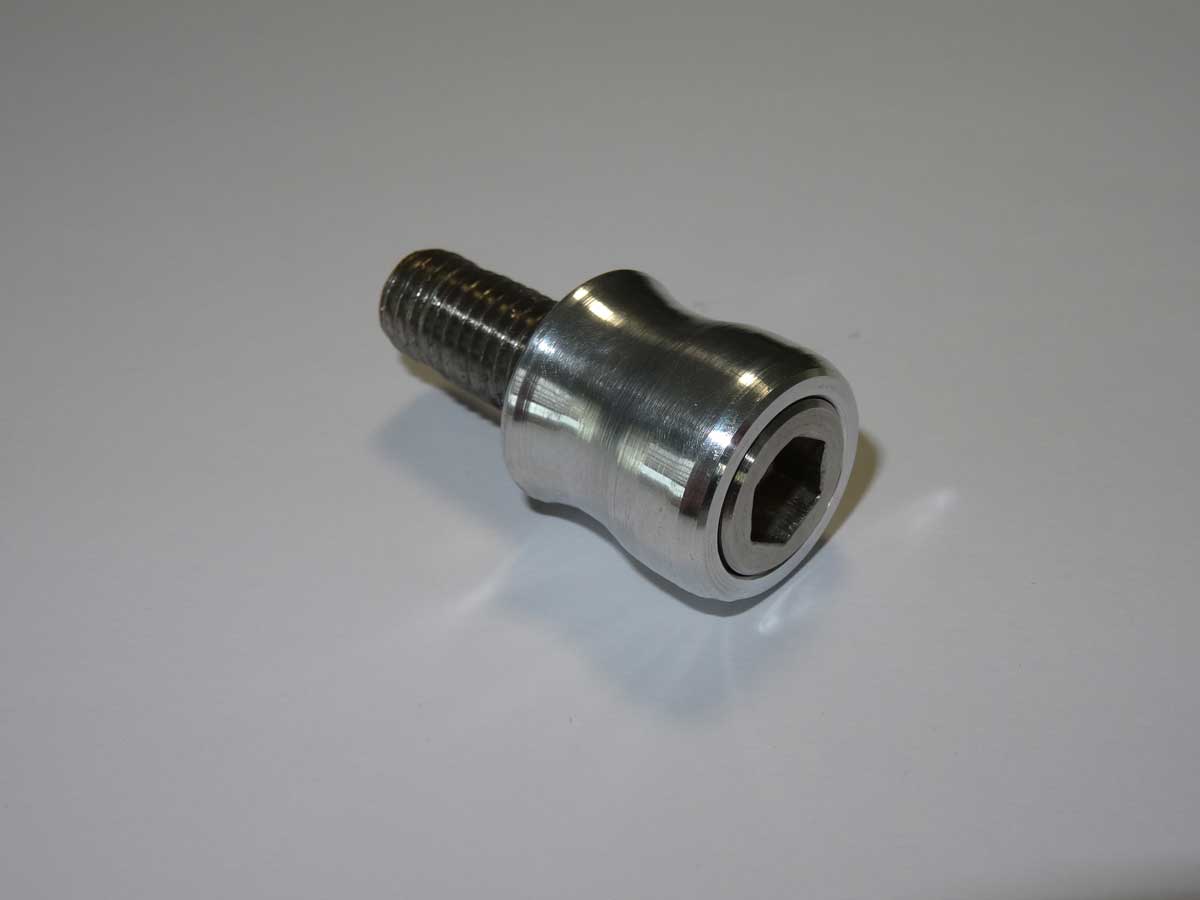
The screw not only looks nicer, it also allowed me to turn the aluminum knob to a tighter fit so that the knob turns nicely but doesn't wobble like the original handle.
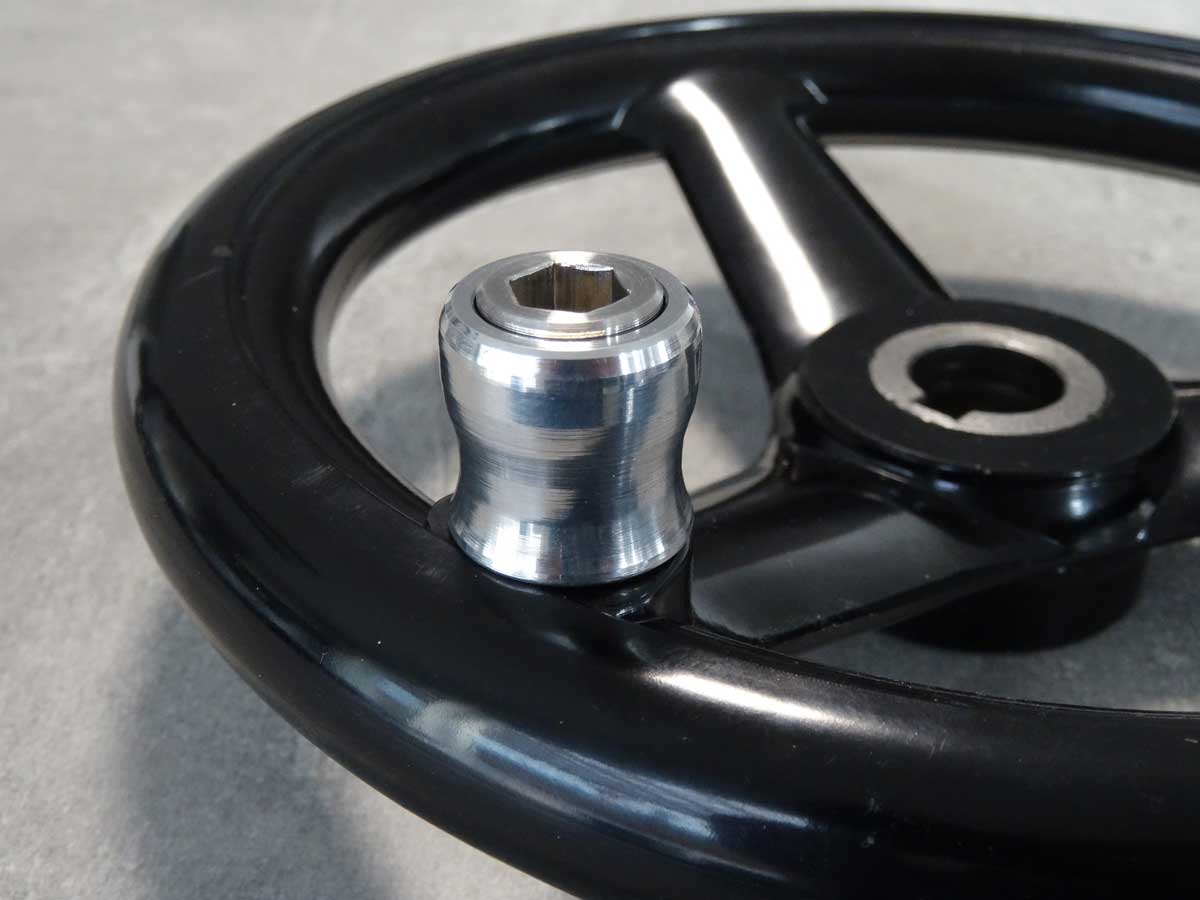
The knob fits the wheel perfectly.
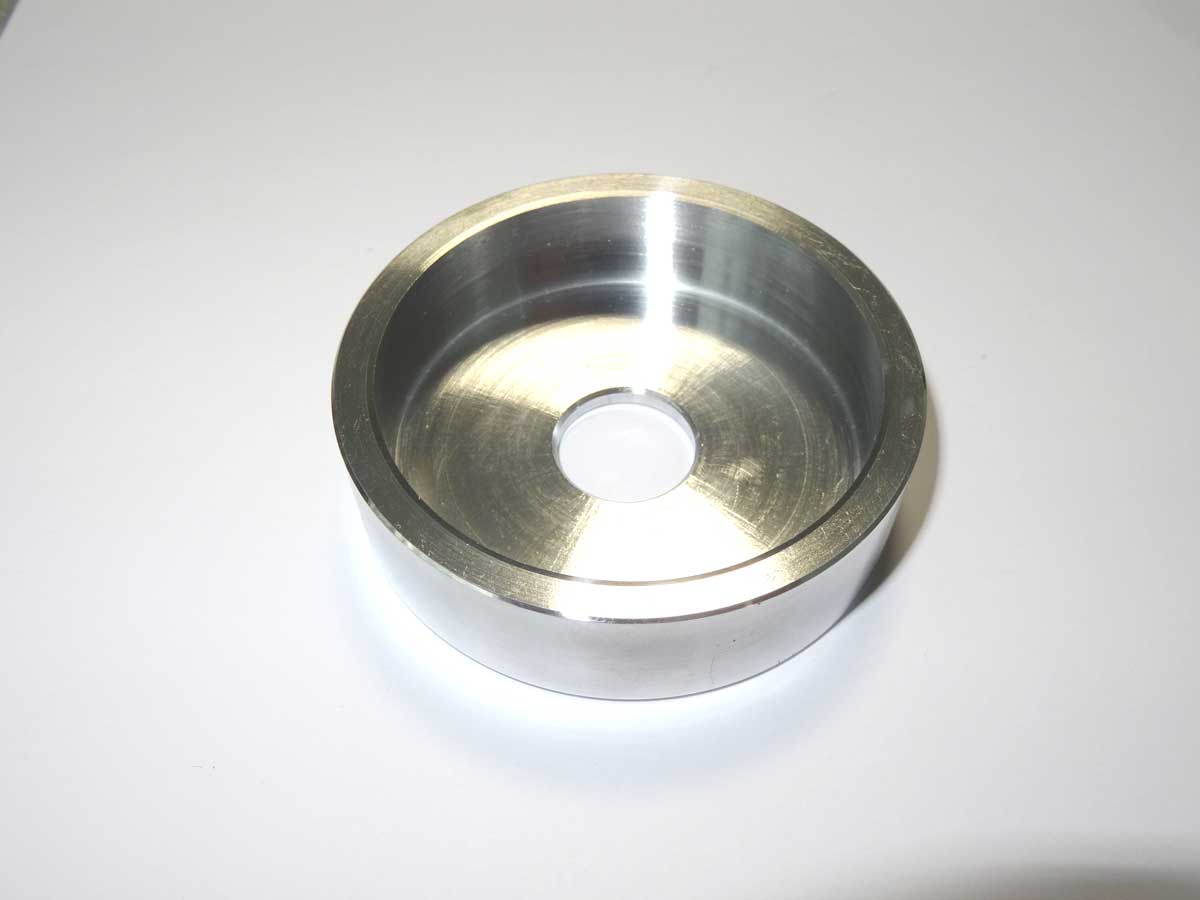
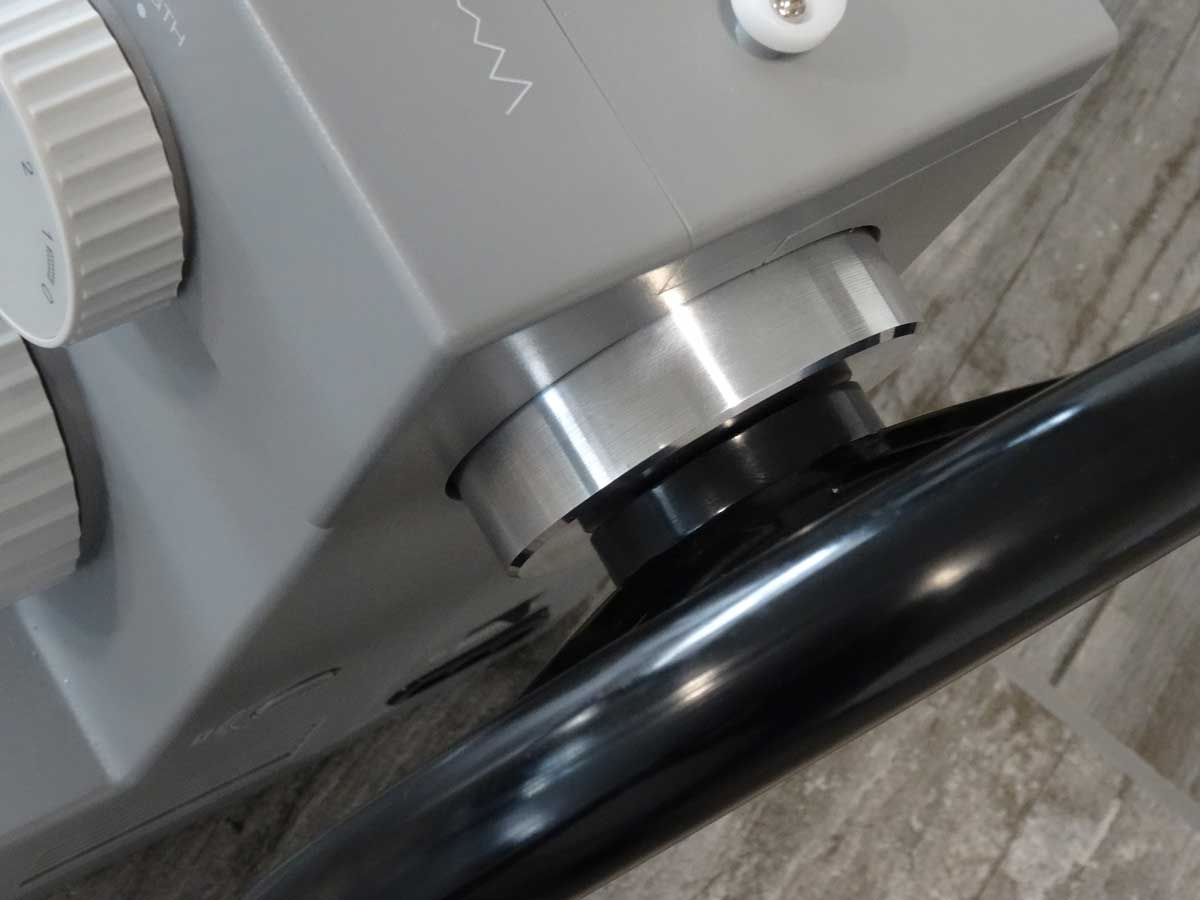
In principle, I now have all the parts I need to mount the wheel. What is still missing is an aluminum cover similar to the original plastic part. I turned this from an aluminum disc and polished it slightly.
Now we have everything together and I can start with the assembly.
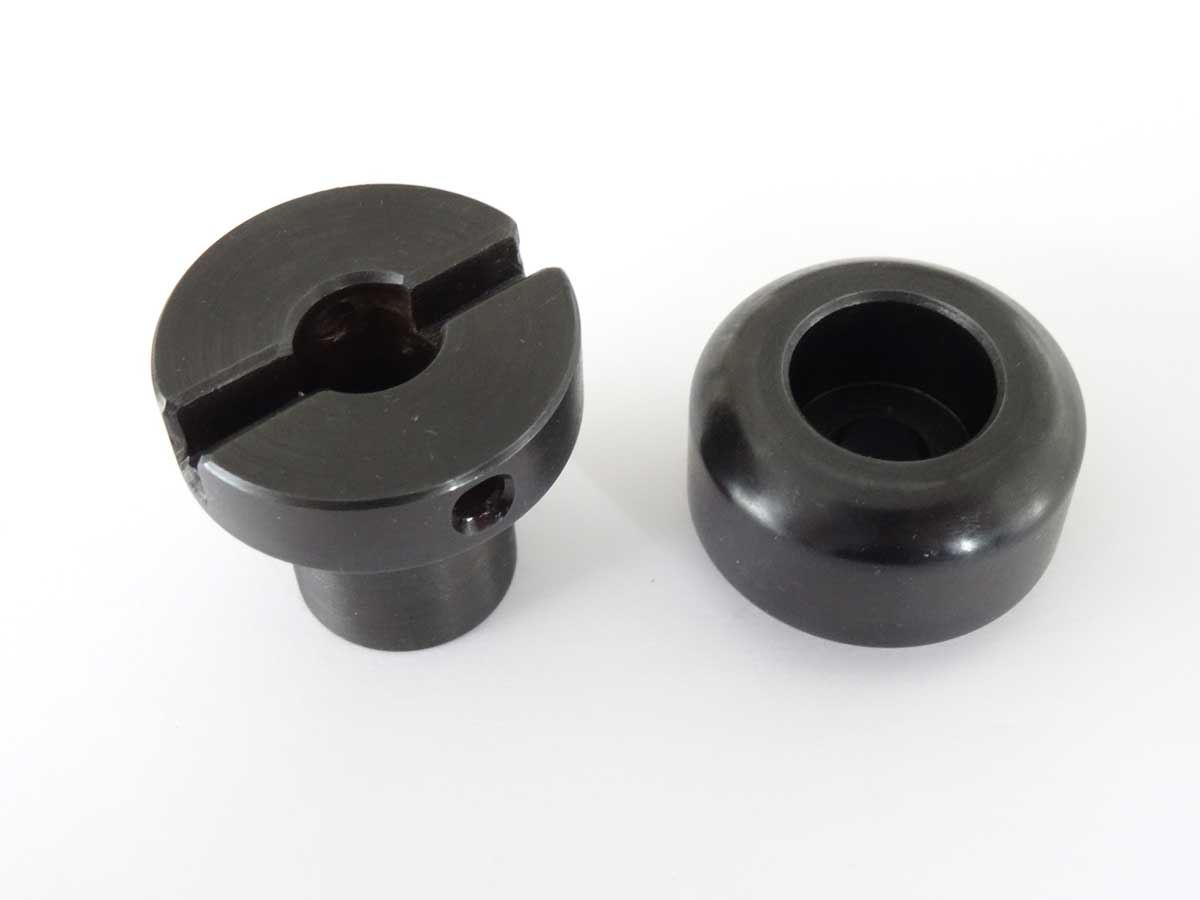
After oiling, the parts have a matt sheen and are now protected against rust.
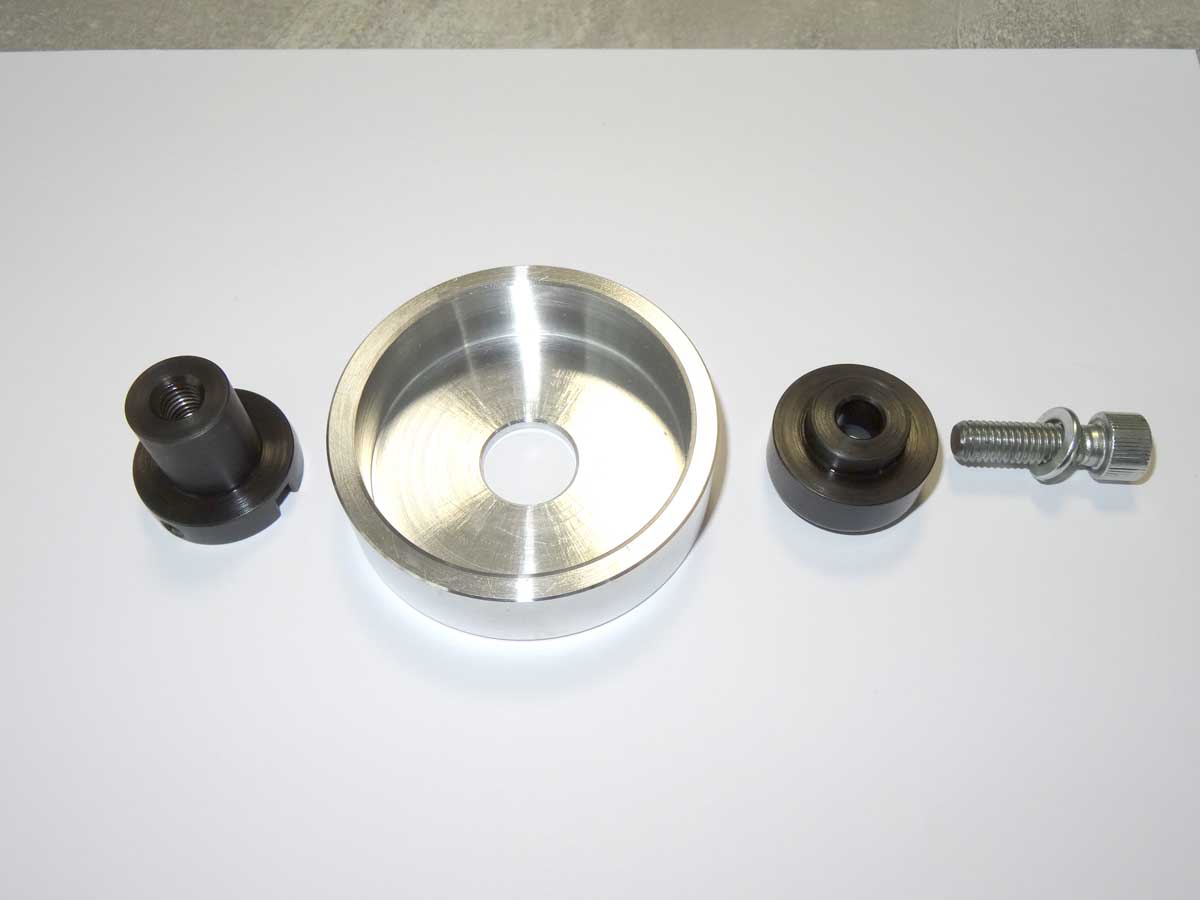
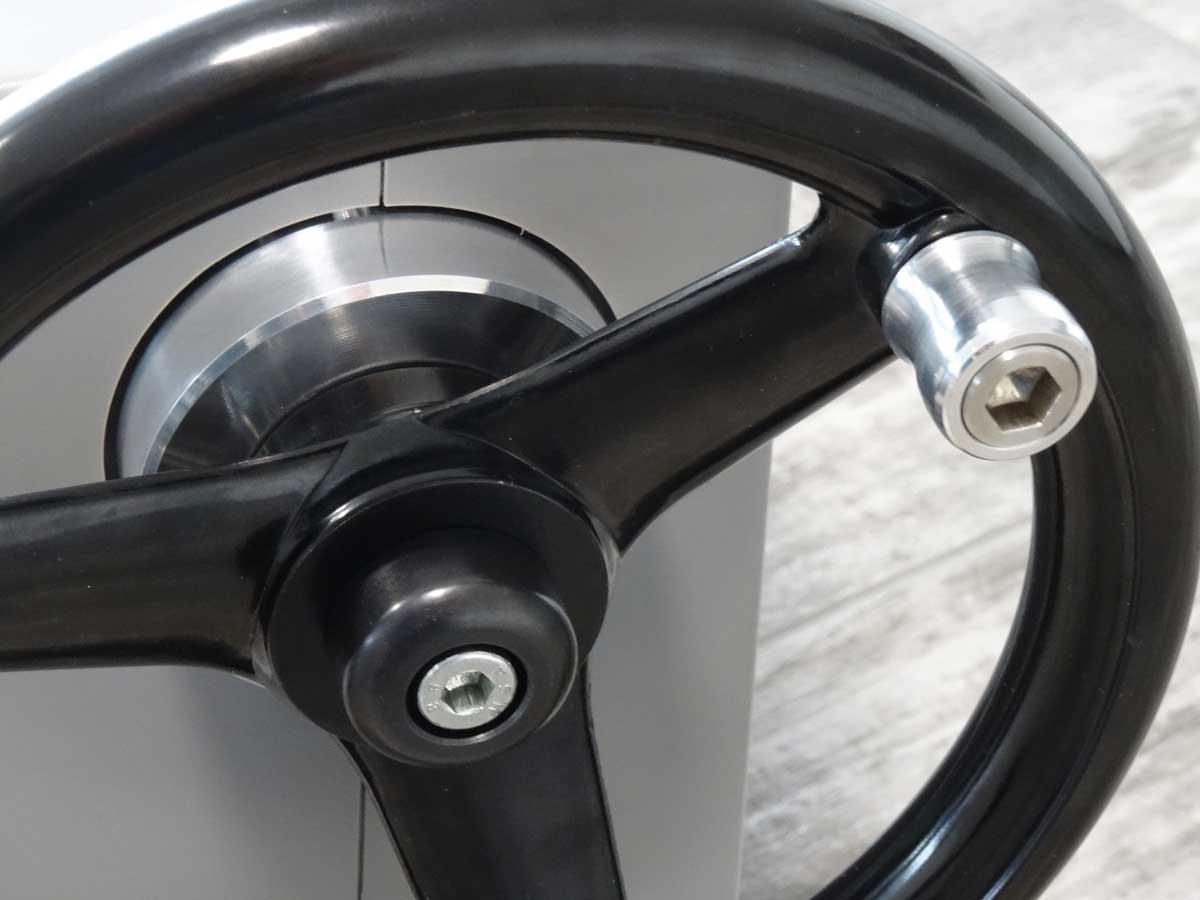
Here are a few pictures where you can see the assembly process. The aluminum cover and the handwheel are clamped by the Allen screw.
First the adapter is mounted, which is firmly connected to the shaft.
I have provided a groove to prevent twisting and there are also 2 grub screws to hold the whole thing on the shaft.

Now it cannot fall off anymore.
Now comes the aluminum cover, which is simply slid over it.
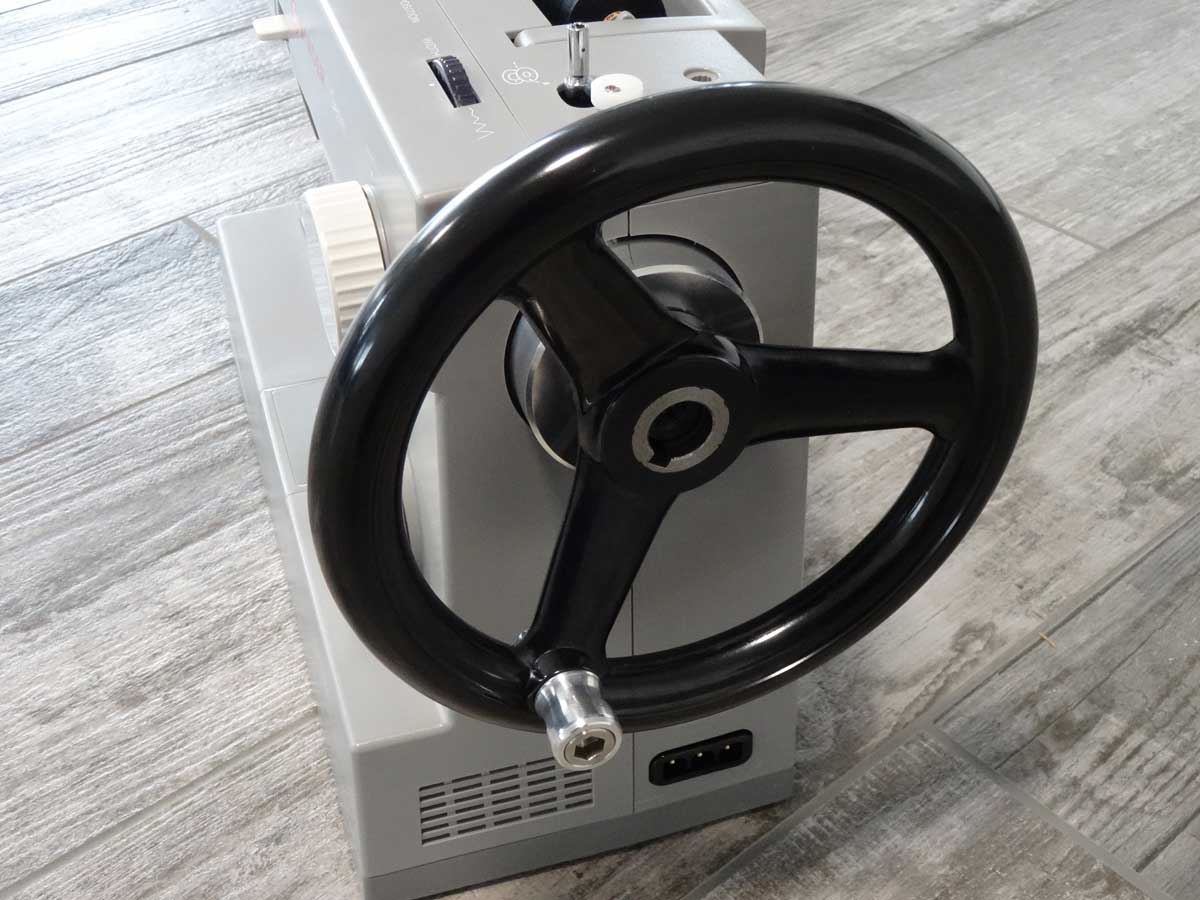
The next part is the handwheel.

Finally the end cap and the Allen screw fixes the wheel and aluminum cover in the desired position.
What is the best position for my crank handle? I have found in tests that I can work best when the handle is in the 12 o'clock position and the thread take-up is also at top dead center. In this case, the needle is driven through the fabric during the downward movement, which requires the least amount of force.
I also always know that I can cut the thread in the 12 o'clock position and not run the risk of the thread being pulled out of the needle eye as I continue sewing.
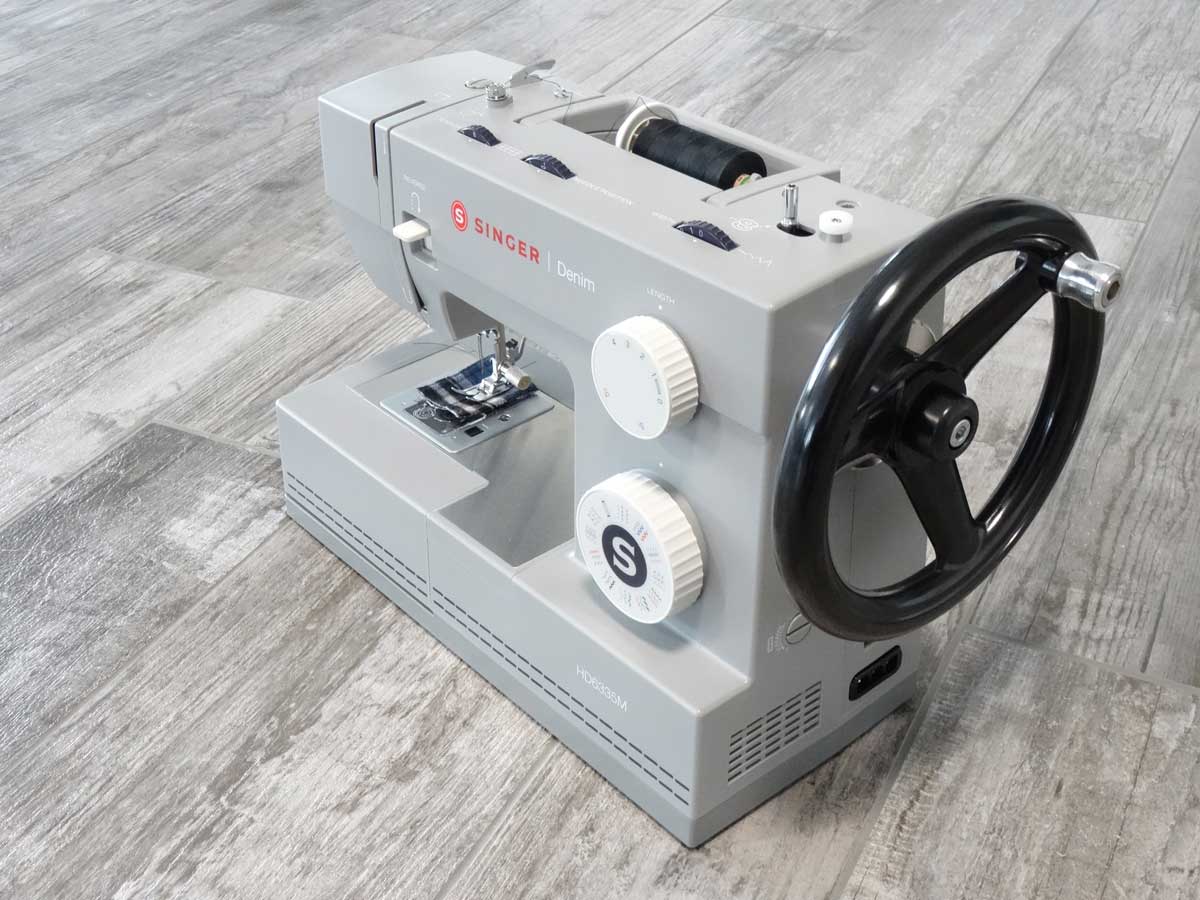
Could almost have come from the factory.
A first step of my planned modifications is done, what comes next are rolling feet which I will modify heavily to fit my tight space.
Copyright © 2001-2024 Markus Maurer - all rights reserved
 Creation Date: 22.03.2024
![]()
![]()
![]()
