| Ford Model A |
Ford Model A Pickup Restoration - Restoration Scintilla Winker (October 2014)
This month I will tell you something about the trafficators which I am using.
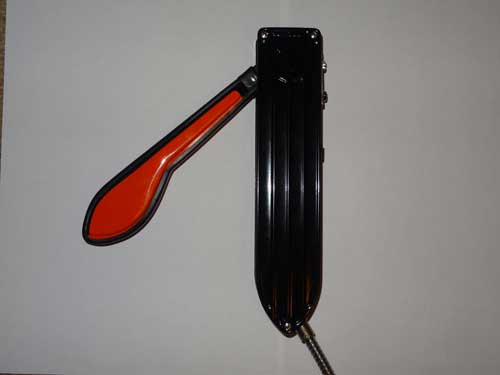
It is a Scintilla trafficator and this one is already restored.
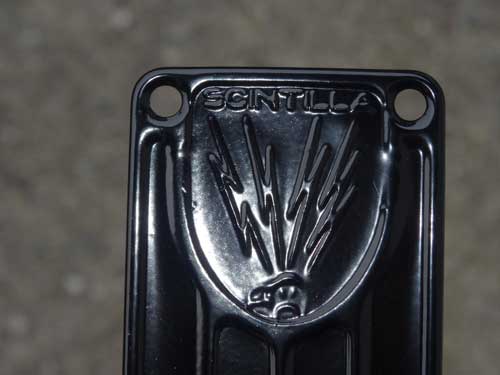
Scintilla is a Swiss company which has also made magnetos for the ignition. That was in the 30's and therefore you see some high voltage flashes in their company logo.
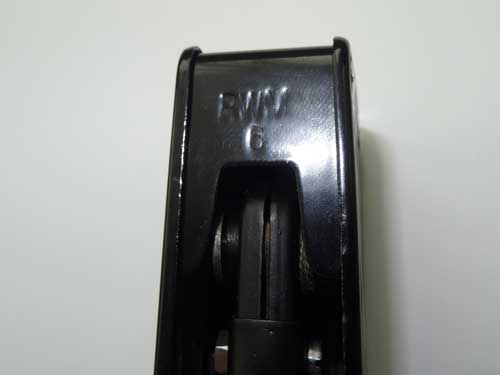
Scintilla trafficators are available in different versions and the difference can hardly be seen from outside. The main criteria when you are searching one on a swap meet is the voltage of your car, because there are 6V and 12V types. This is always stamped on the outside of the housing. In my case it is a 6 for 6V. There are also different versions with bolted or riveted trafficator arms (the screwed one is easier to restore). There is another difference in the way how the current comes to the bulb. In my case it is a thin cable. There are also versions where it is done by a sliding contact, it will make contact as soon as the arm of the trafficator comes out of the housing.
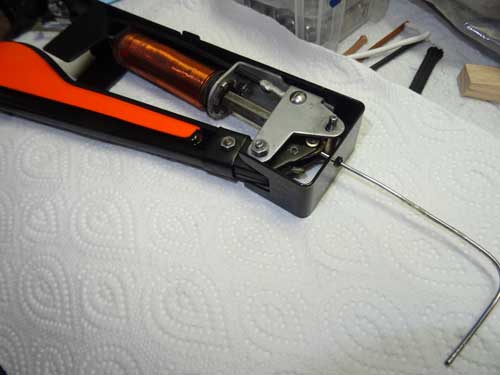
Unfortunately, there are always some idiots who try to pull out the arm with some force. But this procedure will damaged the lock mechanism for sure and bend the aluminum frame of the arm. My version had this damage too which takes you a lot of time to repair it. Guess for what the tiny hole on top of the trafficator is? Yes, it is for releasing the lock mechanism so the arm will come out by his own weight, without any force. The best tool for that is a 1 mm piece of wire.
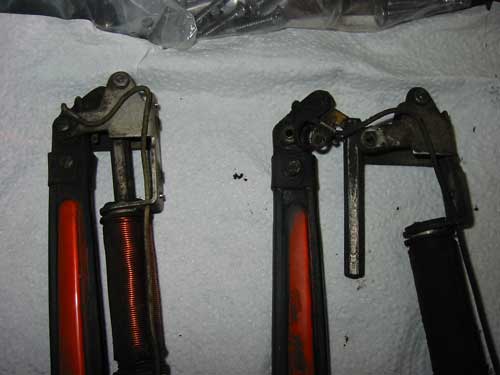
But now let's start with the restoration. Everything was quite dirty and the copper coil could not be seen anymore. I have removed all 4 rivets which connected the hosing with the whole trafficator.
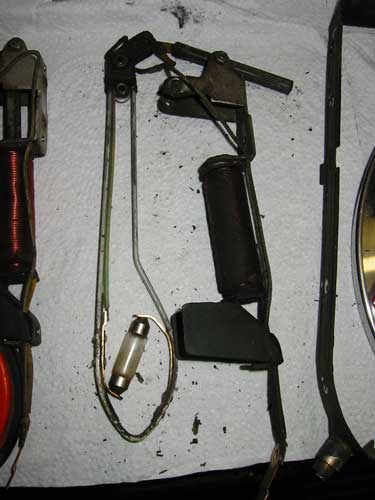
The aluminum arm was bent and the rest had to be cleaned.
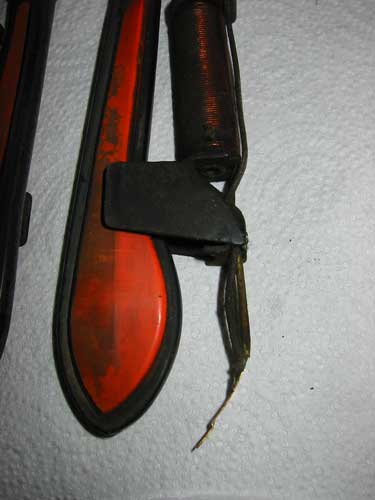
The orange plastic covers of the trafficator arms which are in a transparent orange have to be replaced normally since they are badly worn.
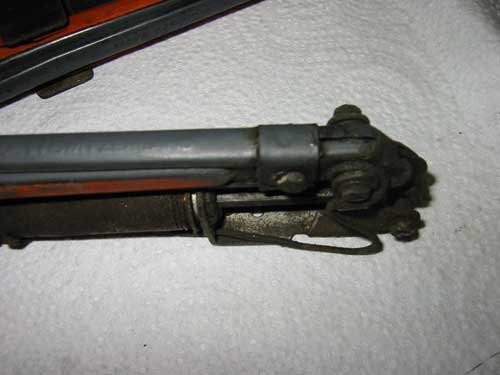
The frame of the trafficator arm was (over-)painted in a gray color, which I have removed and then painted in a matte black. Now the words 'Made in Switzerland' can be read again.
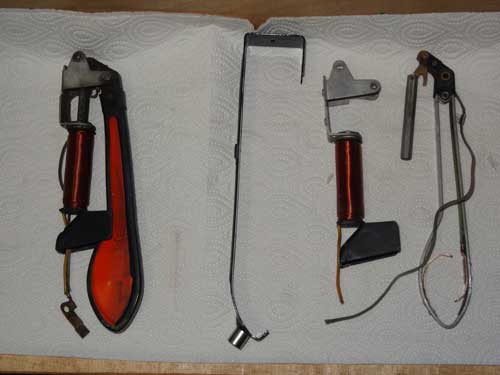
After a first cleaning, it looks a little bit better.
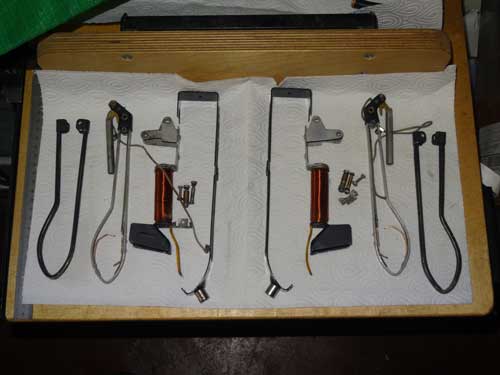
All dents are removed and parts are built up so far.
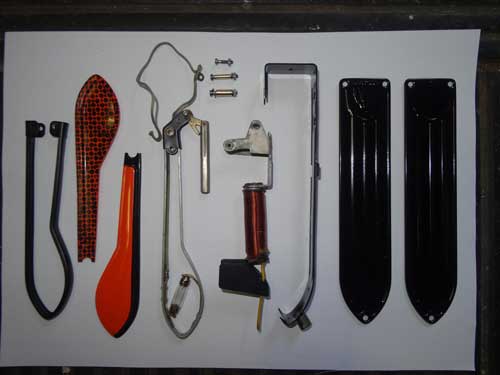
The entire housing with the side covers have been sandblasted some time ago and then powder coated.
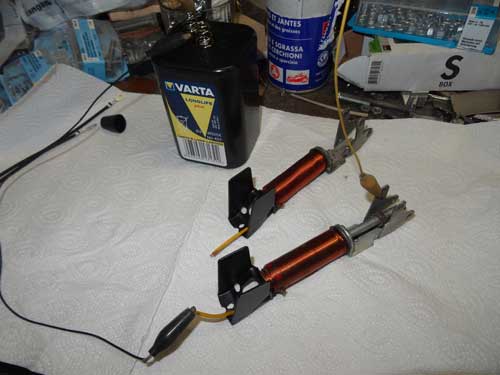
Of course I tested everything before assembling but this little battery is not strong enough to lift the arm. I had to test it with the battery of the car.
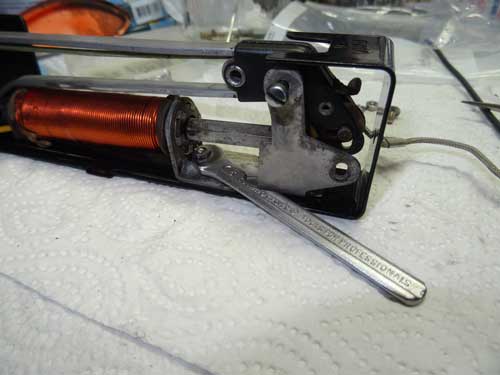
I wanted to keep the impression of rivets from outside the housing but everything should be screwed. For this reason I had to build my special tools because the free space on the inside was very tight.
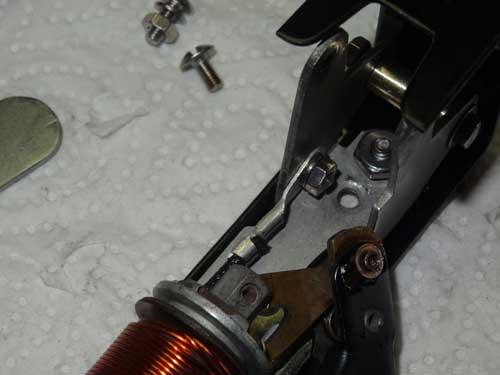
I have also attached an additional ground connection.
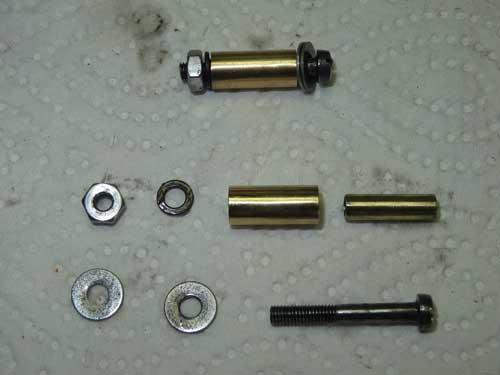
With these brass rolls you can adjust the locking mechanism of the arm.
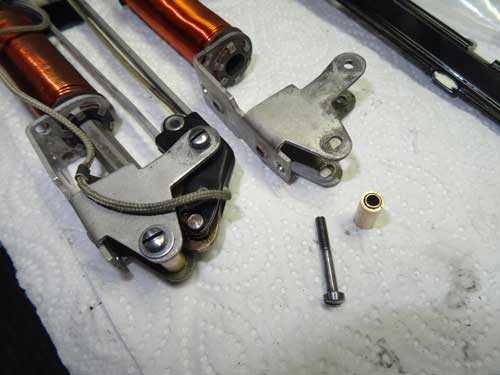
The roll is fixed between the 2 brackets …
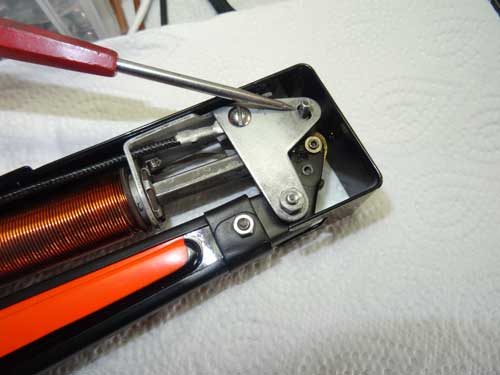
… and can be moved within the slot until the end play is as desired.
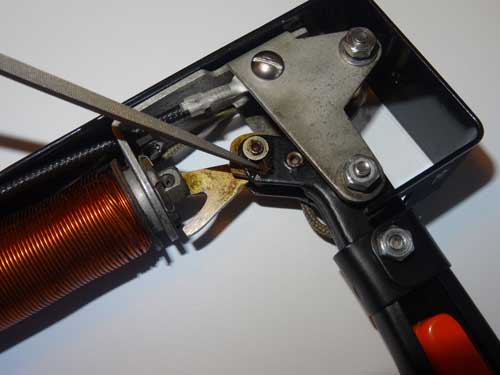
The mechanics of most trafficators is worn over the years. Mainly the marked slot is in a bad condition which has a negative influence when you try to unlock the arm. I have tried to flatten that section and scraped it with the tip of a needle file that the movement of the axle did work better. The second point is the small brass plate to the left of the marked point (covered), but you can easily flatten it with a small file.
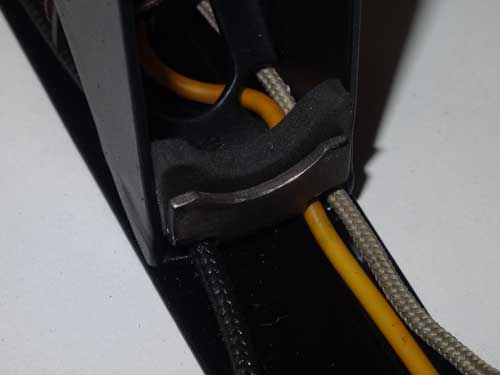
The rubber stopper is new made from a piece of rubber.
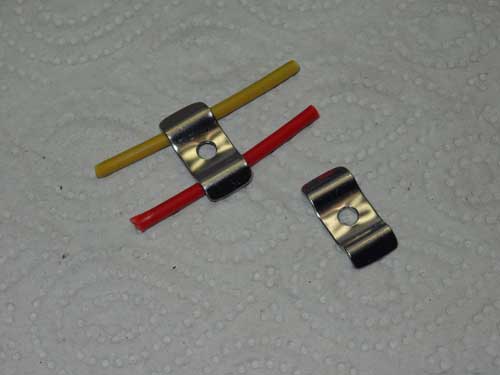
At the bottom side of the trafficator I had to fix all 3 cables and these are the self made brackets.
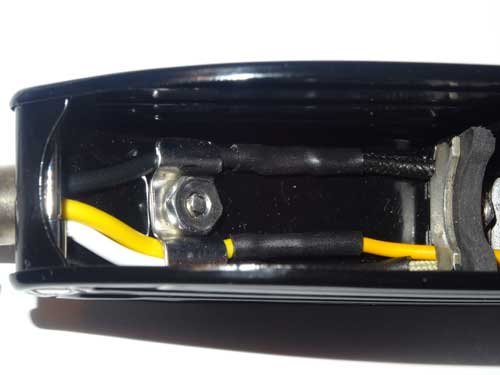
Here they are in its final position.
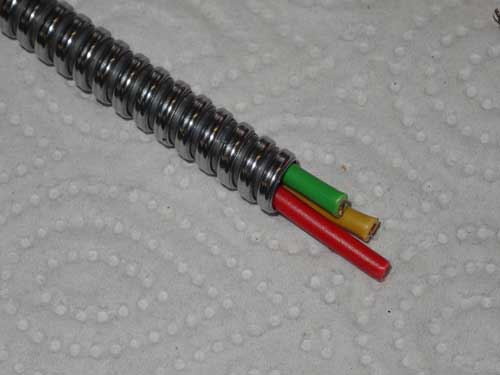
The connection between trafficator and my cabin is made by such a metal tube. My three cables just do fit into it. One cable is for ground, one for the coil and last for the bulb. An original trafficator has a coax cable type connection where ground is outside and the wire in the middle is for the coil and bulb together. Since my bulb will blink, I had to use a 3rd cable in order to separate it from the coil connection. In the 30's you had only a switch where you could activate the trafficator on the left or the right hand side but they did not blink.
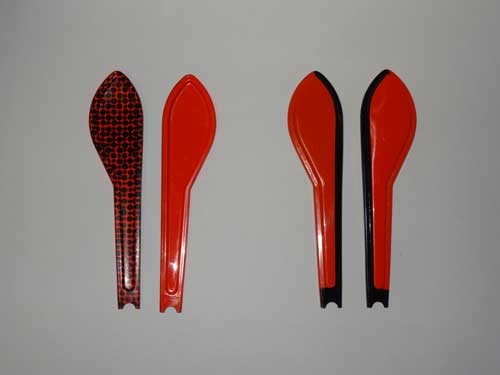
Another point which it is important when mounting the orange plastic covers is the point that they differ inside. On the right hand side you can see both covers from outside, nothing special is visible. If you turn them that you see it from inside, you see that one has lots of black dots, the other one hasn't. The cover with the dots has to be in direction of the driver (dots inside), so he is not blinded by the light when the trafficators are blinking.
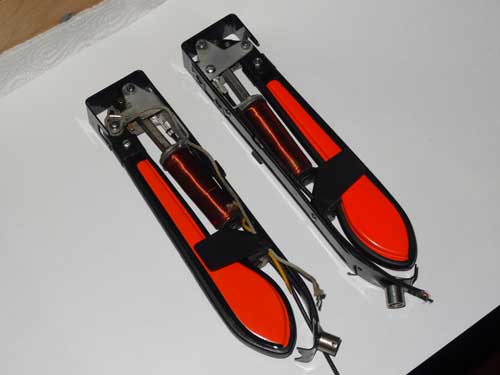
So far nearly everything is mounted.
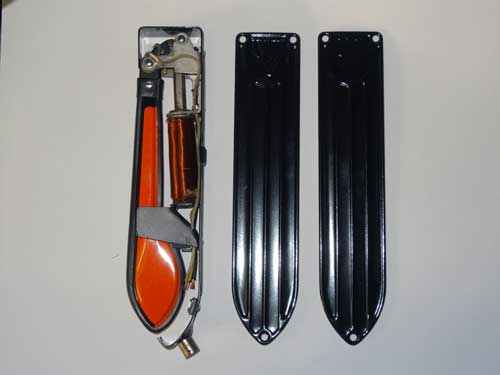
Only the side covers are missing.
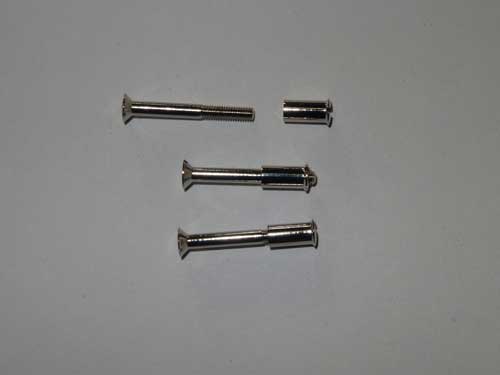
The covers are placed on both sides of the housing and then screwed together with these three screws. These are all original screws which I polished and then nickel plated in the galvanic shop.
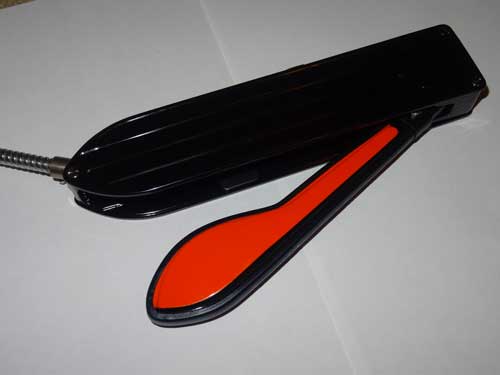
The first trafficator is ready and is looking as brand new.
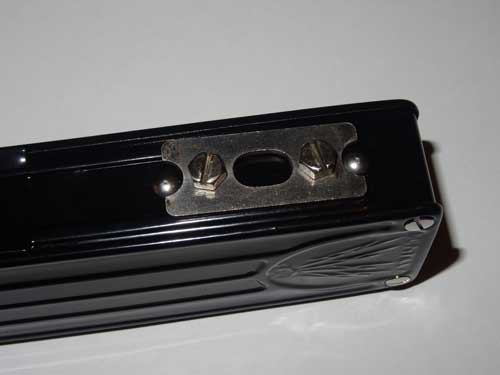
On the back side of the housing I'm using such small steel plates (original).
They are used to get a higher mounting surface that the rivet heads are
out of the way.
That's all folks for this month, now the trafficators will be mounted on the car.


