
/ford_a/2024_11_a_eigenbau_bandschleifer_beschreibung_leistungsmerkmale.en.html
![]()
![]()
I've been wanting to build a 2x72" belt grinder for a long time and have watched a lot of videos on YouTube. My plan was to take the best from all the home-made models and then build my own version. While searching, I came across the 2x72" Tilting Belt Grinder (Gen 2 Design) by Jer Schmidt. Jer has already published a first version, incorporated all the feedback and built the "Generation 2 Design". After studying his videos, it was clear to me - I couldn't make a better version than the one Jer built. When it comes to the feature of tilting by 90 degrees without turning the table, 95% of other Youtube models fail. The whole construction is really well thought out and Jer has also thought of many small details that I miss in other self-built models. It is also very robust and indestructible. His plans / building instructions are based on standard steel profiles, which only need to be cut to size and welded together. As a great service, he also provided metric plans, which made the construction much easier for me :-) I won't go into too much detail in my report on the construction of the belt grinder, as Jer has made some great PDF documents and videos which I refer to (see links below). Jer's plans contain about 100 pages of 1:1 scale plans, descriptions, instructions, etc., simply everything you need for the construction. The plans can be bought on Etsy and I can only recommend them, they are absolutely worth their price.
To break the whole thing down a bit, I have divided the construction of my 2x72" / 50x2000 mm Tilting Belt Grinder into the following 6 chapters:
Chapter 1: Description and performance features of the tilting belt grinder
Chapter 2: Deviations from Jer Schmidt's plans - Using Sanding belts 2x72" AND 50x2000 mm
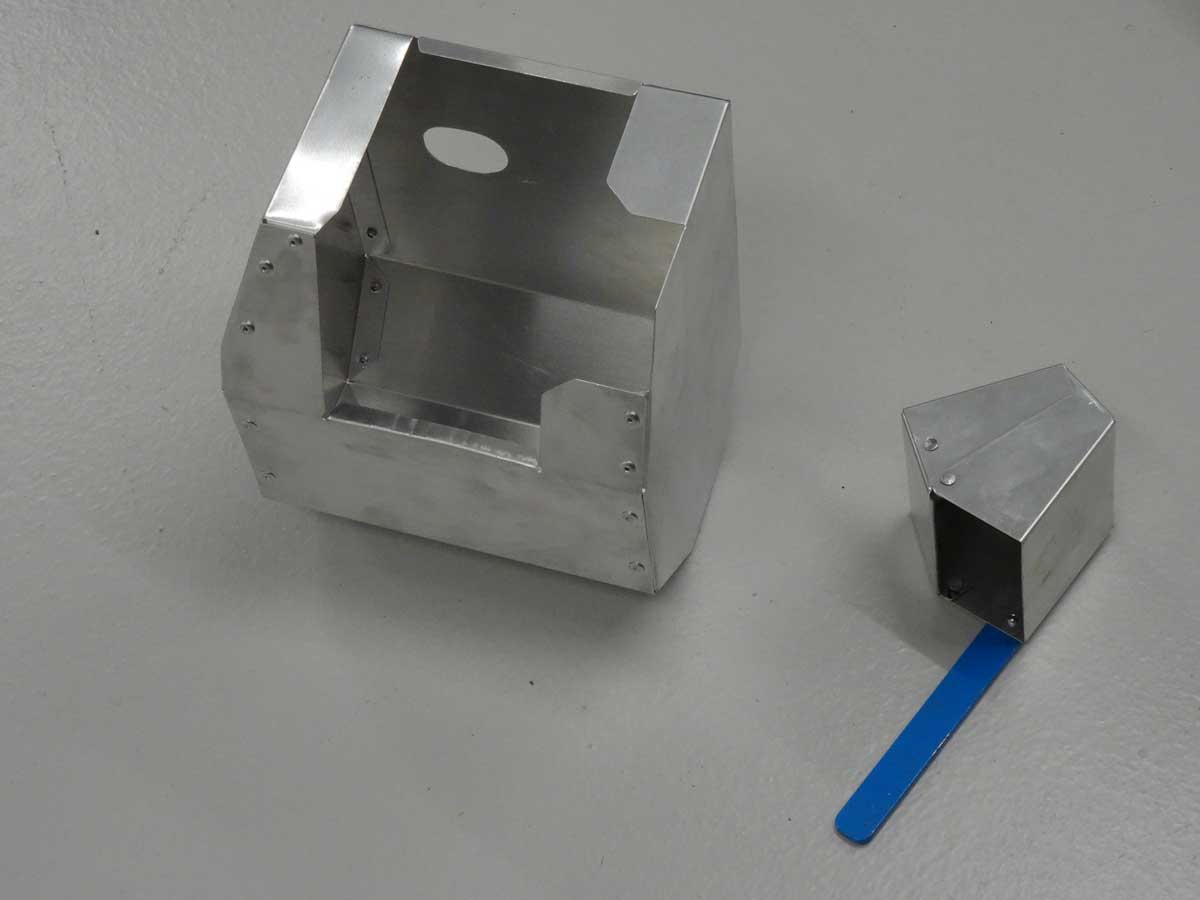
Chapter 3: Steel cutting and welding
Chapter 4: Operating panel for motor control
Chapter 5: Spark collector, Spark arrester, Dust collector
Chapter 6: Mobile table with drawers for belt grinder
Additional links:
Jer's Homepage: https://jerswoodshop.com
Jer's Videos:
Gen 2 Tilting Belt Grinder (Metric plans!)
Attachments for the Gen 2 belt grinder
Jer's plans:
belt grinder plans on Etsy (belt grinder and accessories in imperial/inch or metric version)
That was my introduction with the most important links and now it's time for an overview of what the 2x72" Tilting Belt Grinder can do.
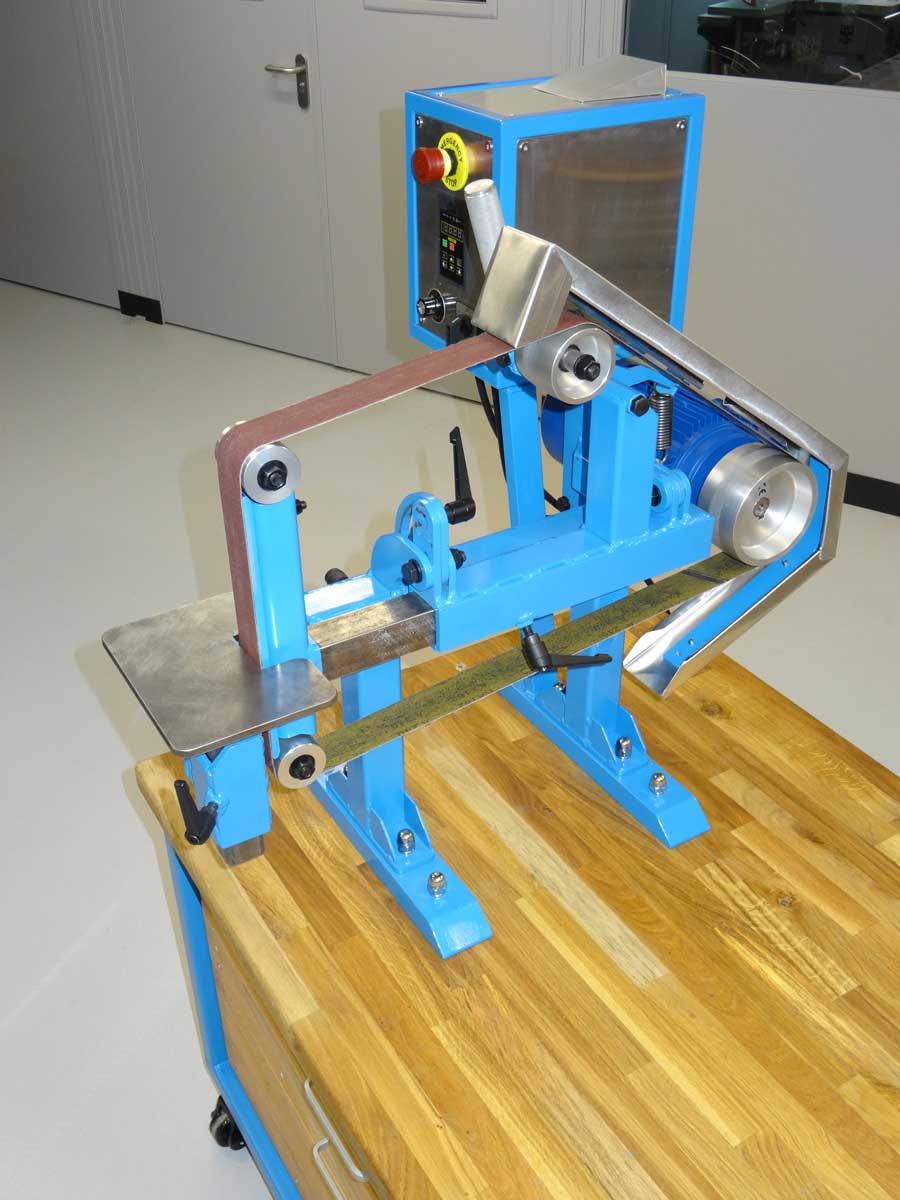
This is what the finished belt grinder looks like. I have mounted it on a mobile table, which I also built myself. All you really need to build it is a welder, band saw, drill and a file. In my opinion, the band saw is absolutely necessary, as a lot of thick steel has to be cut to size and I wouldn't have wanted to do it with a handsaw …
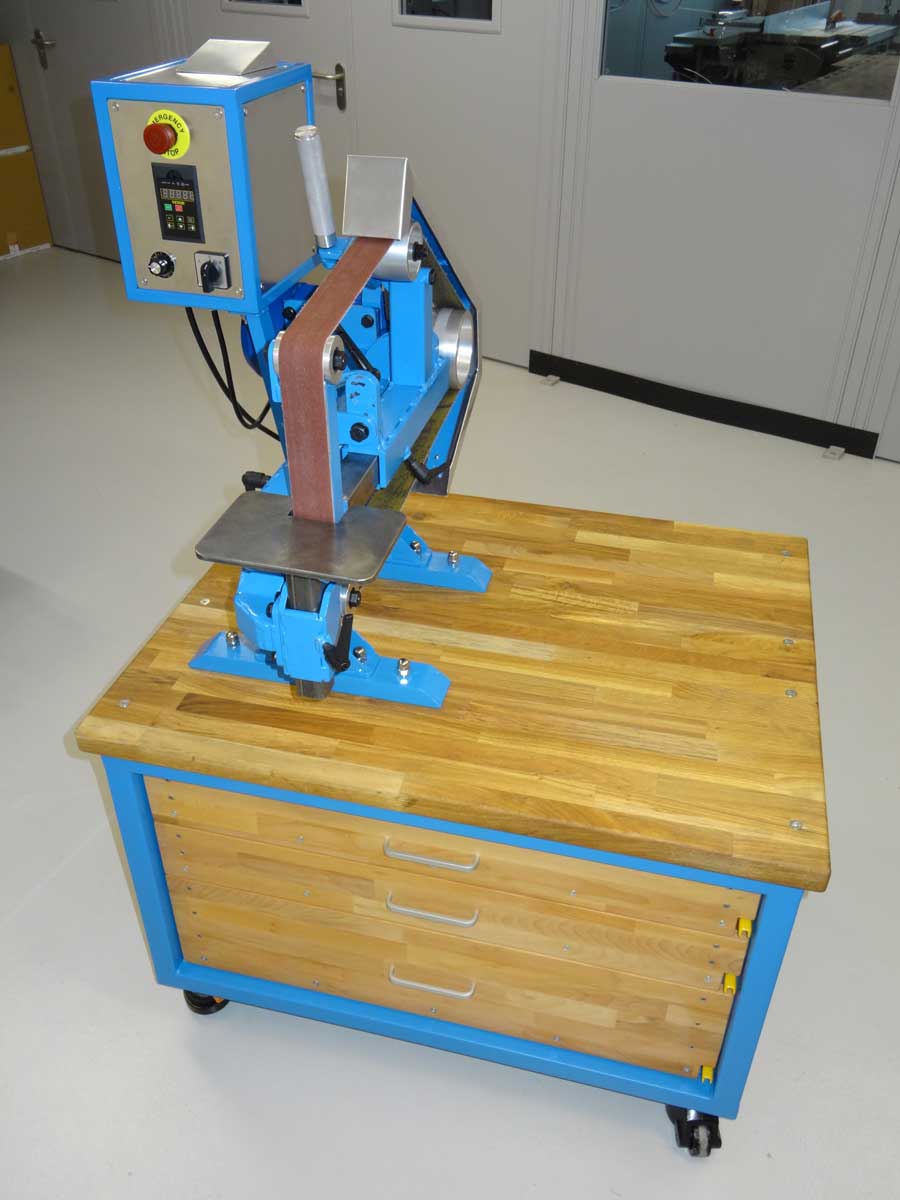
The table on which the 2x72" self-made belt grinder is mounted has 3 drawers in which I can store all grinder accessories such as rollers, tables and sanding belts.
The belt grinder and its accessories weigh 100 kg (motor and a lot of steel …), the table weighs 130 kg - makes in total 230 kg.
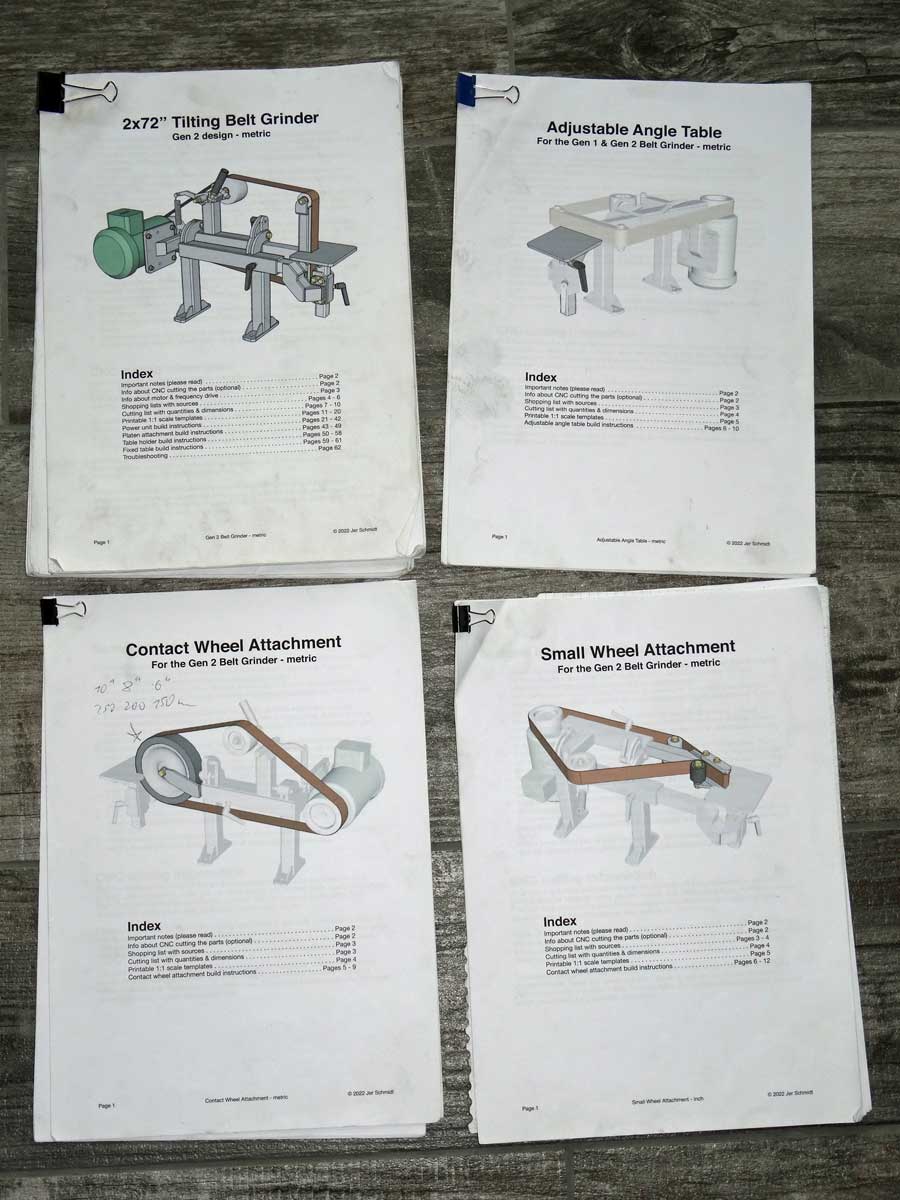
I bought the plans for building the belt grinder from Jer Schmidt. He offers them in 2 packages (basic belt grinder and the accessories) via Etsy and the price is absolutely fair. The links can be found at the top of this page. I have rarely found such professional plans on the internet (so far these are the best ones!). In addition to the plans for the components, there are detailed instructions and tips on how to achieve good results when welding (no distortion, etc.). Also included is a shopping list (parts list) for the steel profiles, screws, rollers, etc. I purchased most of my parts (wheels, nuts and bolts) from Aliexpress and was able to easily find the equivalent product based on its parts list with details of where to buy it.
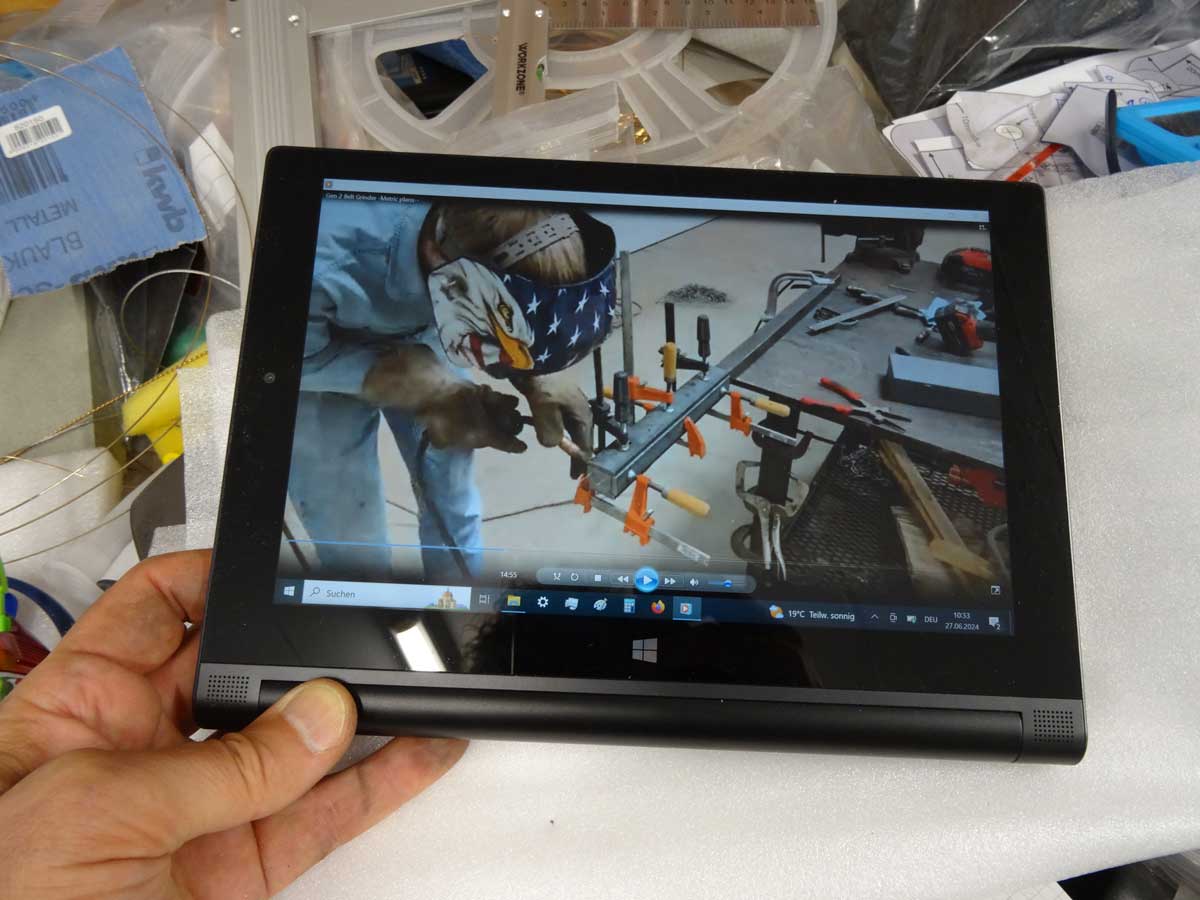
To see more details on the build and features of the "Gen 2 Design 72" Tilting Belt Grinder", I highly recommend watching his 2 videos that I linked to at the beginning of the page. I also used this video on my tablet several times during the build phase. It's actually all in his plans too, but in many cases it's captured even more clearly in the video.

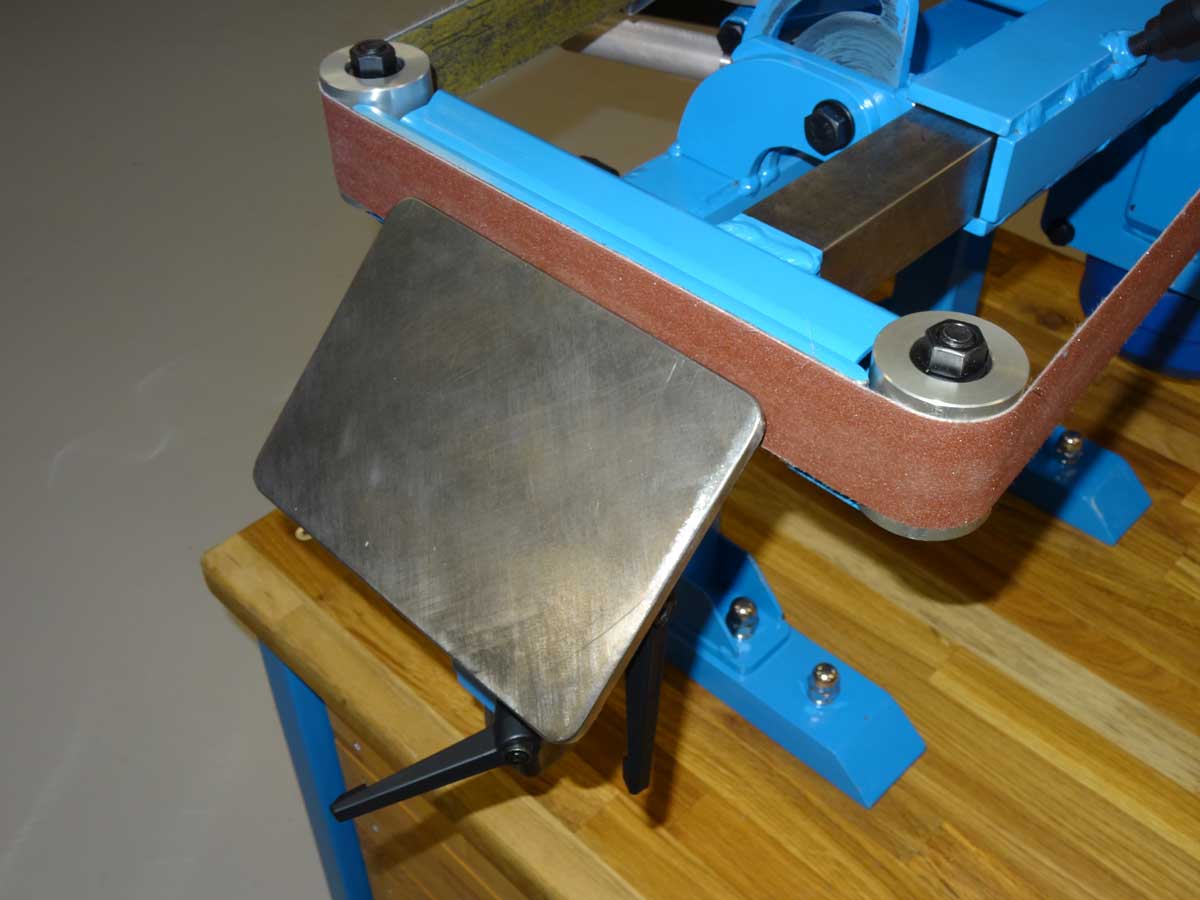
In addition to the belt grinder, I also built all the 'official' accessories and 2 additional tables. At the front left of the picture are the 2 tables from Jer. This is the basic table with the recess on the one hand and the table with the infinitely variable inclination of up to 45 degrees on the right. The other 2 tables are my personal versions with different table shapes. In the back row is a very wide table that provides a large support surface when the belt grinder is aligned horizontally. On the far right is a table with M8 threads. I want to mount flexible fences and tools on this table. First of all, this will be a tool for sharpening drills.
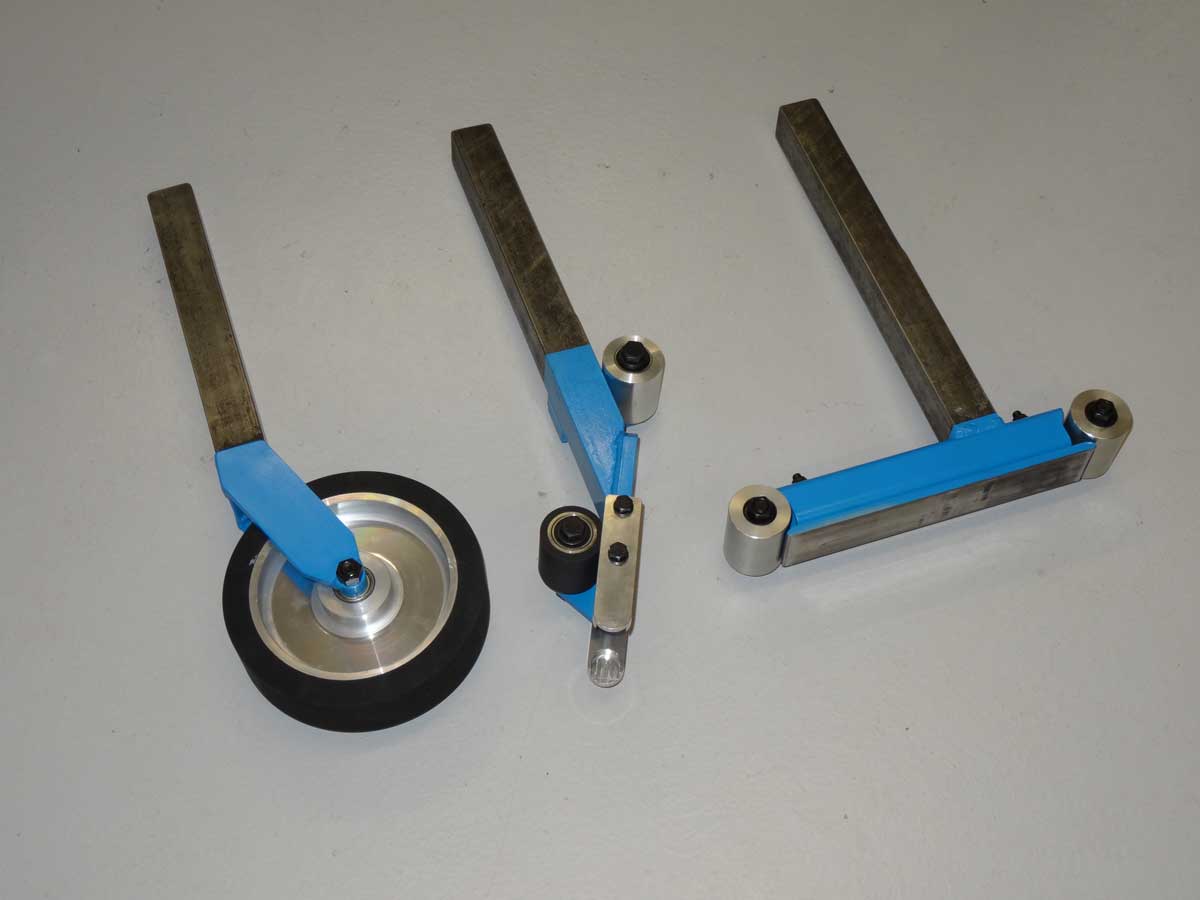
These are the 3 castor attachments. On the far right is the basic version with double castor and a support plate in between. On the left a large wheel with a rubber surface, where the wheel is also interchangeable. I currently only have one wheel size. In the middle is a slightly more complex version where I can insert rollers with diameters from 13 mm to 25 mm at the tip. The part is ideal for grinding pipe transitions to fit before I weld them.
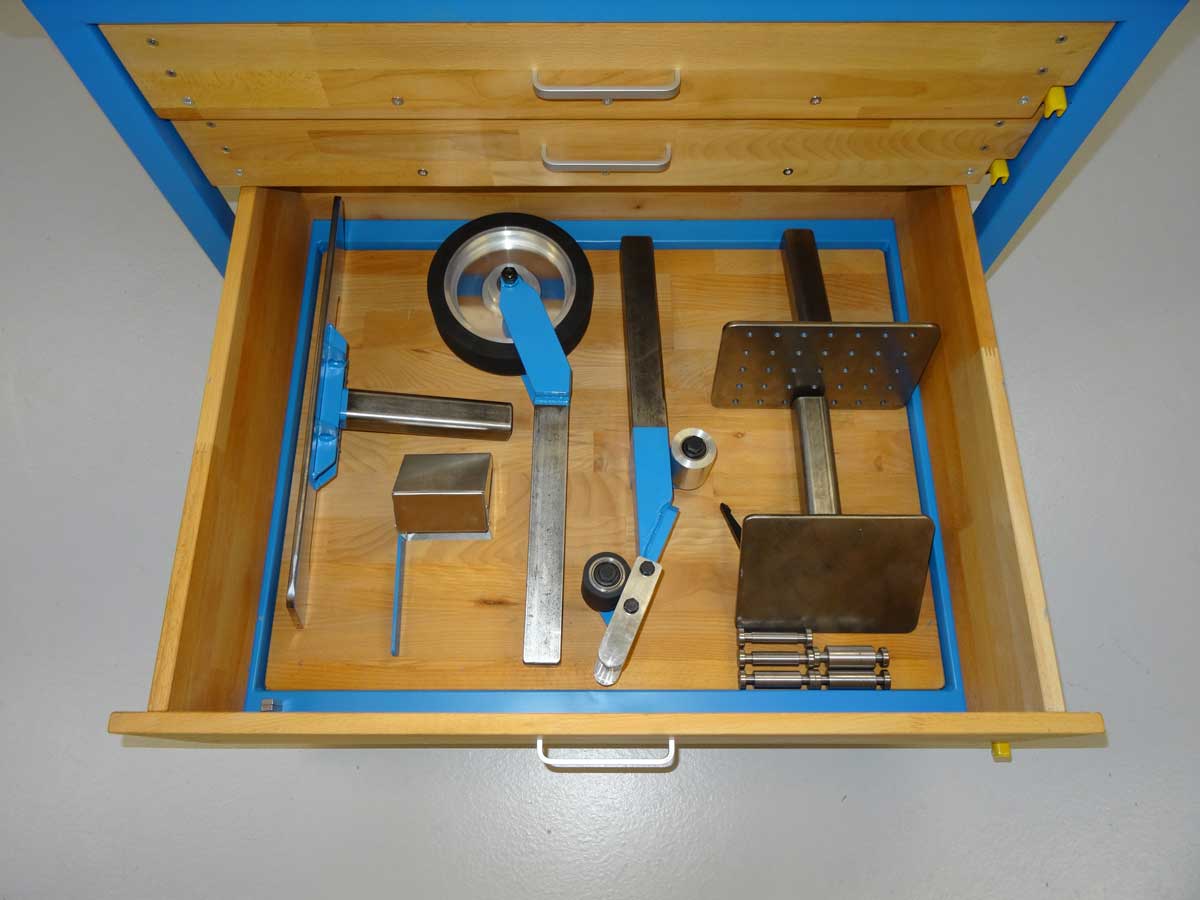
I have enough space for all the accessories in my bottom drawer.
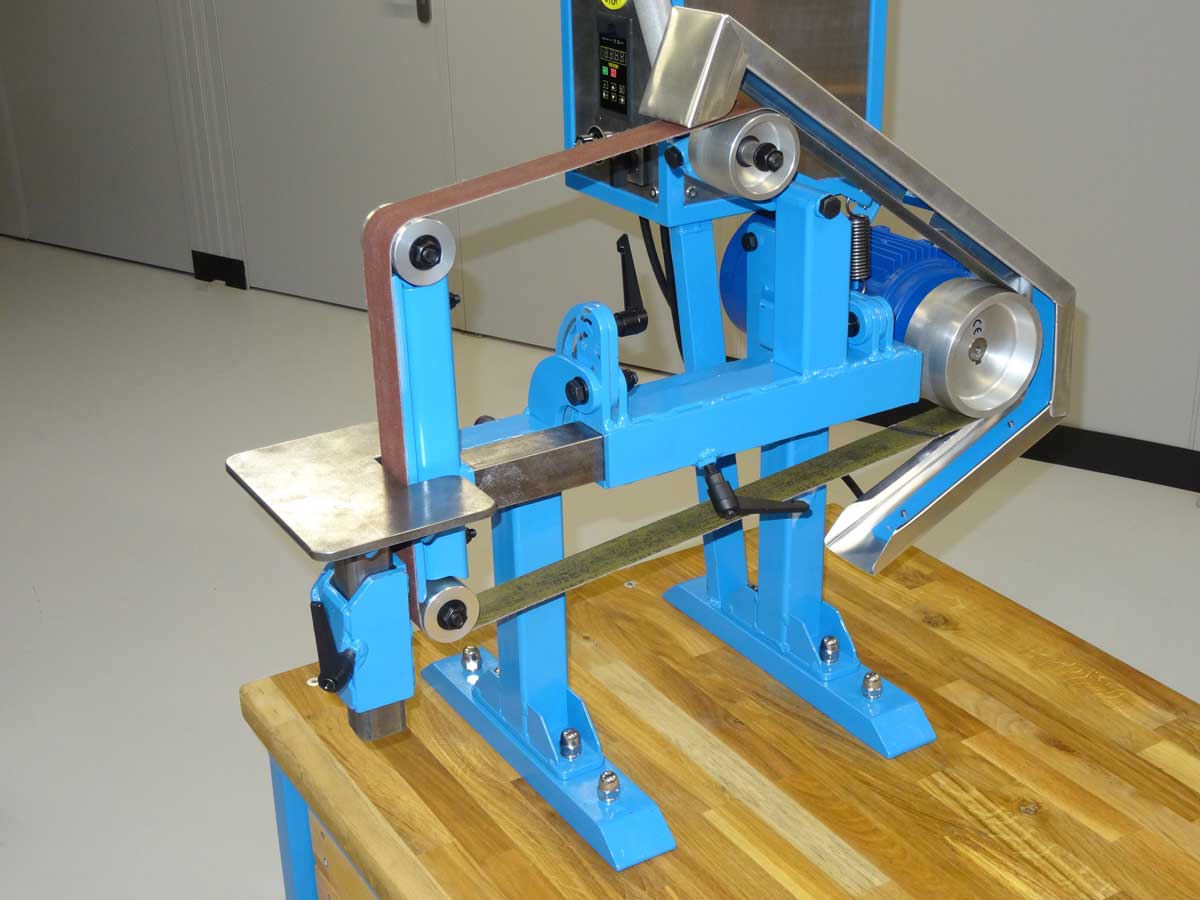
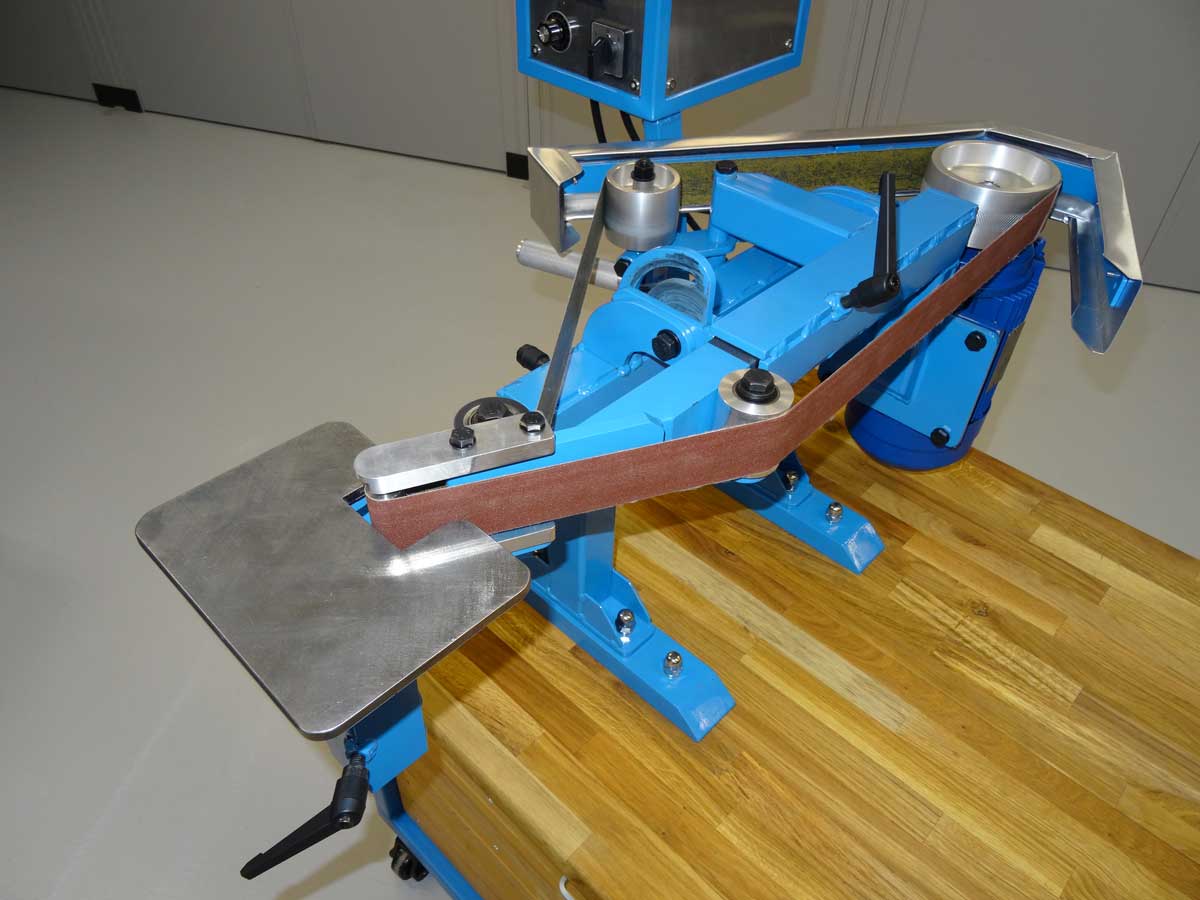
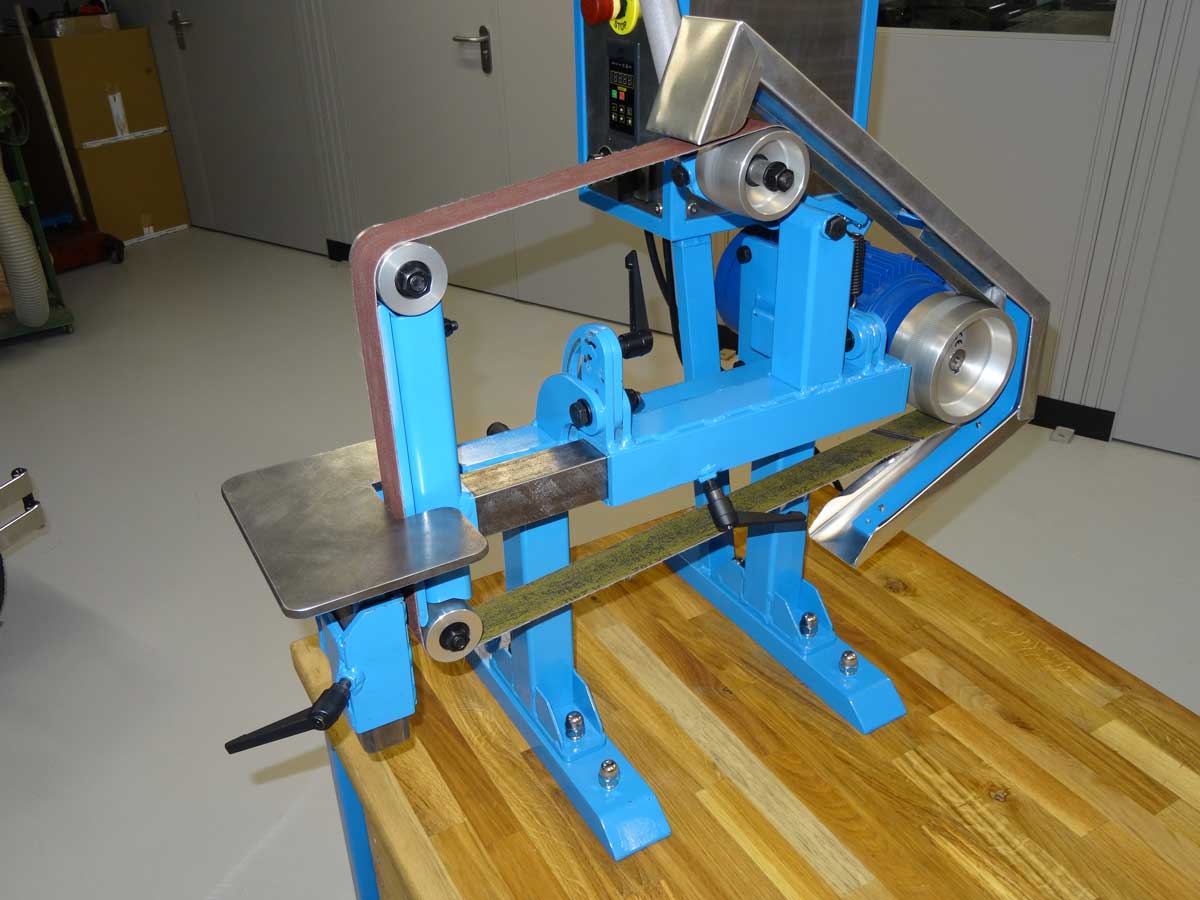
The belt grinder can be operated in the vertical position as shown in the picture.
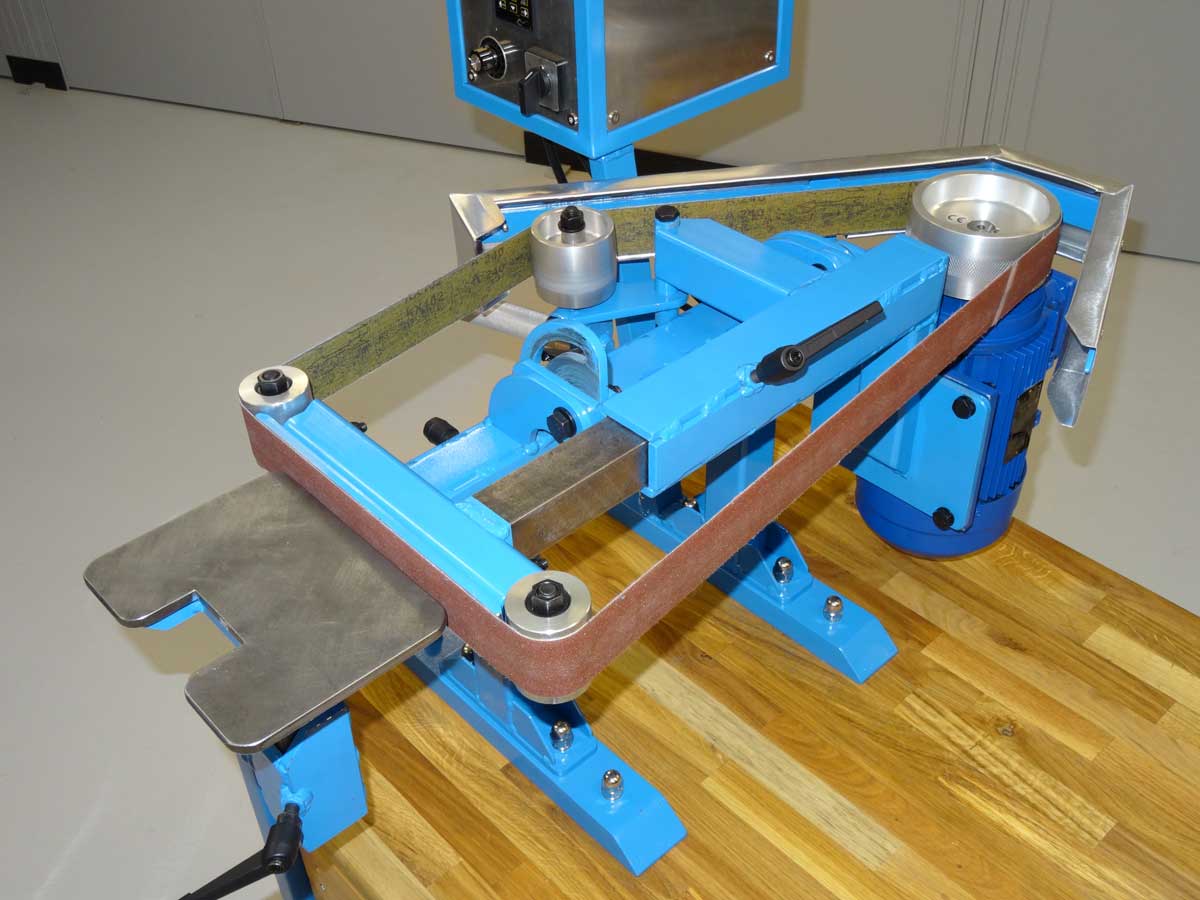
If you want to operate the belt grinder horizontally, you loosen a safety lever, turn the belt 90 degrees and tighten the screw again. The special thing about Jer's design is that the table remains in place and does not rotate as with many other designs. I find this design easier to use and also more stable.
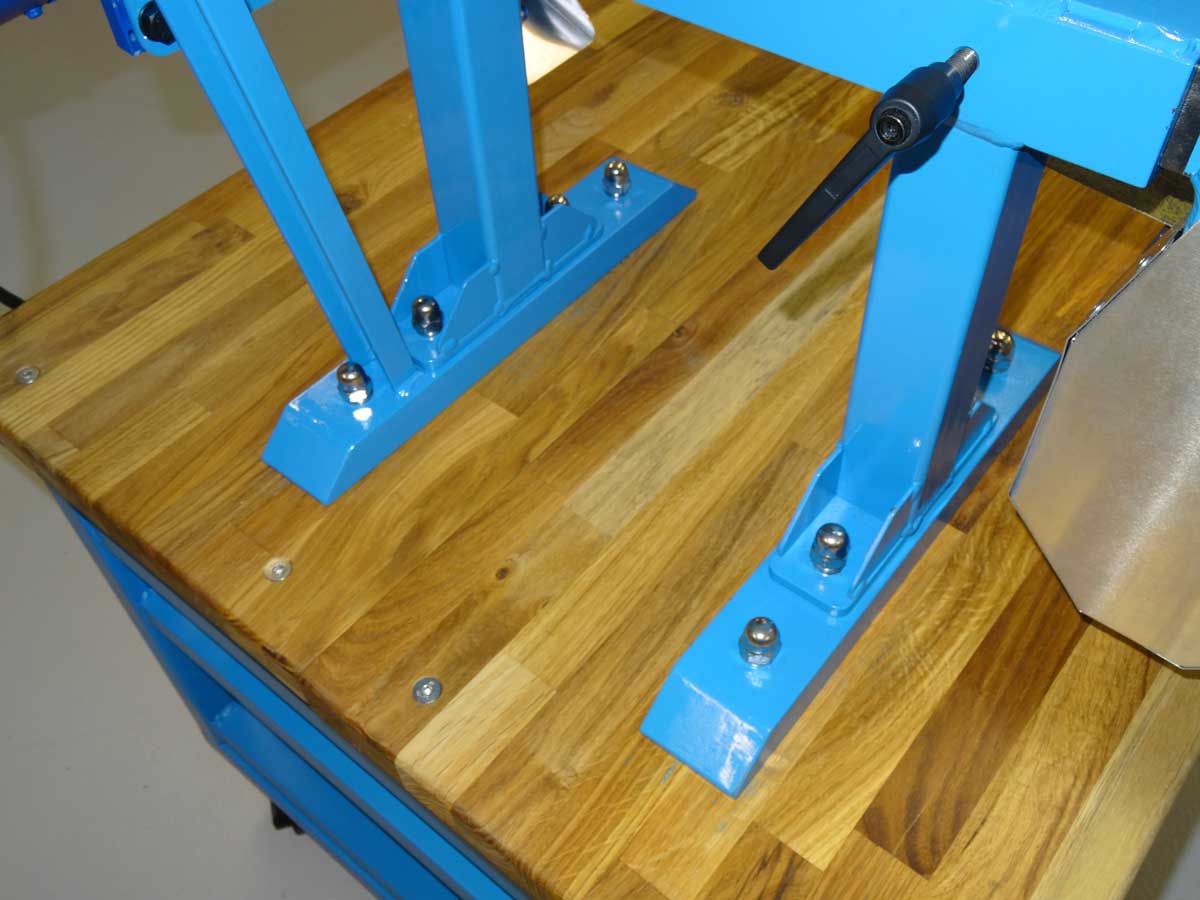
I have fitted my belt grinder with wider feet. This means it is very stable on the table even without being screwed to the table.

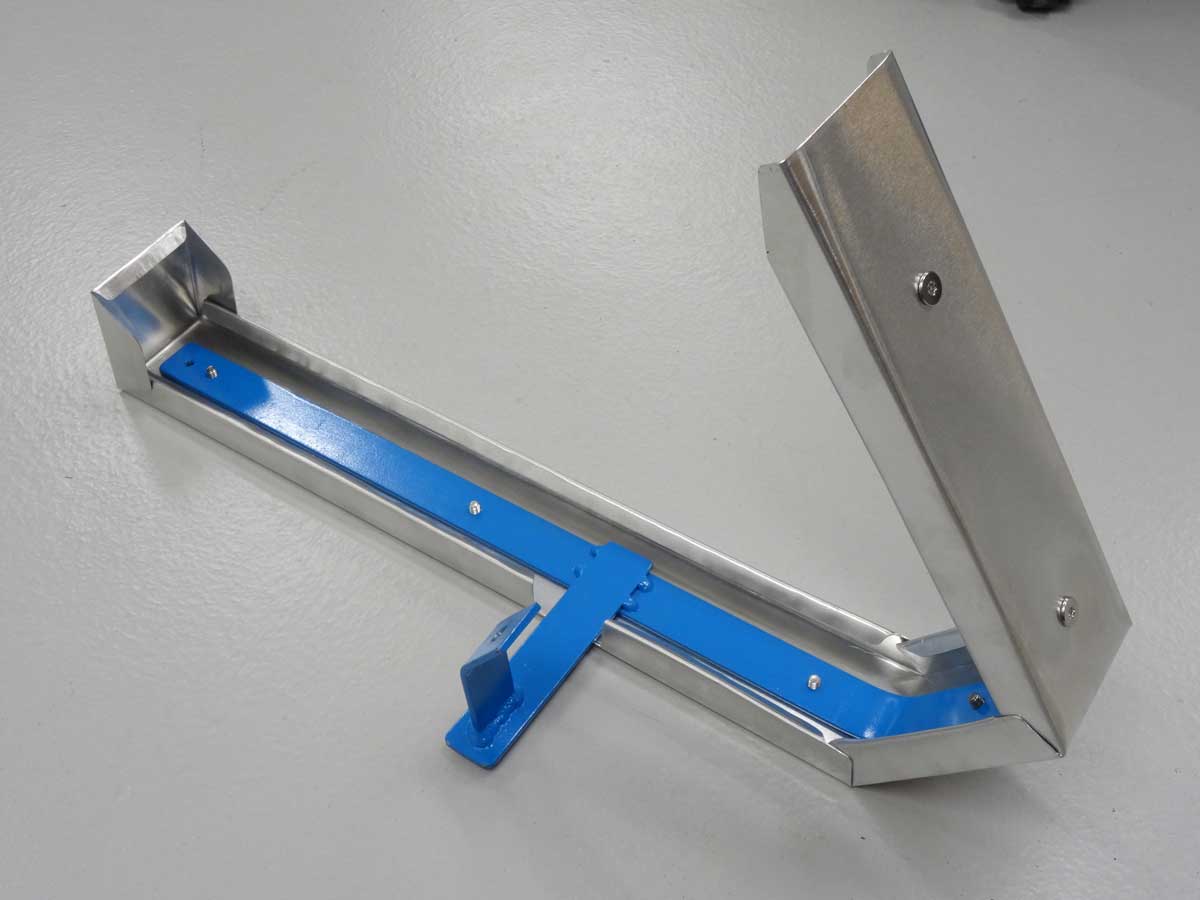
This handle is used to adjust the belt tracking and tension the belt.
This table can be infinitely adjusted from horizontal to 45 degrees. A digital protractor with magnetic base is best suited for setting the desired inclination.
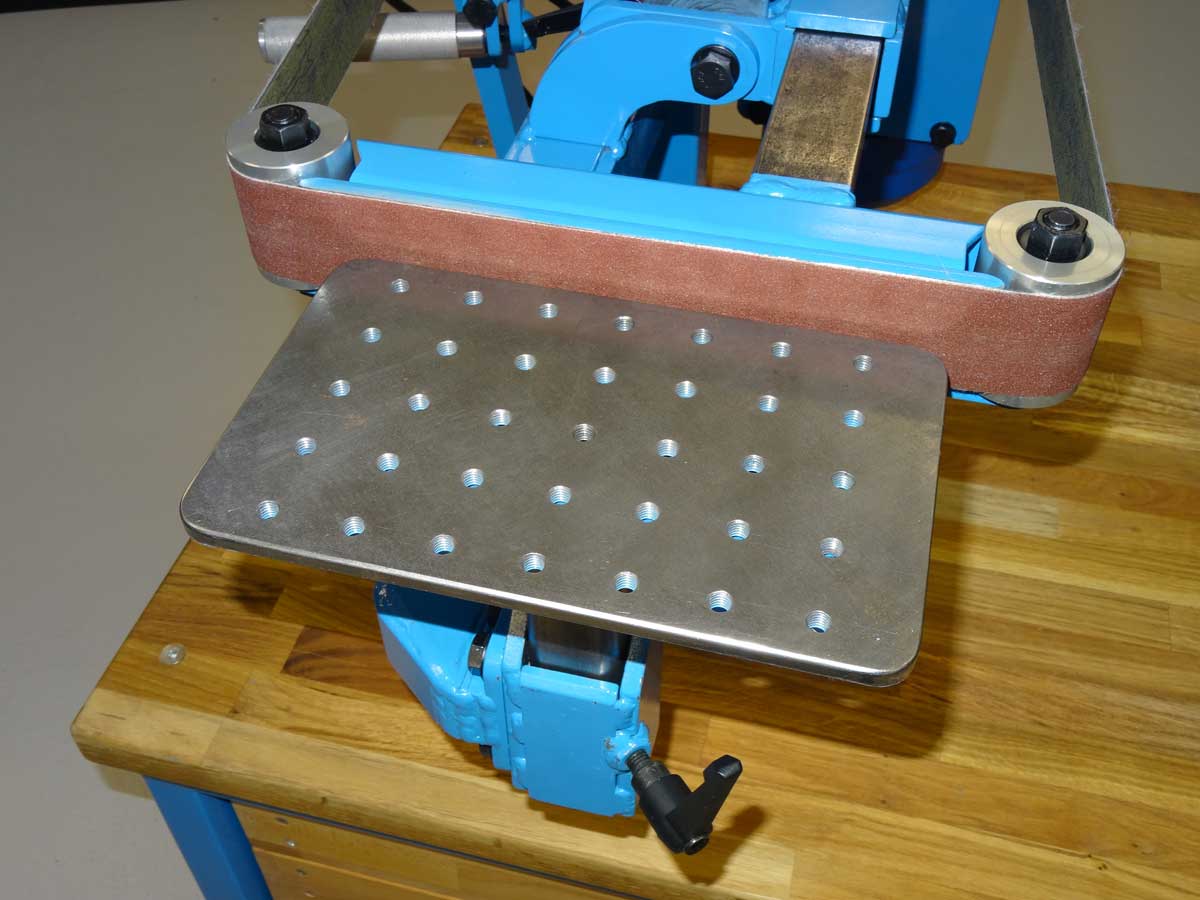
This table has 35 threaded holes (M8). The distance between the holes is 30 mm. I chose this distance so that no ribs or the square tube would get in the way on the underside. For this reason, I first drilled all the holes and cut the threads and then aligned everything neatly with the ribs and welded them together.
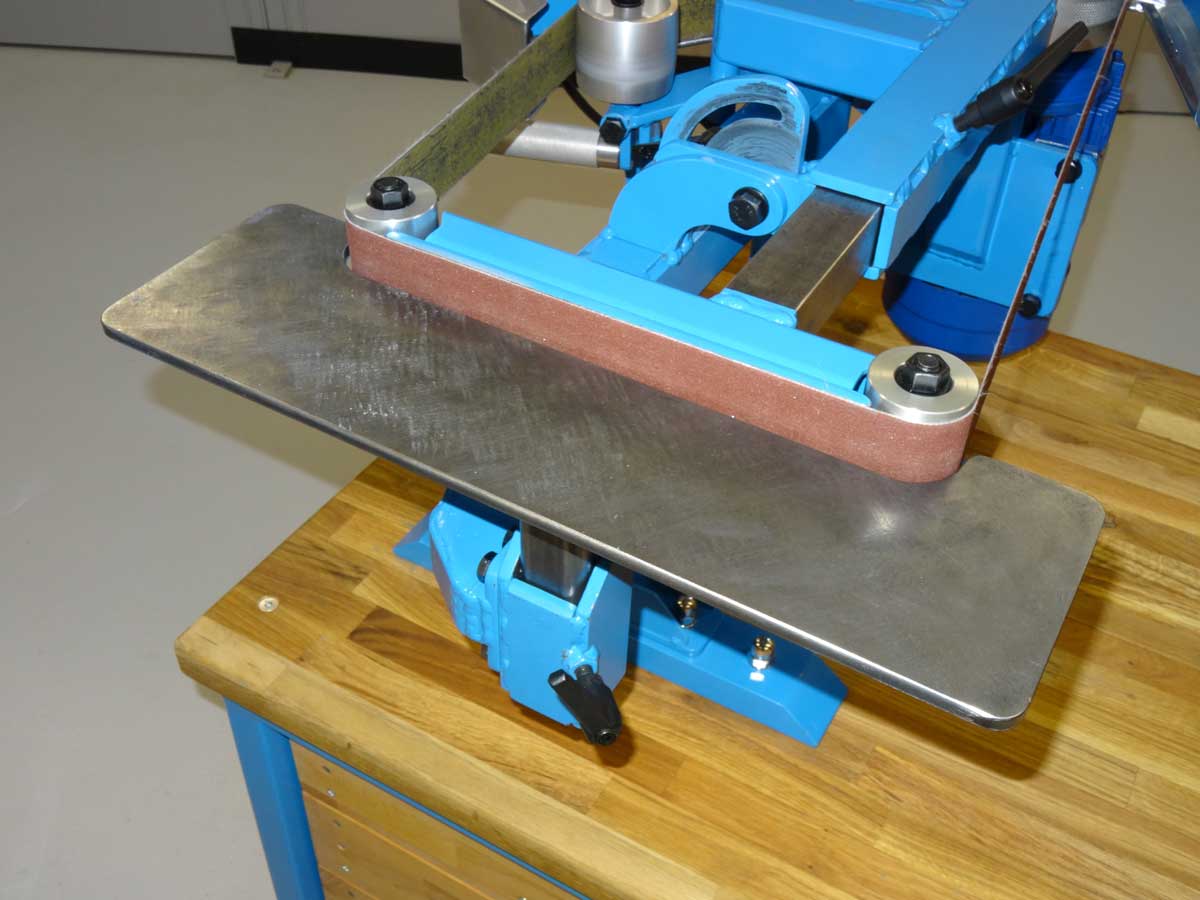
I built a wide table in order to have a wide support surface for horizontal operation and I have the option of grinding radii at the ends.
On the one hand, this is a spark and dust collector, but it also protects my shoulder if the belt should break ;-). I have mounted this guard permanently and it also turns to the side when you change the belt from vertical to horizontal.
On the left is my main spark collector / dust collector, which is located under the table. On the right is my spark arrester which I use when the belt is running horizontally.

Both spark collectors are mounted here.
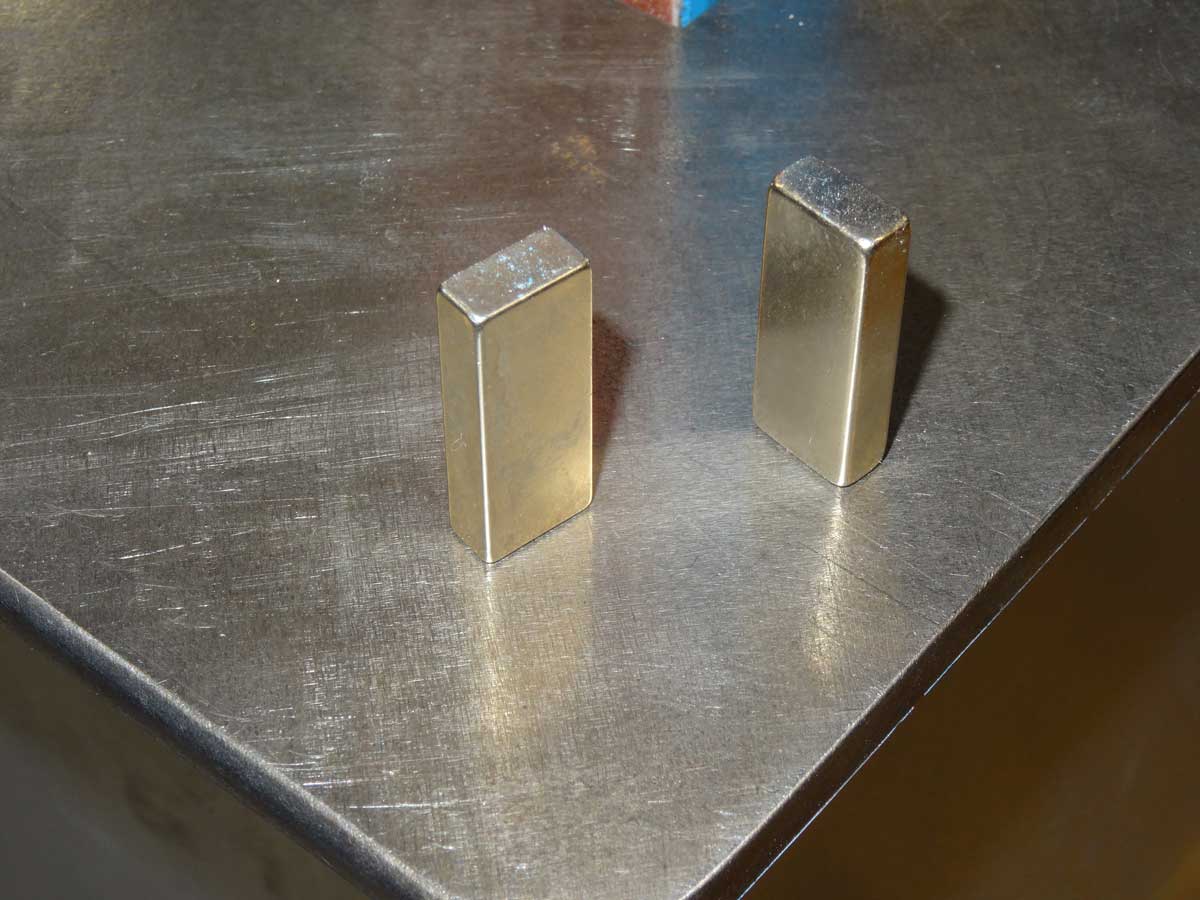
The large 'bucket' under the table is not permanently mounted, but is held in position solely by these 2 (super-) magnets.

I decided to build my own housing for the control panel. I have an emergency stop button, can select the direction of rotation and set the speed using the potentiometer. The display shows the actual frequency and the buttons can also be used to program the VFD (Variable Frequency Drive) motor control. Programming can be used, for example, to limit the maximum frequency, which I could set to a maximum of 400 Hz instead of 50 Hz. The only question is whether the motor, wheels and belt would be able to cope with this … I guess not. My drive wheel has a diameter of 125 mm and the smallest ones have 13 mm, i.e. at 3,000 min-1 (50 Hz) this results in 29,000 min-1 on the small wheel, which it would certainly not survive for long!
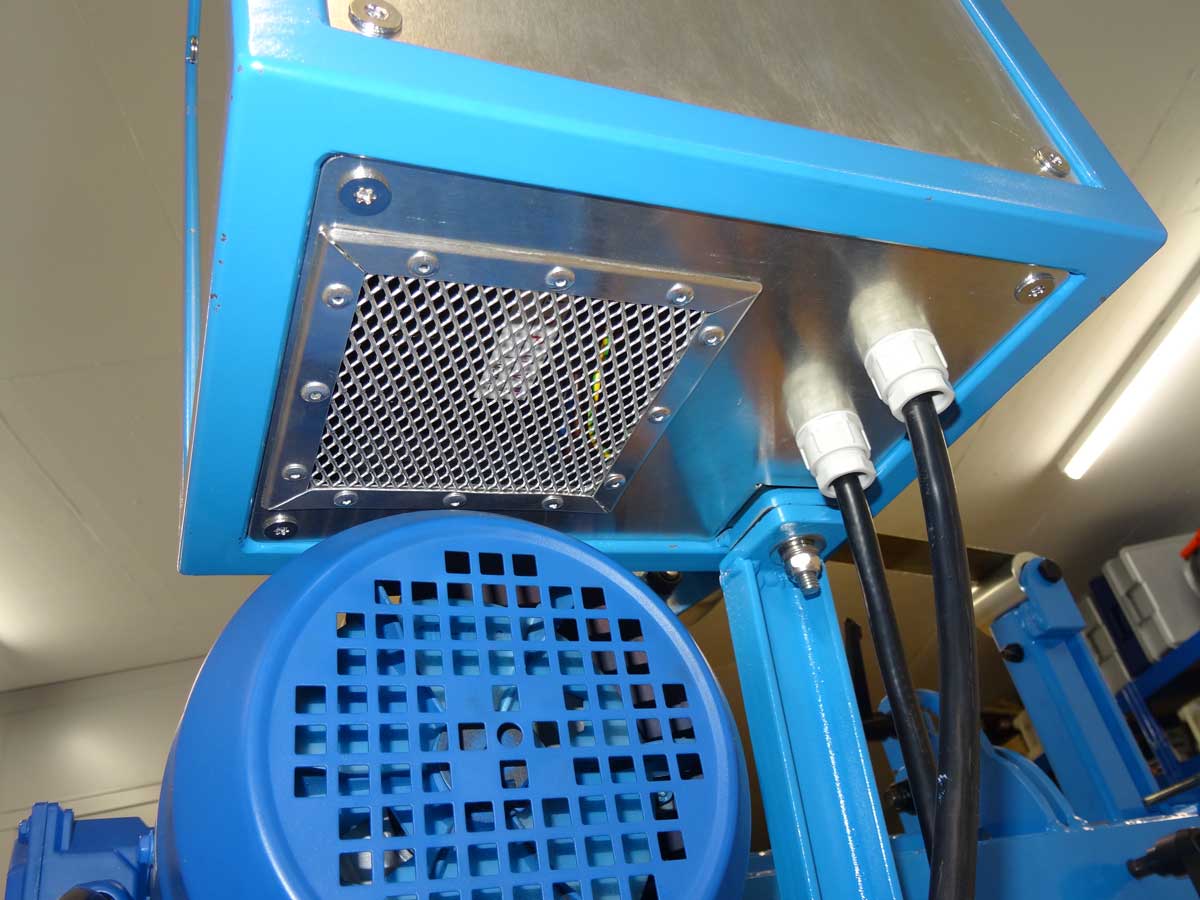
To dissipate the heat, there is a ventilation grille at the bottom for fresh air …
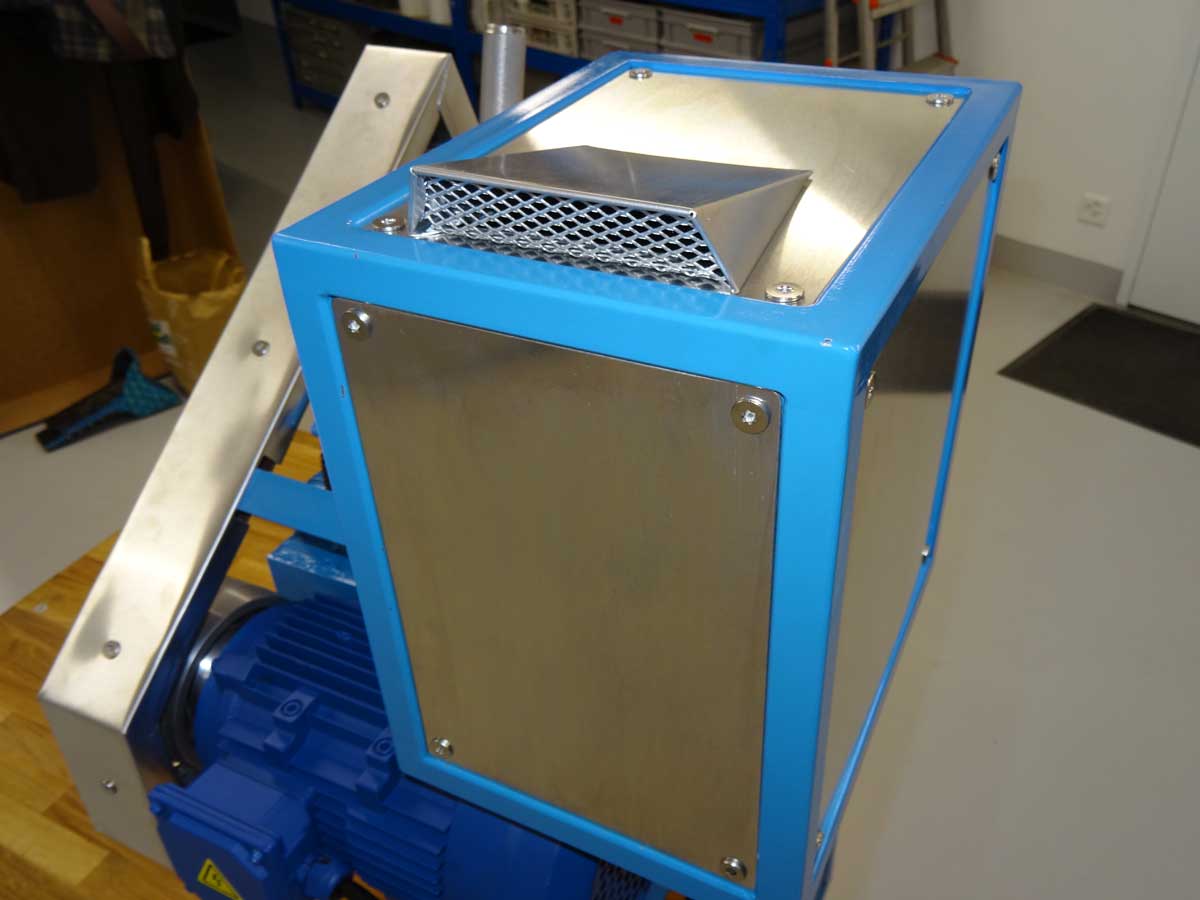
… and a hood at the top that faces backwards for the exhaust air.
The small rollers can be operated via a deflector wheel (rubber wheel) …
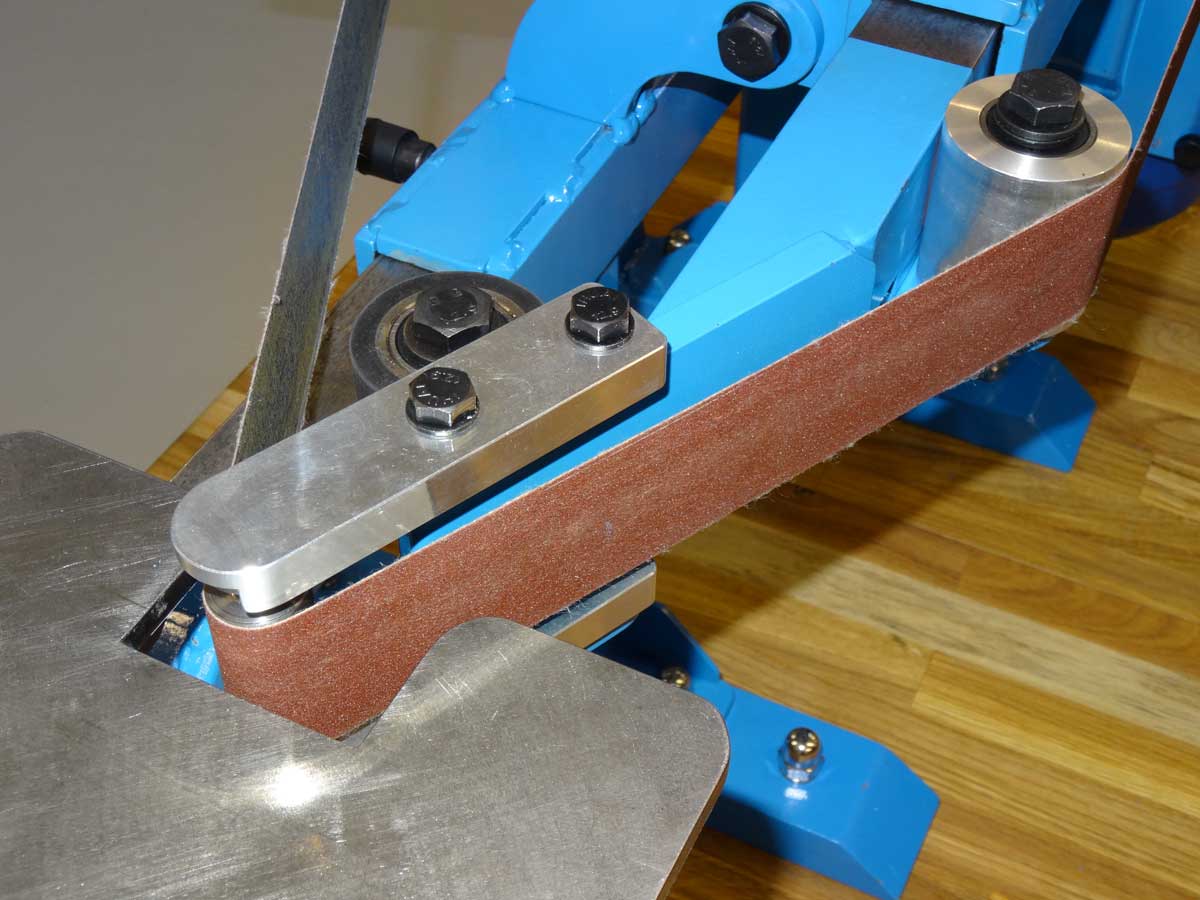
… or clamp the sanding belt directly, bypassing the deflector wheel.
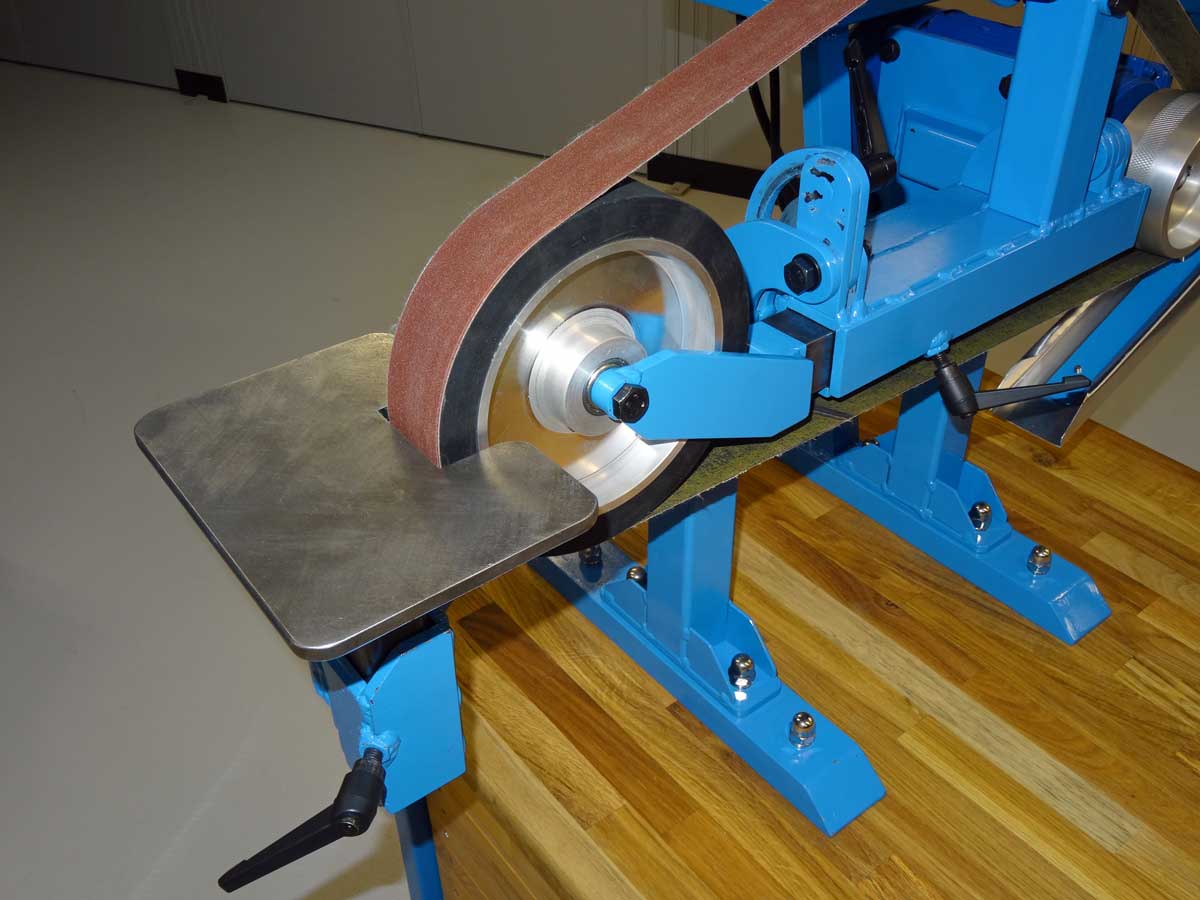
The large wheel, here my version with 200 mm diameter, is interchangeable with other sizes and shapes (e.g. with ribbed rubber surface).

Now comes a small change with a big impact. With my belt grinder, I can use 2x72" AND 50x2000 mm sanding belts, depending on my needs. I primarily work with 72" sanding belts, but I also want to have the option of using a 2 m belt if I only get a special sanding belt in the long version. In Jer's plans, you have to choose either the 72" or the 2000 mm version, but you can't use both lengths. I will explain my solution in the next chapter.
Next follows Chapter 2 where I explain my deviations from Jer Schmidt's plans in more detail (including variable use of the 2x72" AND 50x2000 mm sanding belts).
Copyright © 2001-2024 Markus Maurer |
Creation Date: 17.11.2024 |
Last Modified: 17.11.2024
![]()
![]()
![]()